
At True Digitizing, we transform your creative spark into flawless, high-quality embroidery digitized designs that bring your vision to life.
Our Blogs
We Accept
Copyright 2025 Truedigitizing
At True Digitizing, we transform your creative spark into flawless, high-quality embroidery digitized designs that bring your vision to life.
We Accept
Copyright 2025 Truedigitizing

Thread tension plays a major role in embroidery quality but many people ignore it until they face problems. If stitches look uneven, threads break, or the back of the design looks messy or birdnesting, tension is one of the reasons. understand thread tension does not require high skills. You only need to understand how threads behave during stitching and that's enough.
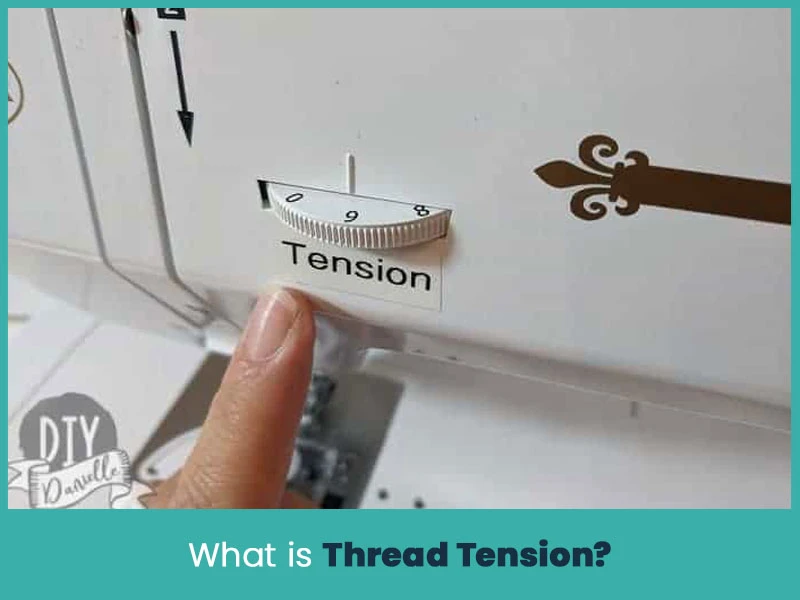
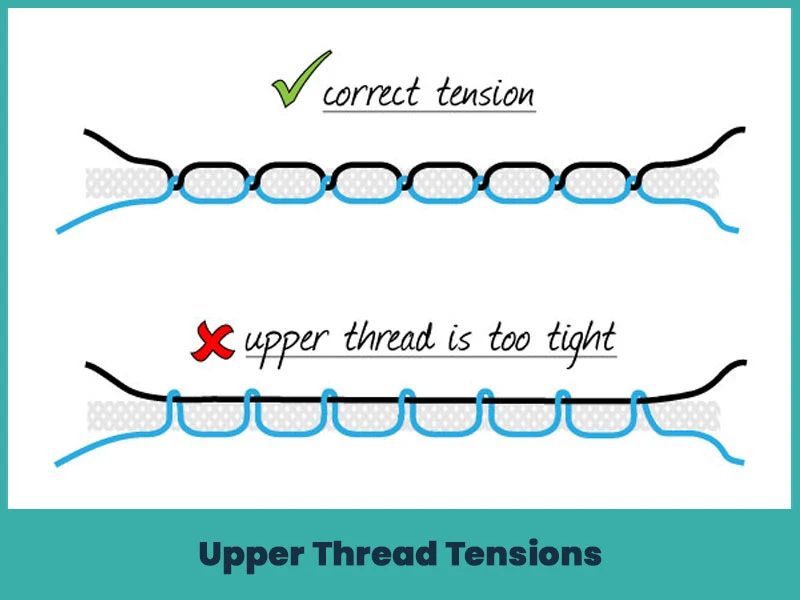
Basically thread tension is the balance between the upper thread and the bobbin thread when the machine stitches. Both threads must pull evenly to lock the stitch inside the fabric. When this balance stays correct, stitches look smooth on top and clean on the back.
If one thread pulls more than the other threads, problems start then. Fabric pucker, stitches loose or threads break. Hence, correct thread tension keeps embroidery stable and consistent from start to finish.

Bobbin thread tension controls how the lower thread works during stitching. It works quietly but affects the final result. Most embroidery machines come with factory-set bobbin tension, and in some rare cases, it stays untouched.
However, changes become necessary when:
- You use different bobbin thread weights.
- Stitches pull through to the top.
- The back of the design looks loose or uneven.
Correct bobbin tension helps the top thread sit properly on the fabric without pulling too much or too little.
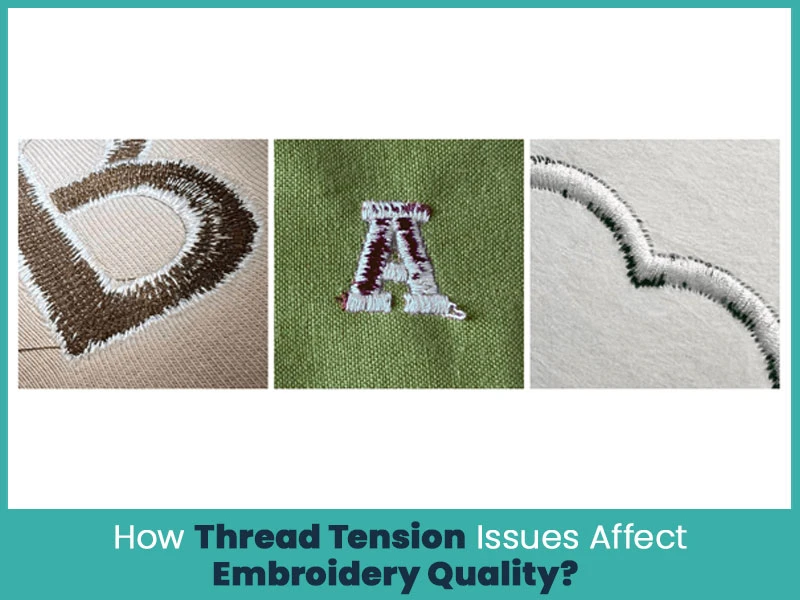
Poor thread tension shows up fast in embroidery. Designs lose shape, stitches overlap badly, and fabric loses its smooth look. Even a well-digitized design cannot stitch cleanly with bad tension.
Common quality issues include:
- Uneven satin stitches.
- Loose fill areas.
- Visible bobbin thread on top.
Balanced tension keeps the design sharp, readable, and durable after washing.
Many elements affect thread tension during embroidery. Machines do not work alone fabric, thread, needle, and speed all interact during stitching.
Key factors include:
- Fabric thickness.
- Thread type and weight.
- Needle size.
- Machine speed.
- Hooping quality.
If one factor changes, tension often needs adjustment.
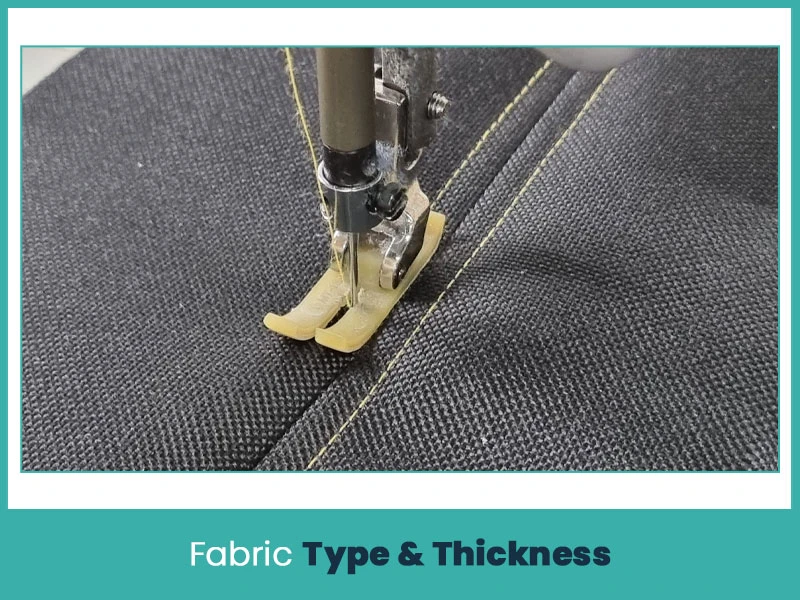
Fabric thickness affects how threads pull through layers. Thin fabrics need light tension, while thick fabrics need strong control. If tension stays same like too tight on light fabric, puckering occurs quickly.
For best results:
- Use stabilizer suited to the fabric.
- Reduce tension for soft or stretchy fabrics.
- Increase control for denim, canvas, or caps.
- Fabric support helps thread tension stay stable during stitching.
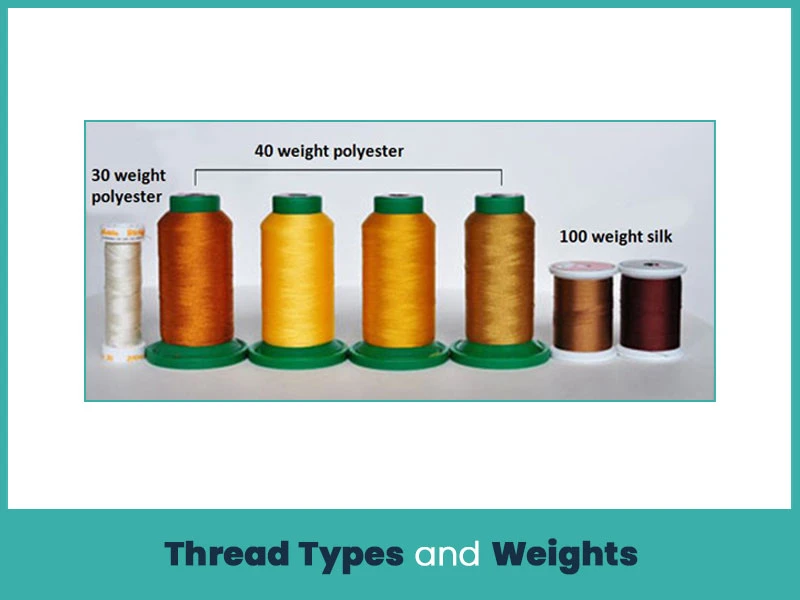
Different thread types behave differently under tension. Polyester threads stretch slightly, while rayon threads break faster under high tension. Heavier threads also need looser tension compared to fine threads.
Keep these points in mind:
- Rayon thread prefers lower tension.
- Polyester handles moderate tension.
- Metallic thread needs loose tension and slow speed.
Matching thread type with proper tension protects the design and thread.
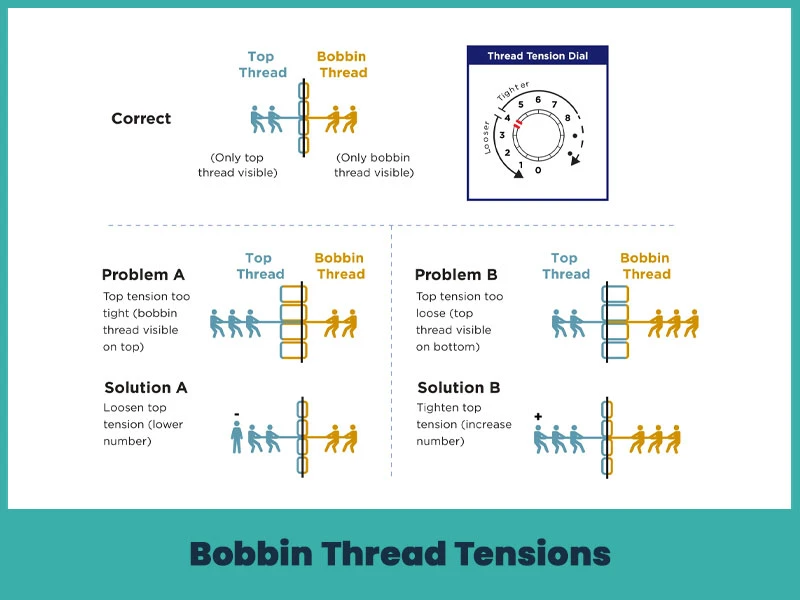
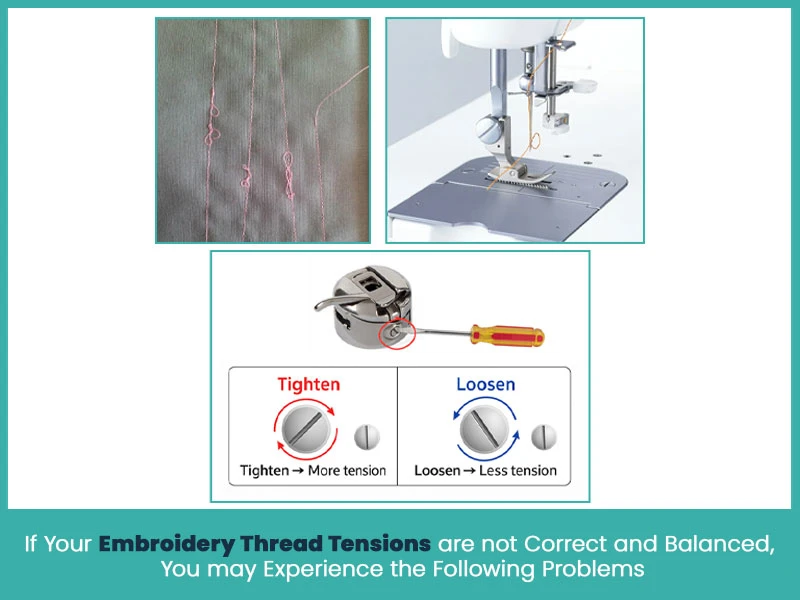
Bobbin tension should remain consistent. Frequent changes cause imbalance and confusion. If bobbin thread shows on top, the bobbin may pull too hard.
Check bobbin tension when:
- Switching bobbin thread brands.
- Changing bobbin case.
- Seeing loops on the underside.
Small adjustments make a big difference so adjust slowly.
Upper thread tension receives most adjustments during embroidery. It controls how firmly the top thread pulls against the bobbin thread. Most machines allow easy adjustment using a dial or screen control.
Signs upper tension needs change:
- Bobbin thread shows on top.
- Top thread breaks often.
- Stitches look tight and stiff.
Upper tension adjustments should always happen before touching bobbin tension.
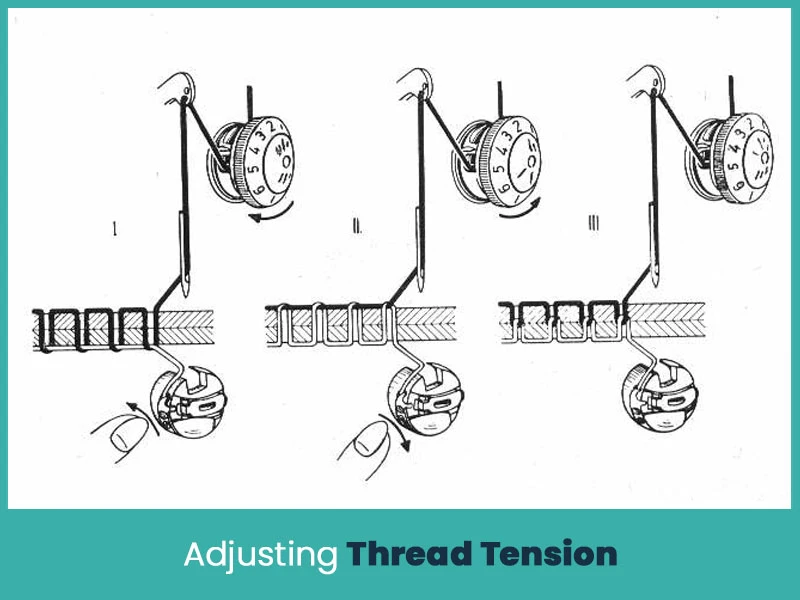
Adjust thread tension in small steps. Large changes create new problems instead of fixing old ones. Always test on scrap fabric before stitching the final design.
Best practice steps:
- Start with default settings.
- Adjust one setting at a time.
- Run short test designs.
- Observe both front and back.
- Patience leads to stable results.
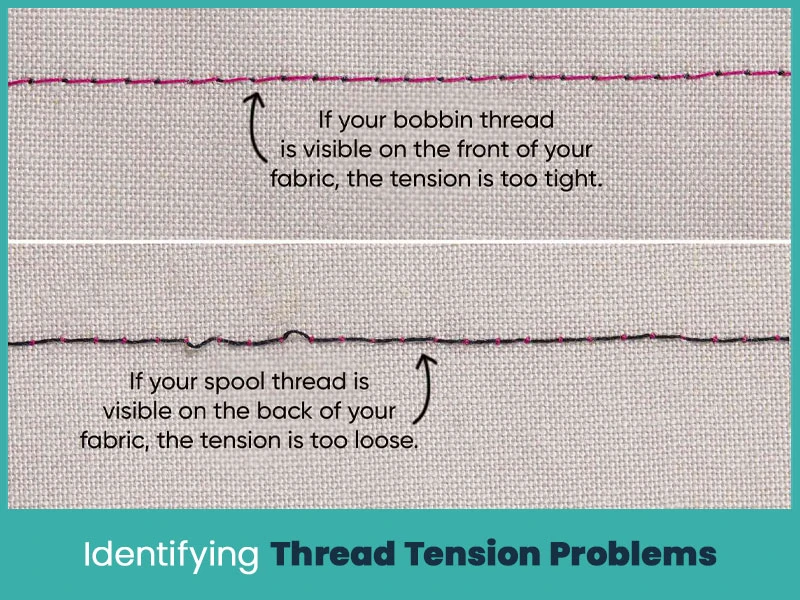
Tension problems often show clear signs if you know what to look for. Learning these signs saves time and material.
Watch for:
- Loops on top or back.
- Thread pulling through fabric.
- Stitches break under fabric.
Each sign points directly to which tension needs adjustment.
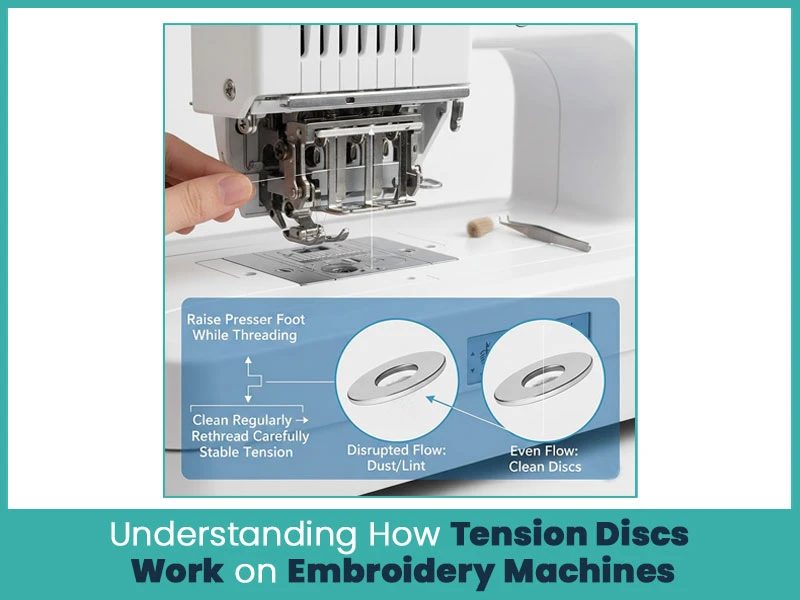
Tension discs control how smoothly thread feeds into the needle. When the machine pulls thread, discs apply pressure to maintain control. Dust, lint, or improper threading disrupts this process.
To keep tension stable:
- Clean discs regularly.
- Rethread machine carefully.
- Raise presser foot while threading.
- Clean discs allow even thread flow.
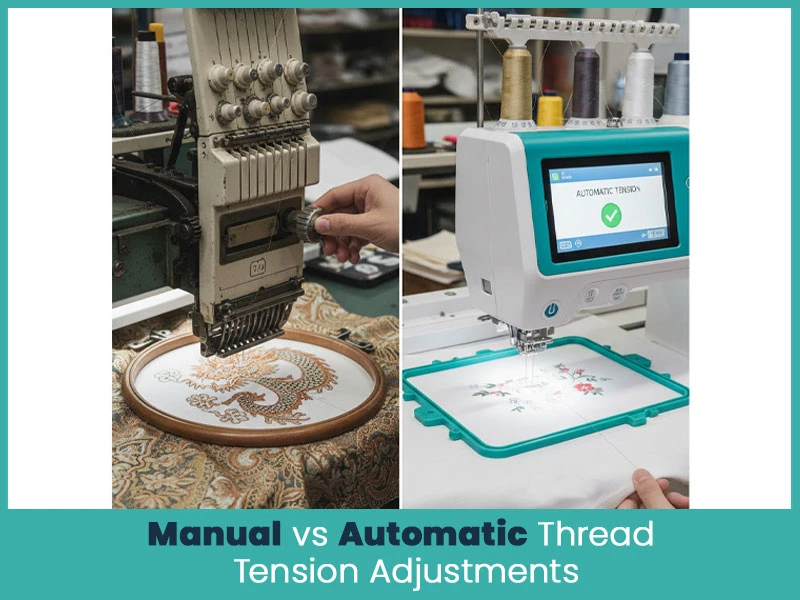
New embroidery machines offer automatic tension, while older machines rely on manual control. Automatic systems work well for general designs but still need manual checking.
Manual tension gives:
- Better control for specialty threads.
- Flexibility with unusual fabrics.
- Precise fine-tuning.
Automatic tension saves time but manual checks matter the most.
Threads tangle under the fabric and form a knot. This happens when top thread tension stays too loose.
Thread snaps due to excessive tension or friction. Tight upper tension causes this issue.
Bobbin thread becomes visible on top, which shows upper tension is too tight or bobbin tension is too loose.
You need to adjust thread tension in some situations, especially when something changes during embroidery.
Each thread type behaves differently. Polyester thread needs tighter tension than rayon. Metallic thread also needs special adjustment based on the machine and thread brand. Frequent switching between thread types often creates tension problems, so staying consistent helps the machine run smoothly.
Thread color changes can affect tension. Dark threads give you heavier dye, which makes them slightly thicker than light colors. Switching from light to dark shades like white to navy, requires tension adjustment. Keeping light and dark colors on separate needles reduces issues.
One tension setting does not work for all fabrics. Caps need tight tension rather than knit shirts or soft garments. Fabric thickness & stretch decide how tight the tension should be, so testing on each material helps.
Technicians often loosen thread tension during service. After maintenance, tension rarely matches embroidery needs. Always recheck and reset tension once the technician leaves to maintain stitch quality.
Thread tension controls embroidery quality more than most settings on your machine. When tension stays balanced, stitches lock properly, designs stay smooth, and fabric remains stable. Understanding tension saves time, material, and frustration.
Nick William has been immersed in the world of embroidery digitizing for over 20 years, earning 25 industry awards throughout his career. As a 3rd generation embroidery expert, Nick’s journey started in his family’s workshop, where he learned the art of digitizing before the rise of modern software. He has worked with leading commercial embroidery businesses and has shared his expertise with over 75,000 home and professional embroiderers. As an author at True Digitizing, Nick is passionate about teaching others how to create beautiful, precise designs through easy-to-follow tutorials and expert advice.
Categories

How to Remove Embroidery From Any Fabric — Step-by-Step Guide 2026
28-06-2026

Embroidery Trends 2026: What's Hot in Machine & Hand Embroidery | TrueDigitizing
26-06-2026

Top Best Embroidery Digitizing Software in 2026
06-05-2026
")
Best Multi-Needle Embroidery Machines for Startups 2026
28-02-2026

DST File: The Complete Guide (What It Is, How to Create, Convert & Use in 2026)
28-02-2026

Janome 550E vs Baby Lock Flare | Best Mid-Range Embroidery Machine?
26-02-2026

Choose the Right Fabric for Embroidery
20-02-2026

Advanced Techniques in Embroidery Digitizing
19-02-2026

Most Common Types of Threads to Use in Machine Embroidery
12-02-2026

AI in Embroidery | Revolutionizing Art and Efficiency
12-02-2026
Asked Questions


