
At True Digitizing, we transform your creative spark into flawless, high-quality embroidery digitized designs that bring your vision to life.
Our Blogs
We Accept
Copyright 2025 Truedigitizing
At True Digitizing, we transform your creative spark into flawless, high-quality embroidery digitized designs that bring your vision to life.
We Accept
Copyright 2025 Truedigitizing

It's common to feel a bit frustrated if you've never done embroidery digitizing before. Learning the software, understanding the process, and converting images to stitch files can feel overwhelming at first.
But in reality, it's not as difficult as it looks. You may quickly and clearly follow this easy guide.
Embroidery digitizing means converting your design into a format your machine can stitch. It’s more than just converting a file, it makes sure your design remains sharp, stable, and suitable for stitching..
If you're new to this, here's what to begin with:
File types: Learn about DST, PES, and EXP formats, as each embroidery machine uses one.
Stitch types: Watch how different stitches look on fabric, so you know how to use them.
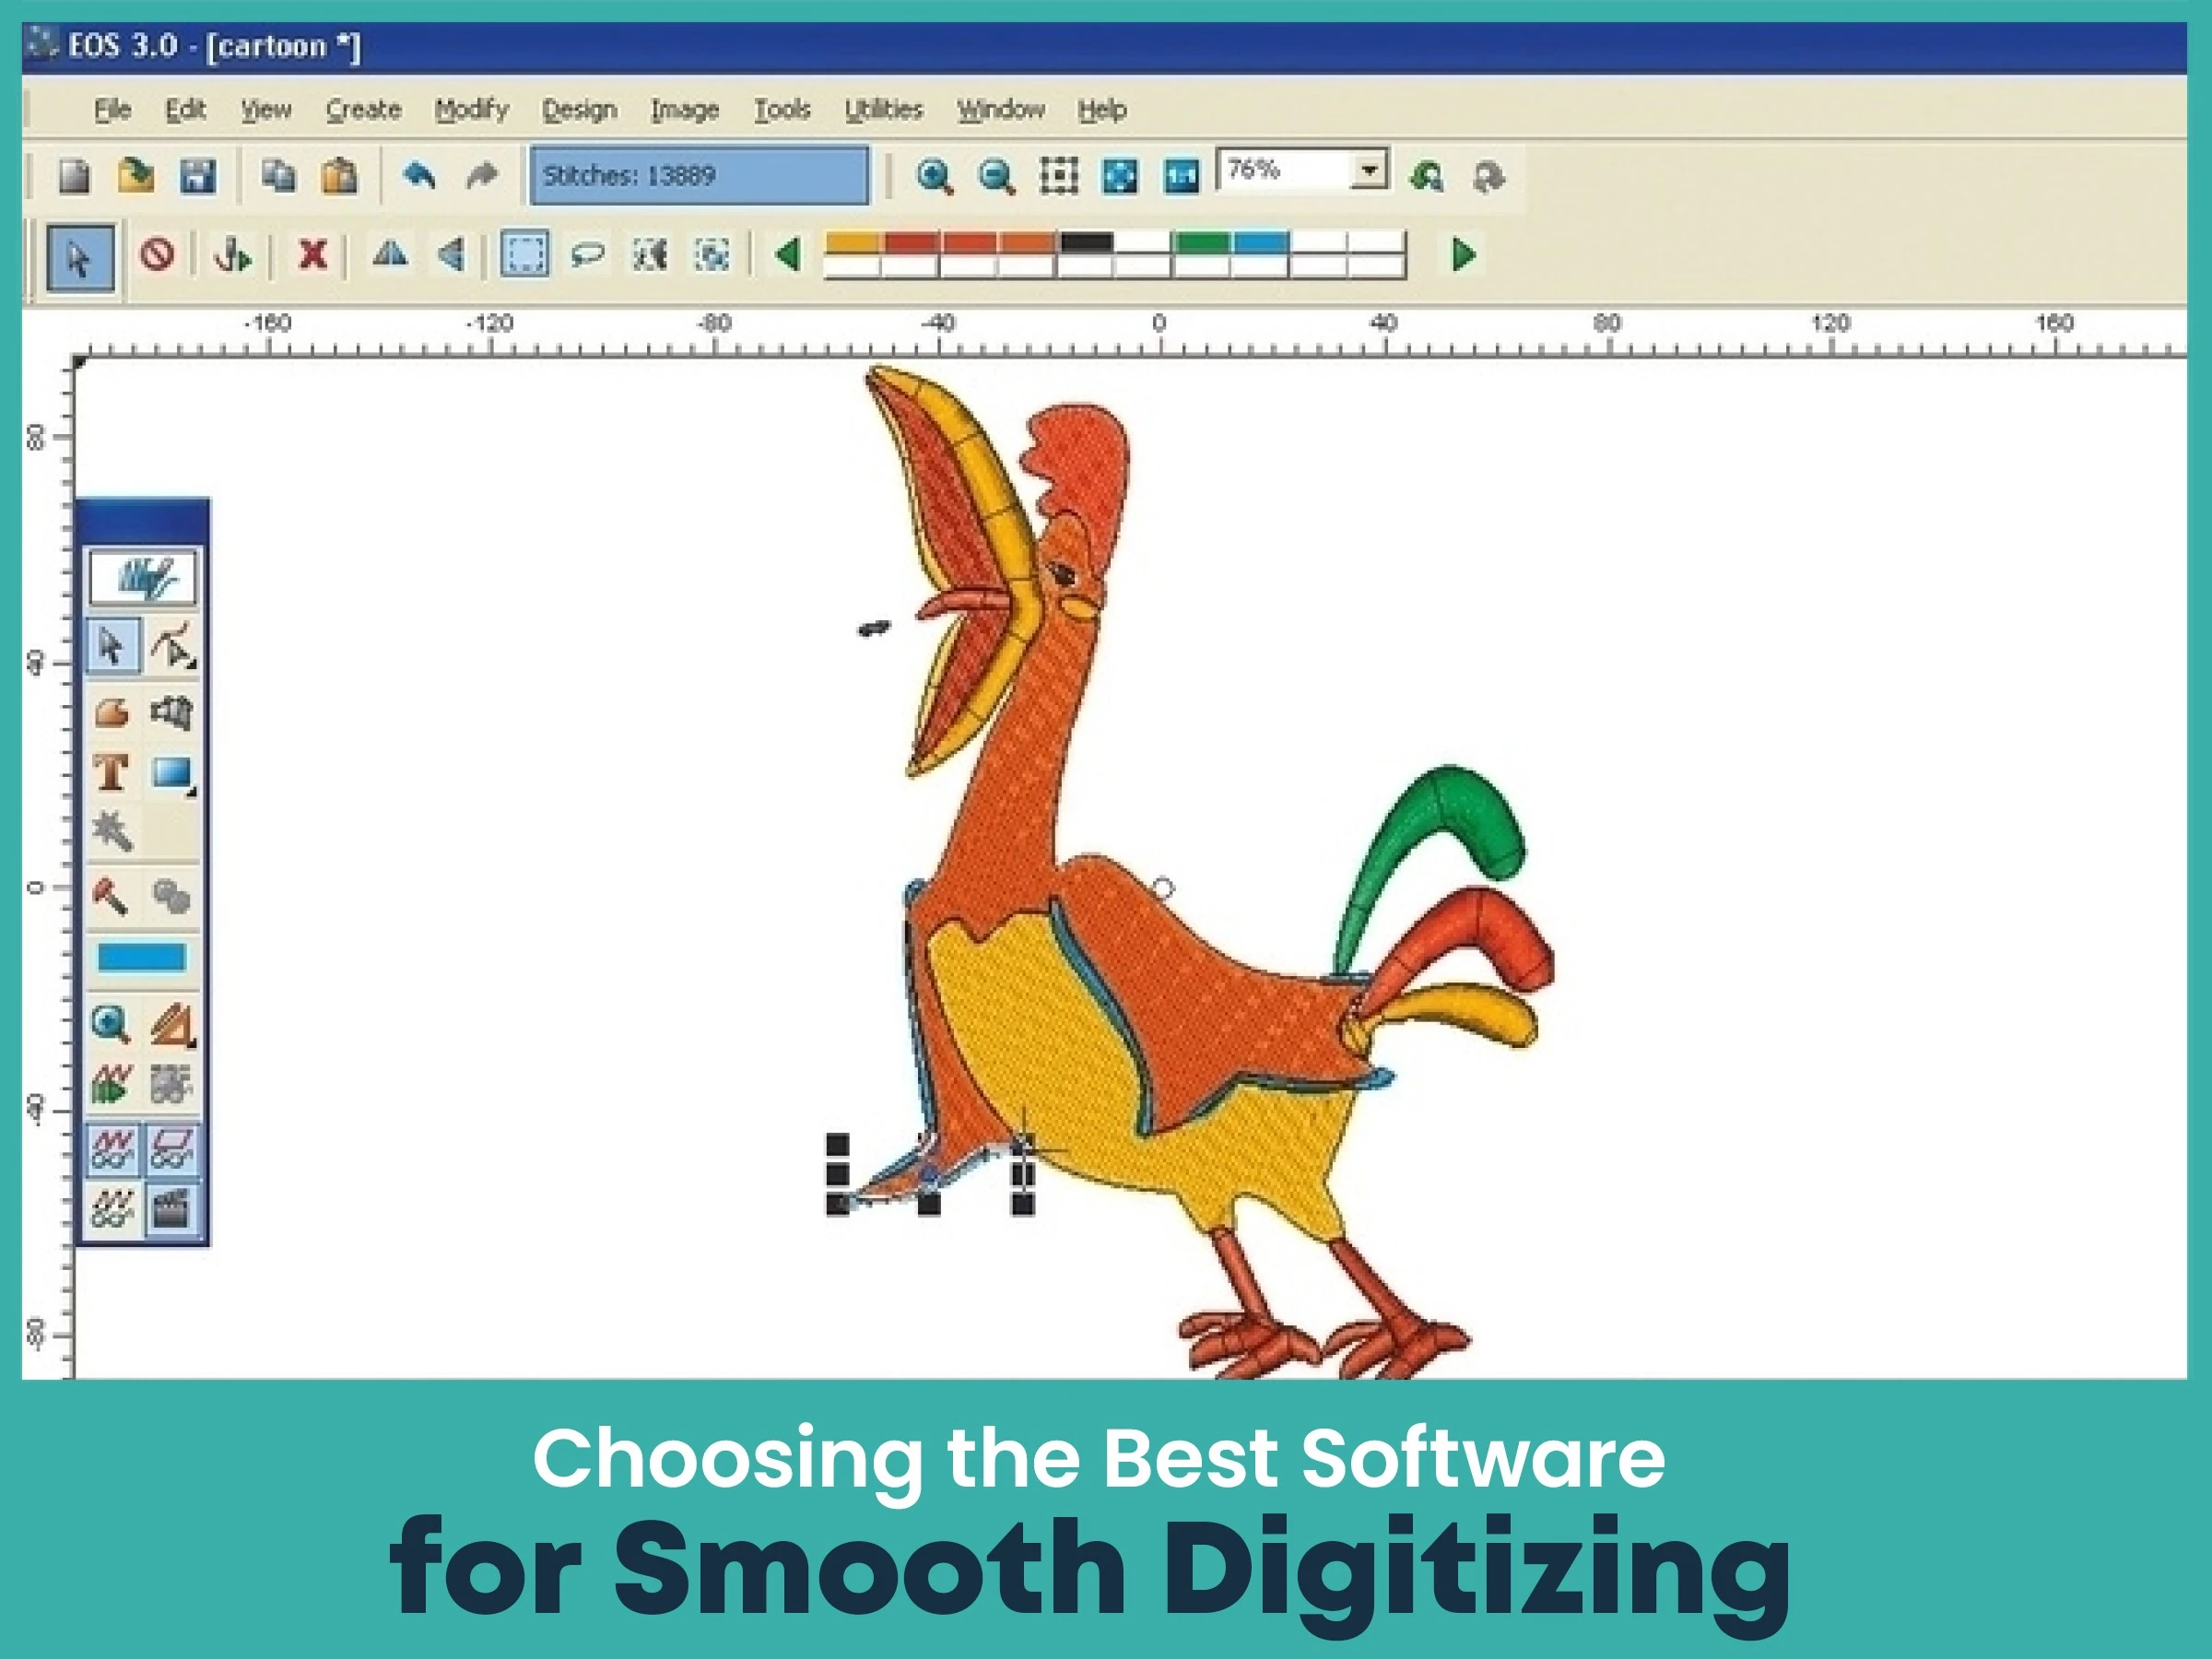
The choice of software can significantly impact your digitizing experience. Advanced programs have many features and they can confuse beginners. Some are designed for ease of use, making them ideal for beginners.
Look for software that:
Let you place stitches manually
Converts images into embroidery files
Shows a preview of the stitch path
Includes guidance and has a clean and easy interface
Here are some beginner-friendly software options:
Embird: Embird is easy to learn and affordable.
Hatch by Wilcom: Hatch by Wilcom is user-friendly with powerful features and tutorials.
SewArt: SewArt is lightweight and simple for basic image-to-stitch conversion.
Brother PE‑Design: Ideal for those using Brother embroidery machines.
Can’t afford expensive embroidery software but still want high-quality embroidery designs within your budget? True Digitizing uses advanced embroidery digitizing software to deliver top-notch results within 2 to 12 hours. The best part? We offer all embroidery digitizing services at lower prices. So place an order now and get your favorite designs at unbeatable rates.
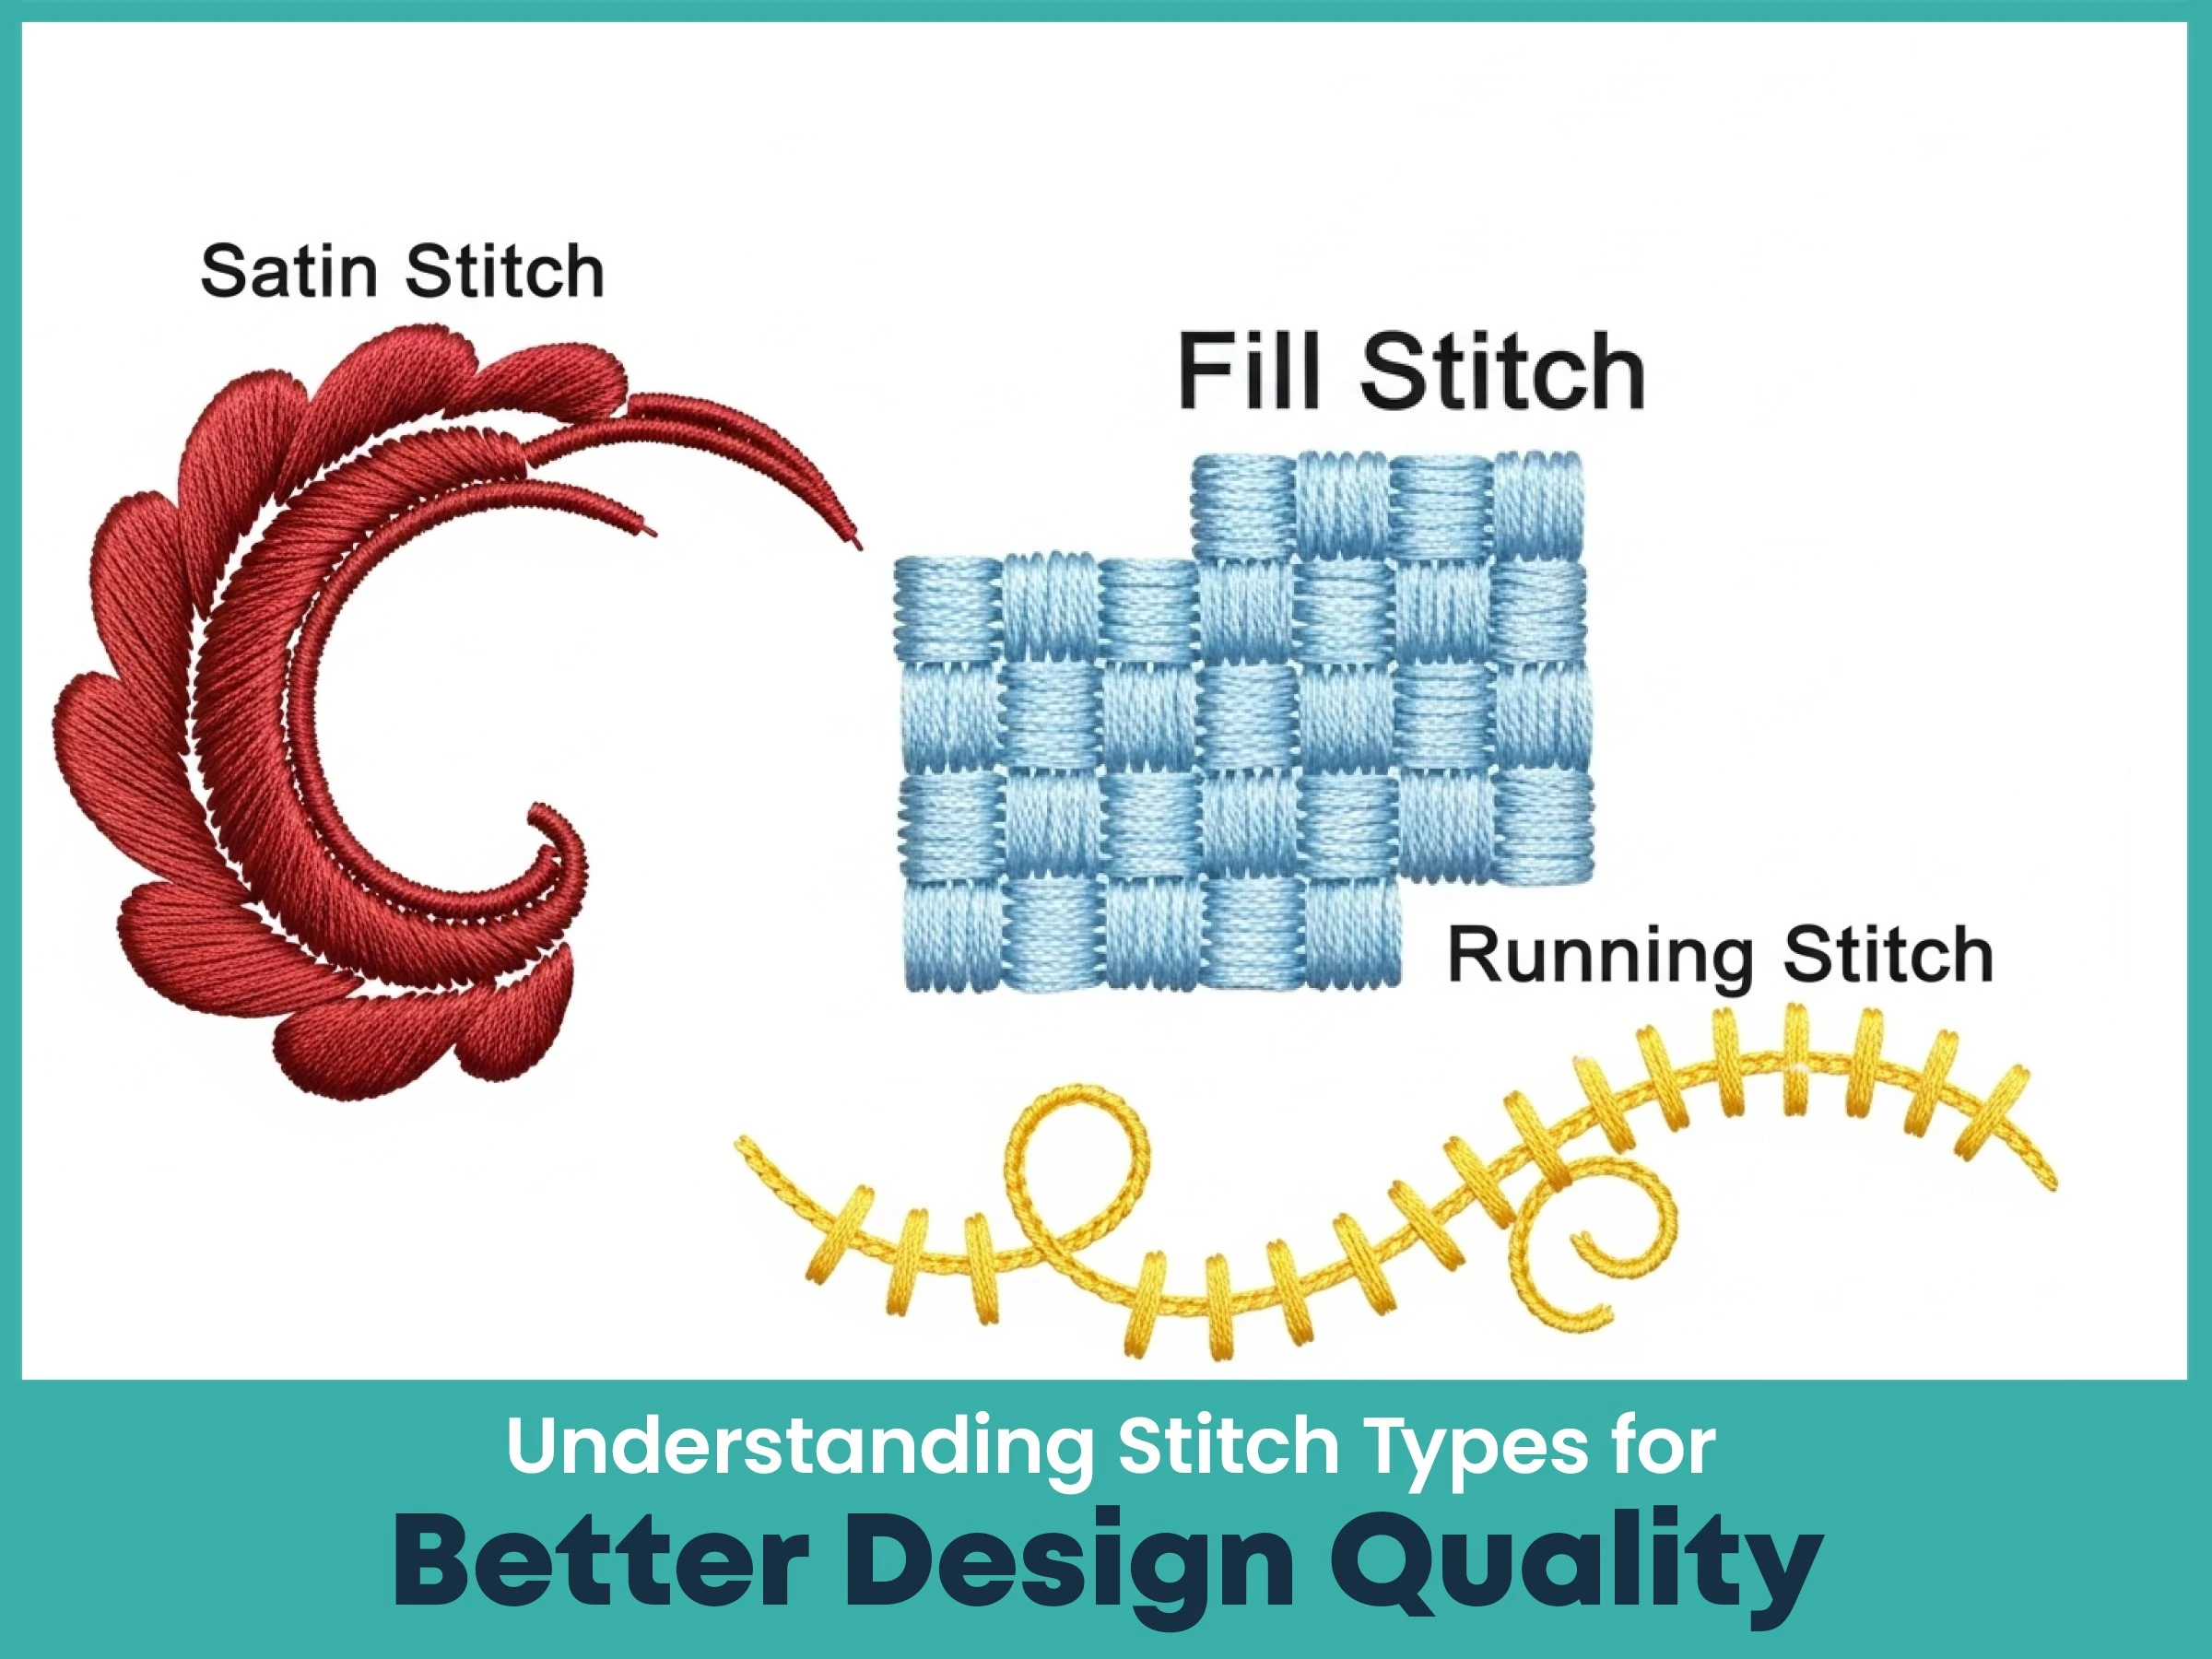
If you want a neat and professional look for embroidery designs, you need to understand stitch types. Every stitch has a different purpose and messy designs or broken threads can be caused by using the incorrect stitch. Being aware of the right stitch to choose will assist you in making your designs sharp, clean and long-lasting.
Common stitches include:
Satin Stitch: Smooth and shiny, great for borders and lettering.
Fill Stitch (Tatami): Fills larger areas and holds shape well.
Running Stitch: Good for outlines and small details.
Bean Stitch: Strong and tidy, often used for borders.
Make sure your artwork is ready before you open your software. Blurry images, gradients, or too much detail can make things tricky.
Here’s what to do:
Use a high-resolution image (300 DPI or higher)
Remove extra lines
Convert to black and white, it helps with tracing
Simplify small details for small designs
Save in formats such as PNG, JPEG, or BMP
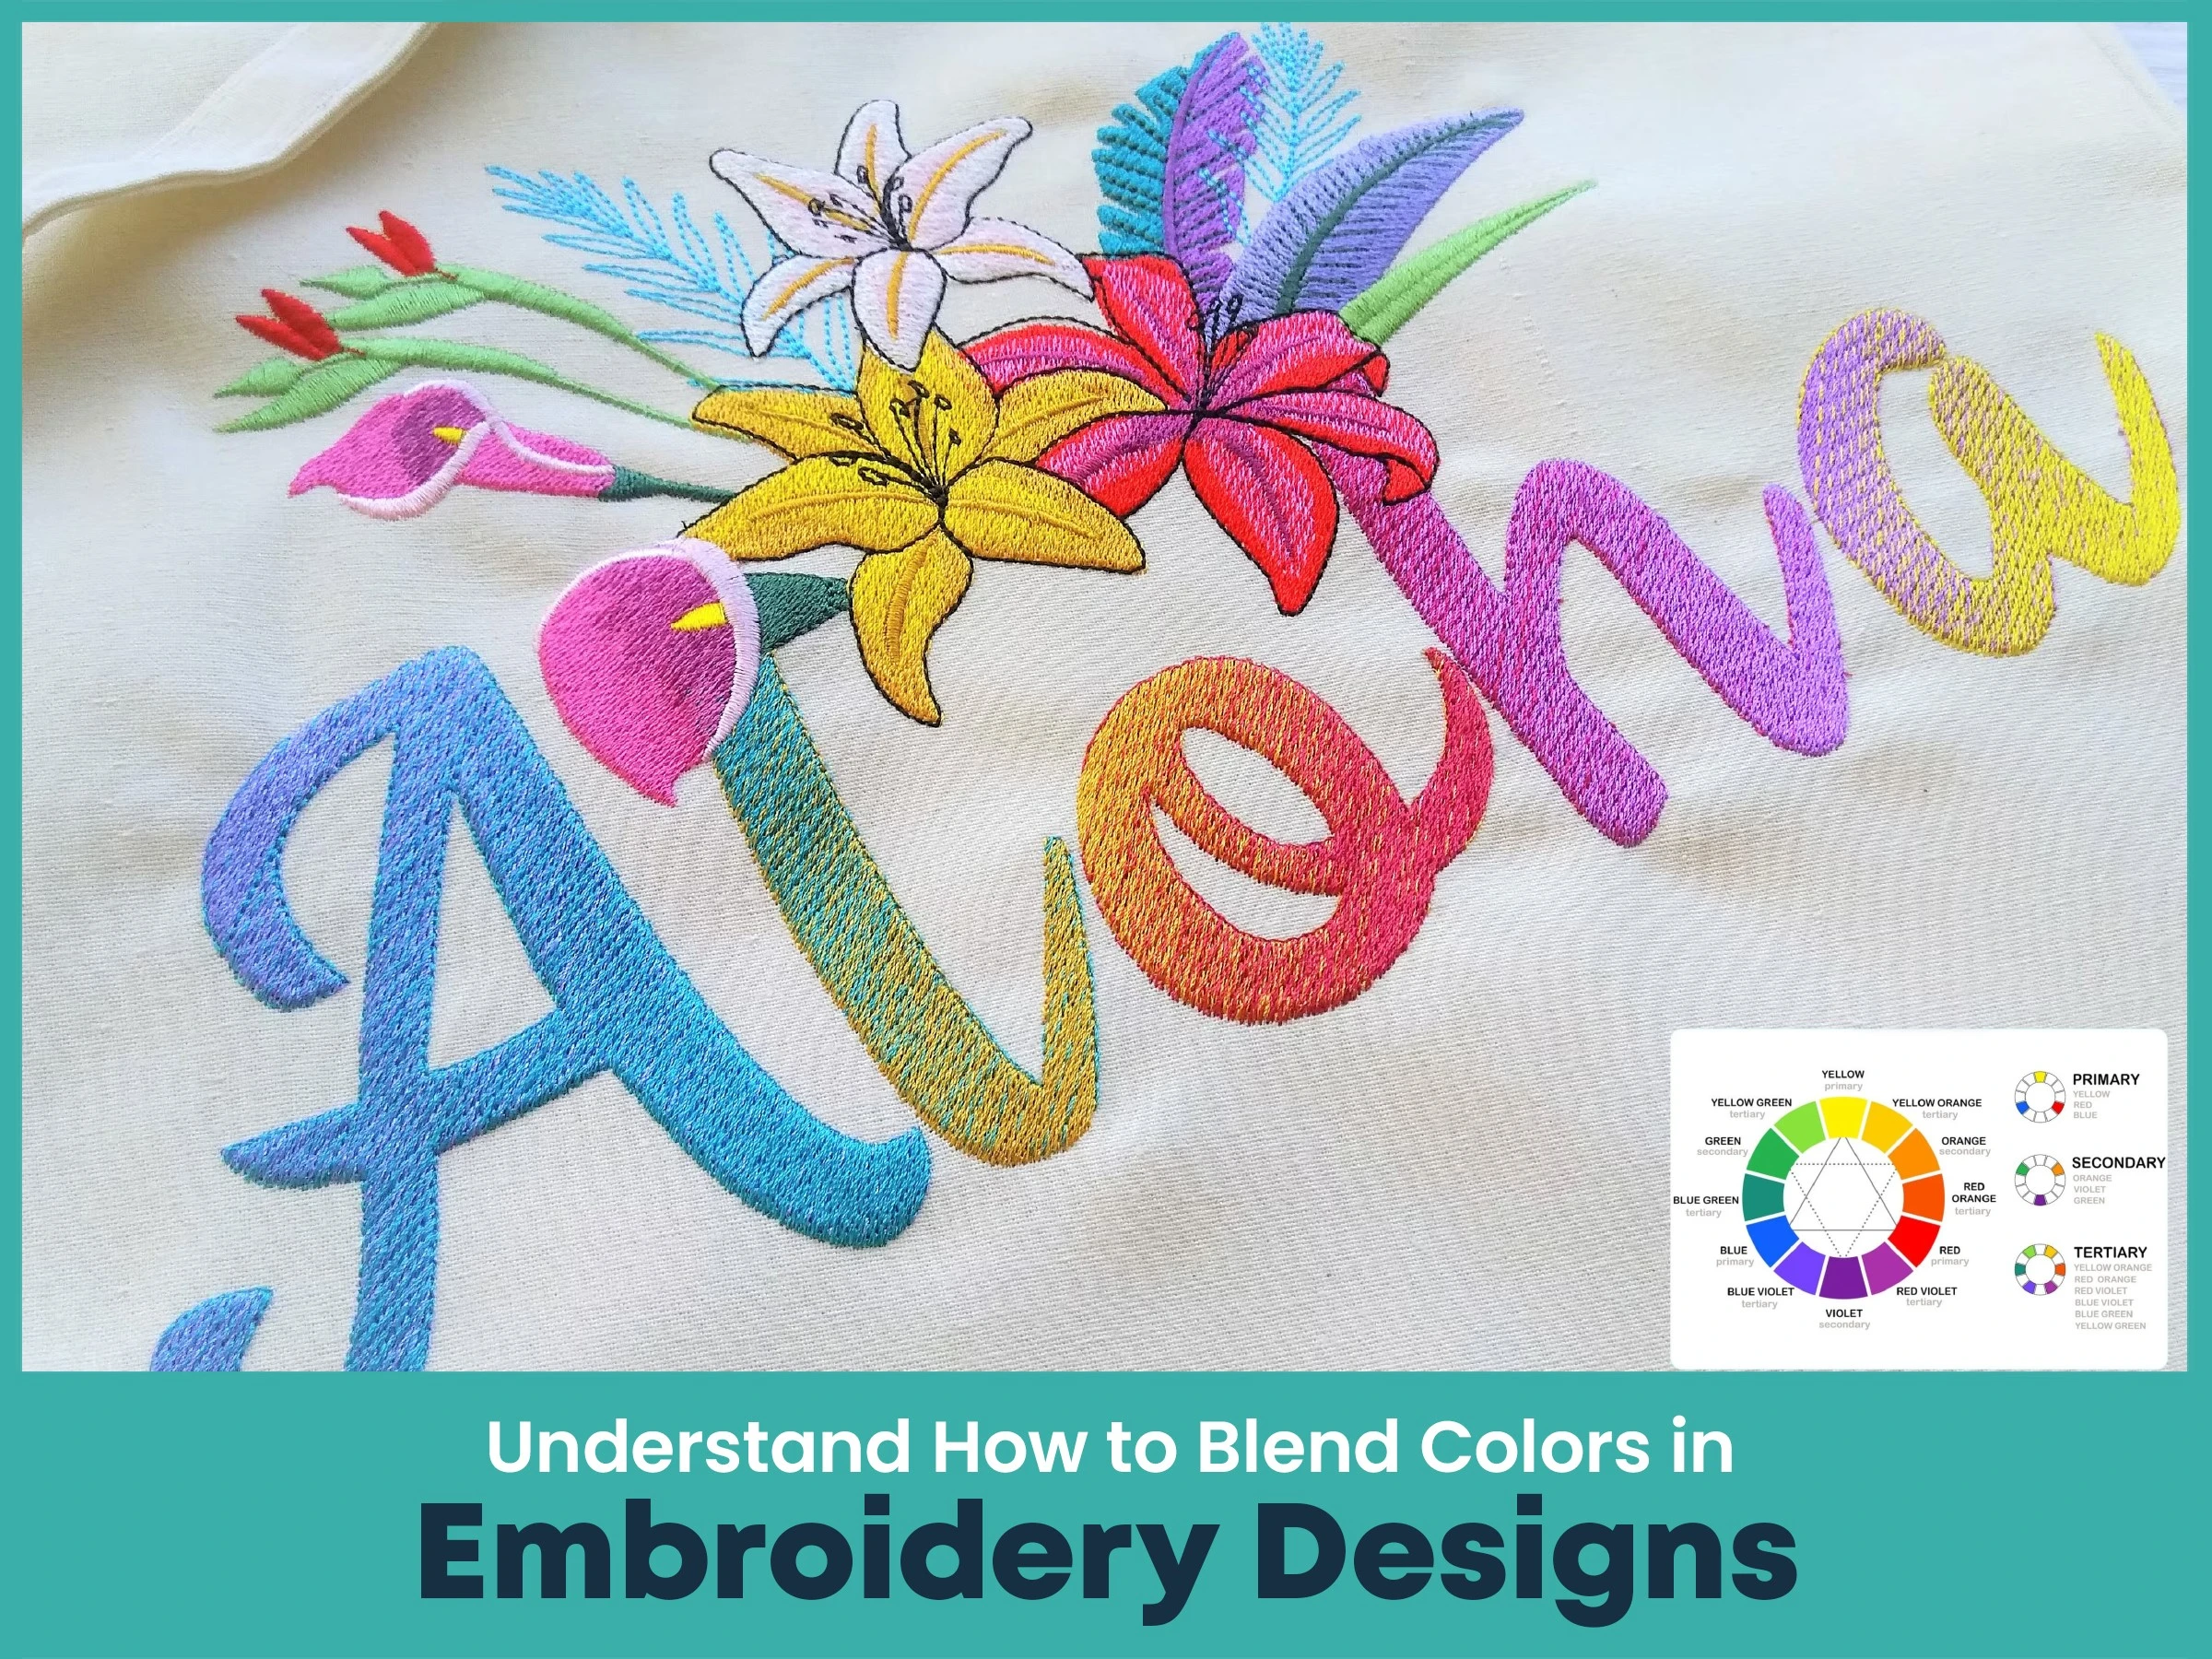
Color blending is a technique that gives your artwork depth and shade. While it might seem like that only highly skilled digitizers can do it, novices can begin exploring as well. The technique that works is using overlapping fills with various thread tones, layering, and stitch position.
In contrast to paint or digital gradients, embroidery does not possess an even color blend. Instead, by combining various colored threads closely together, you may get a blending effect. The selection of thread colors is so crucial as the position of the stitch. Overlaying light and dark tones at an angle can create softer mixes.
Try different color mixes. Even minor changes in thread shades can make a design stand out.
At the beginning, you may find such problems as uncorrected stitch gaps, misalignment, and thread pulling. They occur when the design does not suit your fabric or there are knots in the stitch line.
To get better accuracy:
Keep your designs simple.
Check your work closely and zoom in on details.
Adjust spacing or stitch direction, small changes make a big difference.
Spend time fixing your design in the software before you stitch.
Thread pathing means deciding the order in which your machine stitches. Poor pathing can cause messy lines or threads to jump around, so planning helps.
The order in which your machine will stitch each part of your design is known as thread pathing. Unwanted jumps, messy stitching, or lengthy threads between areas are all results of poor pathing. Clear, logical paths save time and give your projects a more polished look.
Choose which area should be stitched first and in what order to begin by planning it out. Always proceed in a way that avoids unwanted returns.
Everyone makes mistakes when learning. But if you know the common ones, you can avoid them.
Watch out for:
Using too many colors in small designs.
Not changing stitch density for different fabrics.
Skipping test runs before the final stitch.
Overlapping stitches too much.
Saving in the wrong format for your machine.
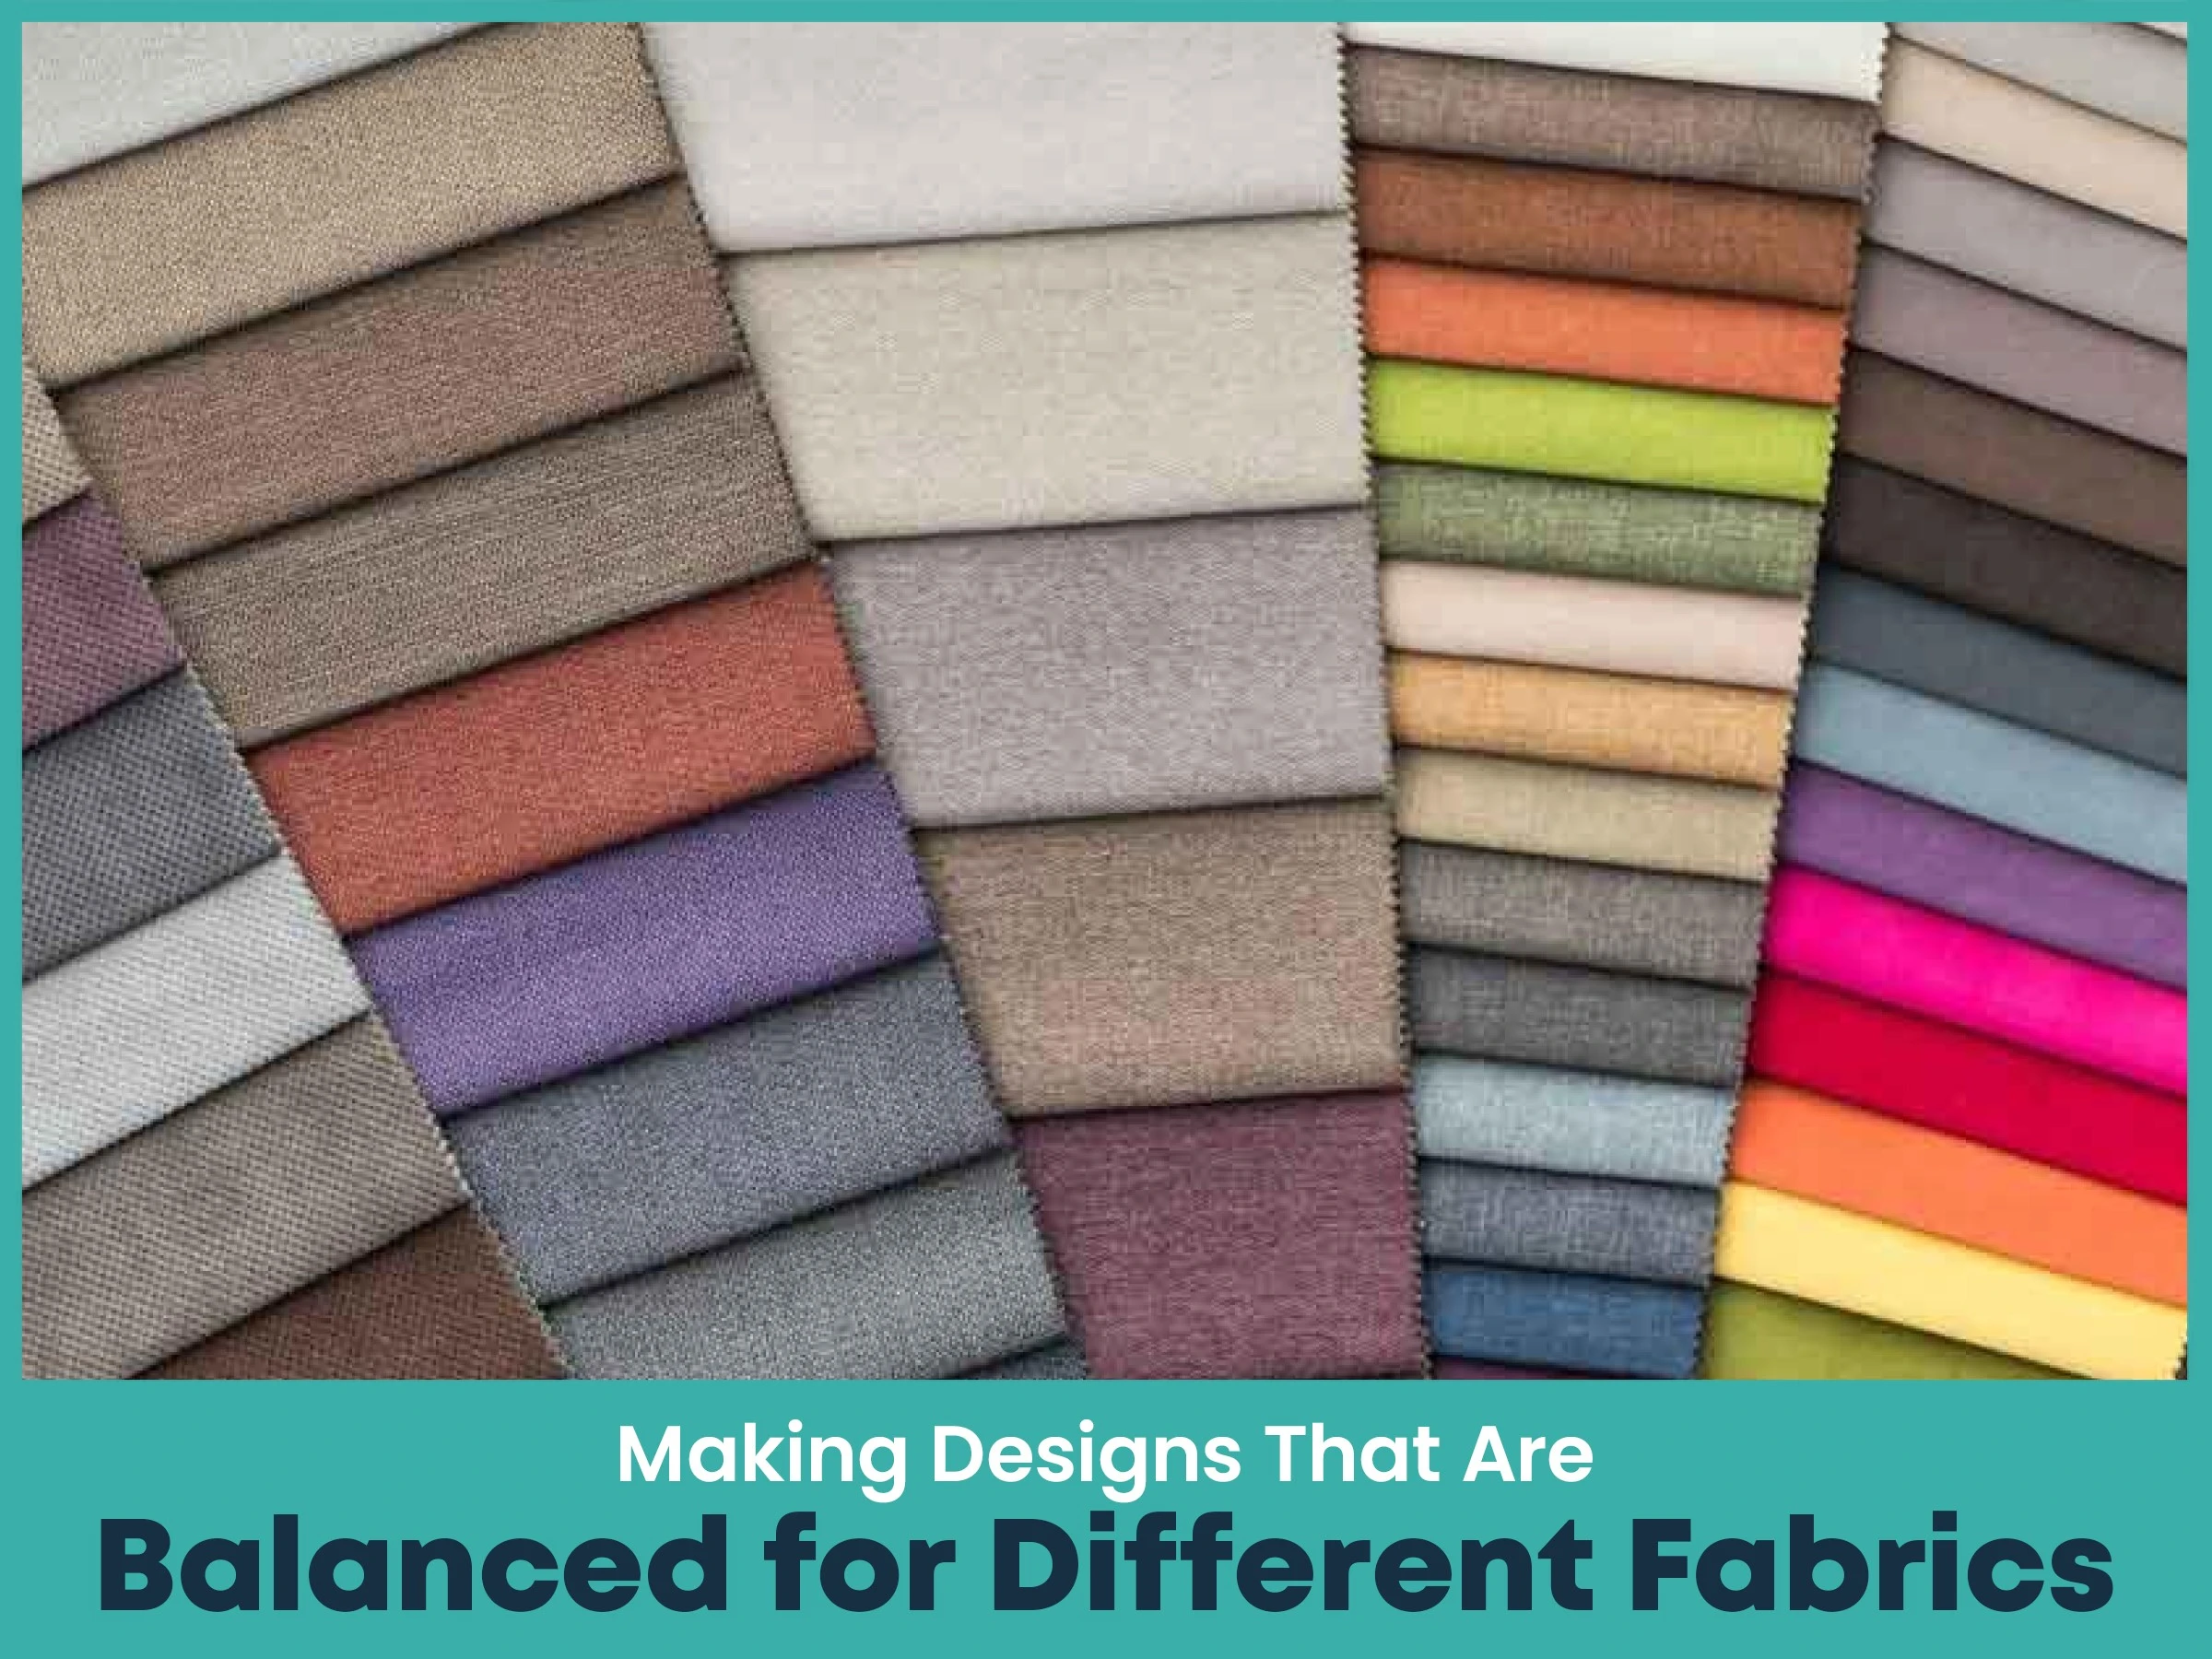
Fabric type affects the feel and look of your design.
Here’s how to balance your design:
For light or stretchy fabrics: Use lighter stitches.
For heavier fabrics: Use longer stitches and looser tension.
Apply stabilizer correctly to prevent puckering.
Always test your design on a fabric sample first.
Even experienced digitizers test their work. Upload your design to your machine, sew it on a plain fabric and check it thoroughly.
Don’t be discouraged if your first try isn’t perfect. Go back to your file, adjust any sections that didn’t sew well, and test again. With each run, you’ll improve your understanding of how digital instructions turn into thread on fabric.
Embroidery digitizing might feel new and tricky at first. However, with small designs, software selection and stitches, thread, and samples, you will get good results quickly.
You're well on your way to transforming your creative thoughts into beautifully embroidered works of art with these beginner-friendly embroidery digitizing guidelines. The most important part of the guide is your growth; keep in mind that every master was once a novice.
Nick William has been immersed in the world of embroidery digitizing for over 20 years, earning 25 industry awards throughout his career. As a 3rd generation embroidery expert, Nick’s journey started in his family’s workshop, where he learned the art of digitizing before the rise of modern software. He has worked with leading commercial embroidery businesses and has shared his expertise with over 75,000 home and professional embroiderers. As an author at True Digitizing, Nick is passionate about teaching others how to create beautiful, precise designs through easy-to-follow tutorials and expert advice.
Categories

Embroidery Trends 2026: What's Hot in Machine & Hand Embroidery | TrueDigitizing
26-06-2026

Top Best Embroidery Digitizing Software in 2026
06-05-2026
")
Best Multi-Needle Embroidery Machines for Startups 2026
28-02-2026

DST File: The Complete Guide (What It Is, How to Create, Convert & Use in 2026)
28-02-2026

Janome 550E vs Baby Lock Flare | Best Mid-Range Embroidery Machine?
26-02-2026

Choose the Right Fabric for Embroidery
20-02-2026

Advanced Techniques in Embroidery Digitizing
19-02-2026

Most Common Types of Threads to Use in Machine Embroidery
12-02-2026

AI in Embroidery | Revolutionizing Art and Efficiency
12-02-2026

Best Thread Tension 101 | A Guide for Embroidery Machines
09-02-2026
Asked Questions


