
At True Digitizing, we transform your creative spark into flawless, high-quality embroidery digitized designs that bring your vision to life.
Our Blogs
We Accept
Copyright 2025 Truedigitizing
At True Digitizing, we transform your creative spark into flawless, high-quality embroidery digitized designs that bring your vision to life.
We Accept
Copyright 2025 Truedigitizing

Have you ever desired to make a custom embroidered adhesive patch that looks great and stays secure on your favorite fabric? Whether you're personalizing jackets, bags, or hats, embroidered adhesive patches are a fun and practical way to express your creativity.
In this blog post, I'll explain to you how to make these adhesive patches, give tips from my own experience, and discuss all of the materials you need to create amazing embroidered designs that adhere properly.
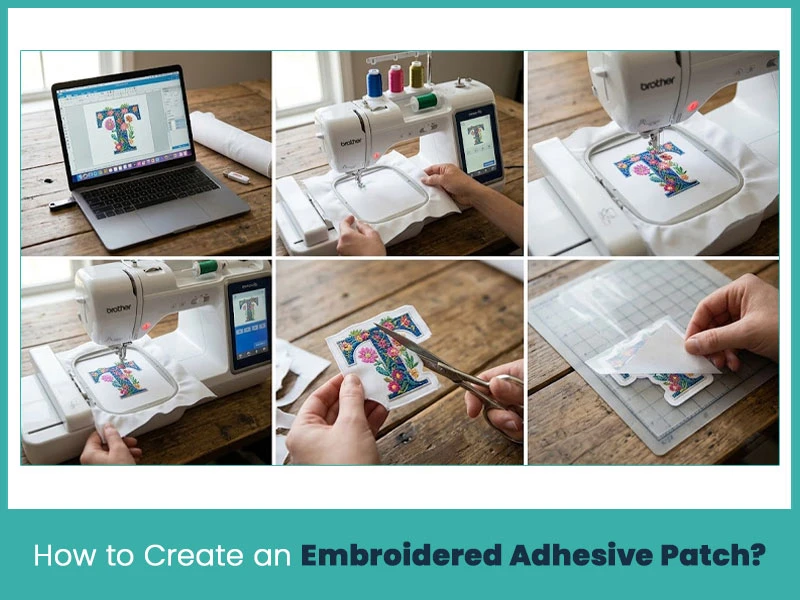
Creating an embroidered adhesive patch combines two crafts: embroidery and patch making. The key is balancing precision in your embroidery design and the creativity of adhesive backing.
Here’s a simplified step-by-step process:
Choose an embroidery design that meets your style. True Digitizing offers professional embroidery digitizing services to ensure your designs are perfectly created for stitching.
Transfer your chosen design to the fabric using embroidery software and a compatible machine. Make sure the thread colors match your design to ensure a professional look.
Secure the fabric in the embroidery hoop and begin stitching. Keep the tension consistent for even results. If you’re hand-embroidering, maintain a steady pace to achieve clean lines.
Once your design is complete, carefully cut around it, leaving a small margin for stability. Use sharp scissors for precise cuts.
Add adhesive backing to your patch. Whether you’re using heat-activated iron-on adhesive or peel-and-stick options, ensure it covers the entire backside for durability.
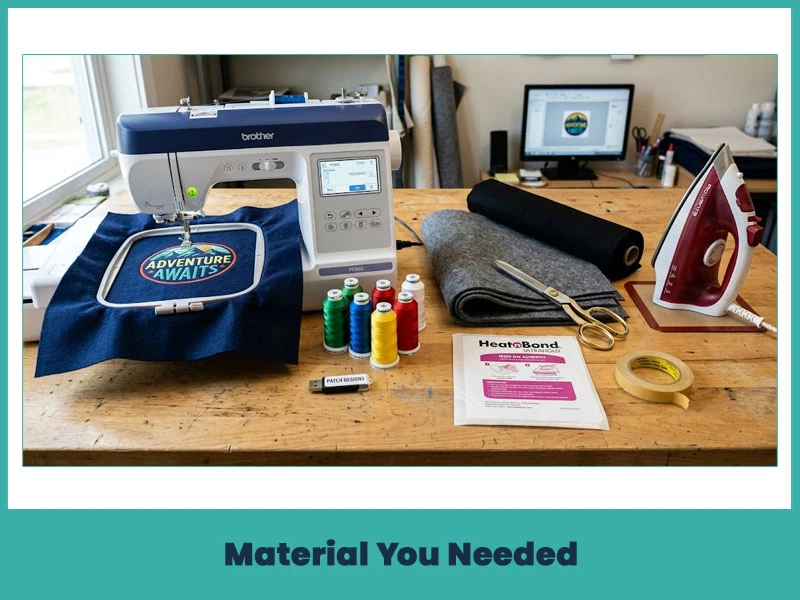
Here’s a quick checklist of materials you’ll need to make an embroidered adhesive patch:
Embroidery Machine Tools:
Embroidery Designs (digitized files for machine embroidery).
Fabric (felt or cotton works well for patches).
Embroidery Thread (choose high-quality threads for durability).
Adhesive Backing (iron-on adhesive sheets, double-sided tape, or peel-and-stick backing)
Scissors (sharp ones for clean cuts)
Iron (for heat-activated adhesive)
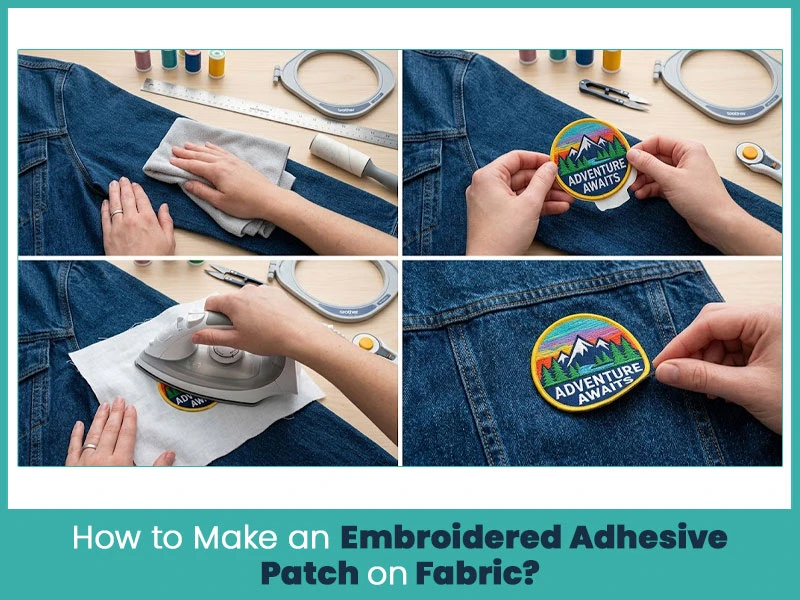
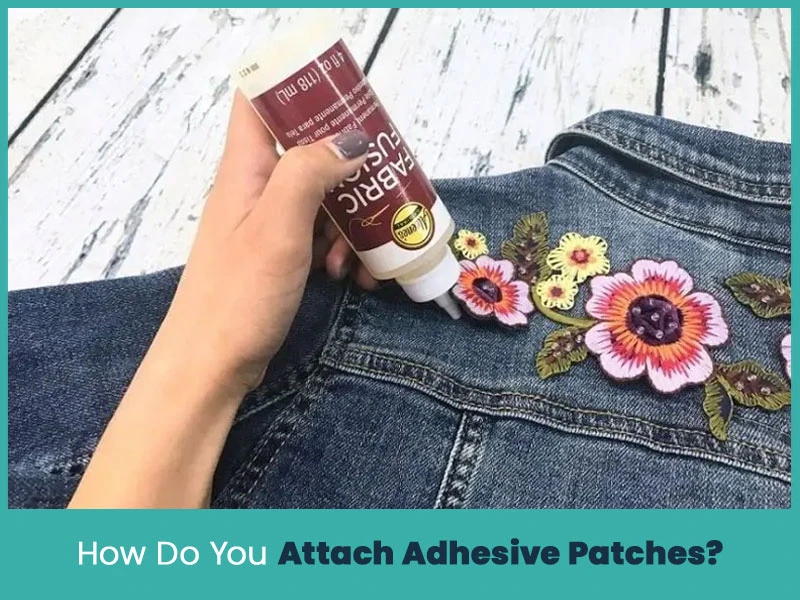
Attaching your embroidered patch to fabric seamlessly involves preparation and careful application:
Clean the Fabric
Before applying the patch, make sure the surface is clean and dry. Adhesive sticks better to smooth, lint-free surfaces.
Position the Patch
Lay your patch on the fabric, adhesive side down. Adjust its placement until you’re satisfied with how it looks.
Apply the Adhesive
If using iron-on adhesive, set a thin fabric over the patch and gently press it with a hot iron for 10-15 seconds. Press gently with your hands or a roller to apply peel-and-stick patches.
Test the Bond
Let it cool for a minute, then test the edges to ensure the patch is fully adhered.
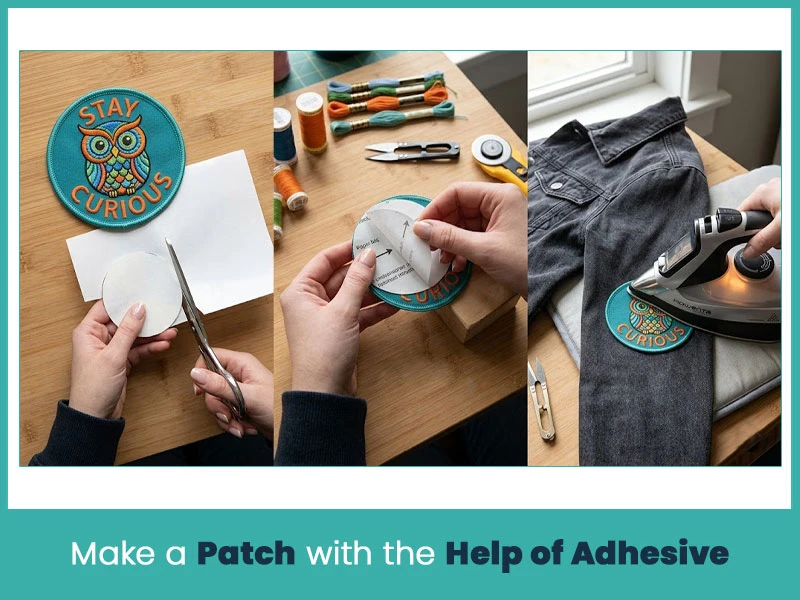
Using adhesive backing is the secret to transforming embroidered designs into accessible patches. Here’s how to do it efficiently:
Cut the Adhesive to Size
Cut the adhesive sheet to match the size of your patch. Avoid overhanging edges.
Attach to the Patch
Peel the protective layer off one side of the adhesive and stick it to the back of the embroidered patch. Smooth out any air bubbles.
Secure to the Fabric
For iron-on adhesive, follow the heat activation process outlined earlier. If using peel-and-stick, ensure even pressure is applied across the patch.
Attaching adhesive patches is simple, but ensuring they last requires attention to detail:
Prepare the Surface
Always clean the target surface before attaching the patch. Dust and oils can weaken the adhesive.
Follow the Instructions
Different adhesives have unique application methods. Follow the guidelines for best results.
Reinforce if Necessary
For extra durability, consider stitching the patch’s edges. This step is especially useful for garments that undergo frequent washing.
Nick William has been immersed in the world of embroidery digitizing for over 20 years, earning 25 industry awards throughout his career. As a 3rd generation embroidery expert, Nick’s journey started in his family’s workshop, where he learned the art of digitizing before the rise of modern software. He has worked with leading commercial embroidery businesses and has shared his expertise with over 75,000 home and professional embroiderers. As an author at True Digitizing, Nick is passionate about teaching others how to create beautiful, precise designs through easy-to-follow tutorials and expert advice.
Categories

How to Remove Embroidery From Any Fabric — Step-by-Step Guide 2026
28-06-2026

Embroidery Trends 2026: What's Hot in Machine & Hand Embroidery | TrueDigitizing
26-06-2026

Top Best Embroidery Digitizing Software in 2026
06-05-2026
")
Best Multi-Needle Embroidery Machines for Startups 2026
28-02-2026

DST File: The Complete Guide (What It Is, How to Create, Convert & Use in 2026)
28-02-2026

Janome 550E vs Baby Lock Flare | Best Mid-Range Embroidery Machine?
26-02-2026

Choose the Right Fabric for Embroidery
20-02-2026

Advanced Techniques in Embroidery Digitizing
19-02-2026

Most Common Types of Threads to Use in Machine Embroidery
12-02-2026

AI in Embroidery | Revolutionizing Art and Efficiency
12-02-2026
Asked Questions


