
At True Digitizing, we transform your creative spark into flawless, high-quality embroidery digitized designs that bring your vision to life.
Our Blogs
We Accept
Copyright 2025 Truedigitizing
At True Digitizing, we transform your creative spark into flawless, high-quality embroidery digitized designs that bring your vision to life.
We Accept
Copyright 2025 Truedigitizing

Doing embroidery is simple until puckering occurs and ruins all your hard work or efforts. Even the best machines and threads can’t save your designs but by understanding why it happens and how to prevent it, you control the outcome.
You finish an embroidery design with care and patience. The stitches look neat, the colors look right, and everything looks just perfect. Then you remove thehoop and notice the fabric looks pulled and uneven. This moment hurts you because all your effort feels wasted.
This guide covers practical ways to prevent puckering so your designs stay sharp and professional from the first stitch to the last.
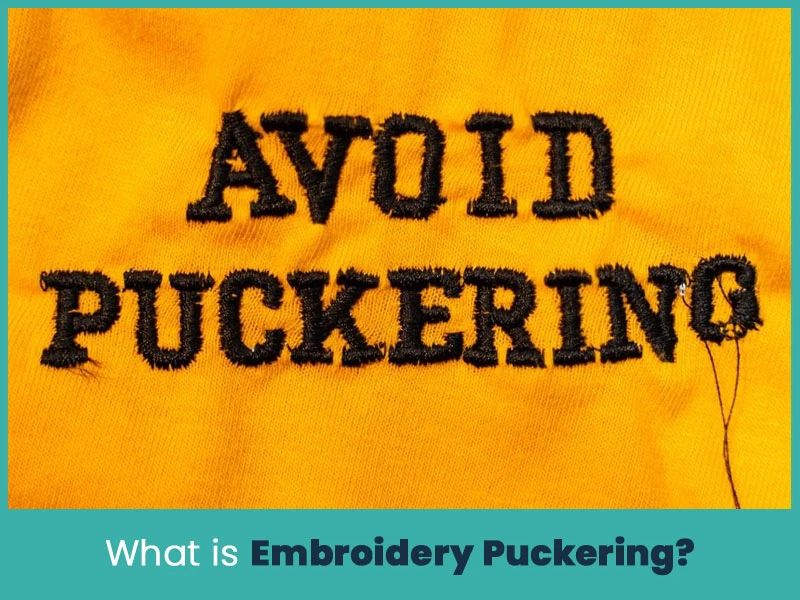
Embroidery puckering occurs when fabric pulls inward around the stitching area. Stitches are tight and secure but fabric has waves or wrinkles. Sometimes puckering appears while the machine stitches, but most times it shows after you remove the hoop.
Puckering doesn’t signal a machine fault. It shows issues in fabric choice, stabilizeruse, hooping, or digitizing setup.
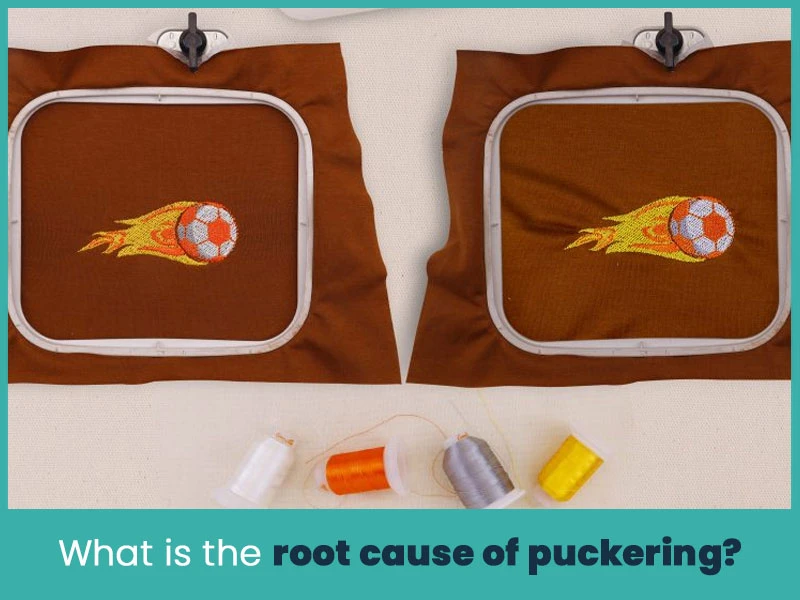
Puckering starts when stitches pull harder than the fabric handles. Incorrect stabilizers, poor hooping, high stitch density, fabric stretch, and weak thread cause this pull. When fabric fails to support stitches, it gathers inward and loses its shape.
Here are some common root causes of embroidery puckering.
Stabilizers support fabric during stitching. When a stabilizer feels too soft or too weak, the fabric moves while the needle works. This movement creates pulling and wrinkling.
Light fabrics need strong support, and stretchy fabrics need stabilizers that control movement. The wrong stabilizer leads to puckering, even when other settings look correct.
Hooping keeps fabric stable during embroidery. Loose hooping allows fabric movement with every stitch. Tight hooping stretches the fabric and creates puckering after hoop removal.
The fabric must sit flat and firm inside the hoop.
Large and dense designs place many stitches in one area. When fabric and stabilizer fail to support that stitch load, puckering appears.
Small garments with large designs show puckering faster because the fabric lacks space to relax around the stitched area.
Low-quality thread creates uneven tension. It twists, breaks, or pulls too hard during stitching. This extra pull distorts the fabric.
High quality thread runs smoothly and keeps tension balanced throughout the design.
Stretch fabrics like knits, jersey and spandex move during stitching. After stitching ends, the fabric doesn't move while the stitches stay tight. This difference creates puckering around the design.
Density puckering happens when stitches sit too close together. High stitch density adds weight and pull to the fabric. When digitizing ignores density balance, stitches overpower the fabric.
This issue usually appears in auto digitized designs that ignore fabric behavior.
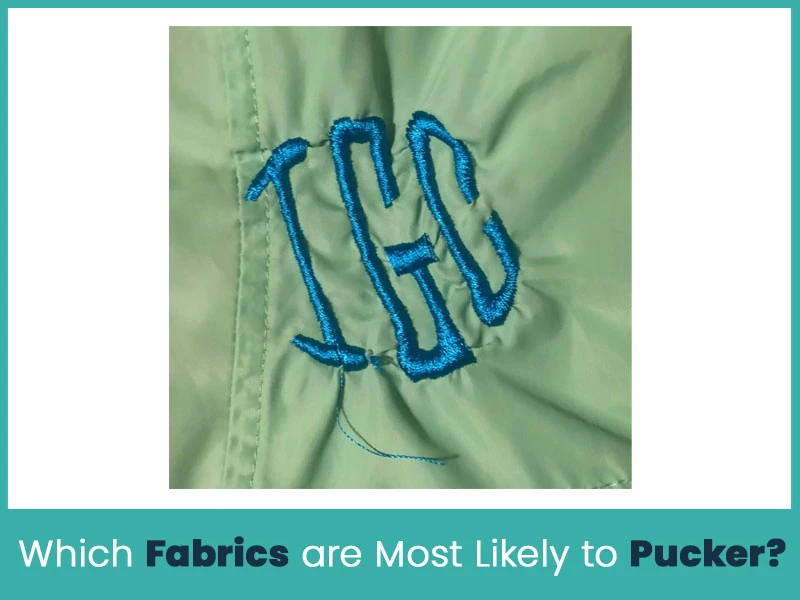
Some fabrics pucker more easily than others. Slippery and lightweight fabrics move under the needle and react quickly to stitch tension.
Fabrics prone to puckering include:
- Nylon.
- Satin.
- Silk.
- Polyester blends.
- Lightweight cotton.
- Stretch fabrics.
These fabrics need extra care, correct stabilizers, and proper digitizing to avoid puckering.
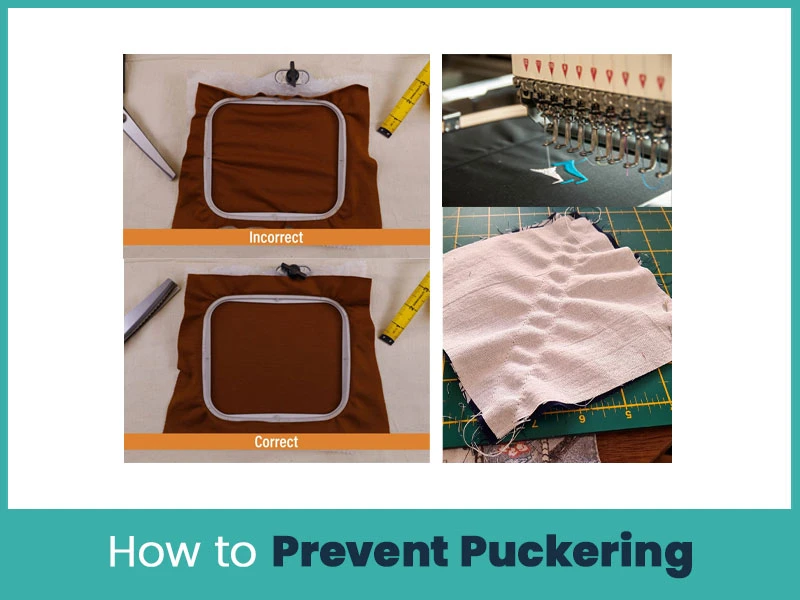
Prevention saves time, fabric, and effort. Follow these steps to reduce puckering before it starts.
Choose stabilizers based on fabric type. Use cut-away stabilizers for stretchy fabrics. Use medium or heavy tear-away stabilizers for stable woven fabrics. Add a topping for textured fabrics when needed.
As long as the stabilizer supports the fabric fully, puckering reduces.
Place fabric and stabilizer together in the hoop. Keep the fabric flat and secure without stretching it. Tighten the hoop evenly so the fabric stays stable during stitching.
Proper hooping keeps the fabric steady from start to finish.
Check top and bobbin tension before starting embroidery. Balanced tension stops thread from pulling the fabric. When tension feels tight, loosen it slightly and test again.
Correct tension protects fabric and keeps stitches smooth.
Match the needle to fabric and thread. Use ballpoint needles for knit fabrics and sharp needles for woven fabrics. A damaged or incorrect needle increases fabric stress.
The right needle helps clean stitching without pulling.
Professional digitizing balanced stitch direction, density, and pull compensation. Skilled digitizers adjust designs based on fabric behavior. This planning reduces stress on fabric during stitching.
Poor digitizing causes puckering even with correct stabilizers and hooping.
You can secure embroidery projects when puckering starts during stitching. Stop the machine and place a layer of tear-away stabilizer underneath the hooped fabric. Restart stitching after adding support.
This extra stabilizer reduces pulling while the design finishes. After stitching, gentle ironing from the back side relaxes the fabric. Use light steam and avoid pressing directly on stitches.
Puckering frustrates everyone at some point. Precautions and well digitized designs reduce risk and save projects from damage.
Machine embroidery puckering is so frustrating but you can control it with the right strategy. Use right stabilizers, proper hooping, balanced tension, and professional digitizing creates a huge difference. Once you fix these basics isuues, embroidery looks smooth, clean, and professional.
At True Digitizing, we provide embroidery digitizing services at the most affordable prices. Our experts adjust stitch density, direction, and pull compensation based on fabric type. We deliver fast turnaround time and reliable results with confidence. Also if you want revisions or design didn’t match your expectations, we give free revisions and minor editing until you are satisfied.
Nick William has been immersed in the world of embroidery digitizing for over 20 years, earning 25 industry awards throughout his career. As a 3rd generation embroidery expert, Nick’s journey started in his family’s workshop, where he learned the art of digitizing before the rise of modern software. He has worked with leading commercial embroidery businesses and has shared his expertise with over 75,000 home and professional embroiderers. As an author at True Digitizing, Nick is passionate about teaching others how to create beautiful, precise designs through easy-to-follow tutorials and expert advice.
Categories

How to Remove Embroidery From Any Fabric — Step-by-Step Guide 2026
15-07-2026

Is SVG a Vector File? Yes — SVG vs EPS, PNG, PDF Vector Formats you need to know
08-07-2026

Embroidery Trends 2026: What's Hot in Machine & Hand Embroidery | TrueDigitizing
26-06-2026

Top Best Embroidery Digitizing Software in 2026
06-05-2026
")
Best Multi-Needle Embroidery Machines for Startups 2026
28-02-2026

DST File: The Complete Guide (What It Is, How to Create, Convert & Use in 2026)
28-02-2026

Janome 550E vs Baby Lock Flare | Best Mid-Range Embroidery Machine?
26-02-2026

Choose the Right Fabric for Embroidery
20-02-2026

Advanced Techniques in Embroidery Digitizing
19-02-2026

Most Common Types of Threads to Use in Machine Embroidery
12-02-2026
Asked Questions


