
At True Digitizing, we transform your creative spark into flawless, high-quality embroidery digitized designs that bring your vision to life.
Our Blogs
We Accept
Copyright 2025 Truedigitizing
At True Digitizing, we transform your creative spark into flawless, high-quality embroidery digitized designs that bring your vision to life.
We Accept
Copyright 2025 Truedigitizing

Stick and stitch embroidery is a revolutionary technique that simplifies the embroidery process. It is a water-soluble material with adhesive backing, making it incredibly convenient for transferring designs onto fabric. Whether you want to create complex patterns or add decorative elements to your clothes, Stick and stitch is the perfect choice. Stick and stitch embroidery can be used on various surfaces, including smooth, textured, and stretchy fabrics. It provides the flexibility to explore different stitching techniques and patterns. Whether you are a beginner or an experienced embroidery artist. Stick and stitch open up endless creative possibilities.
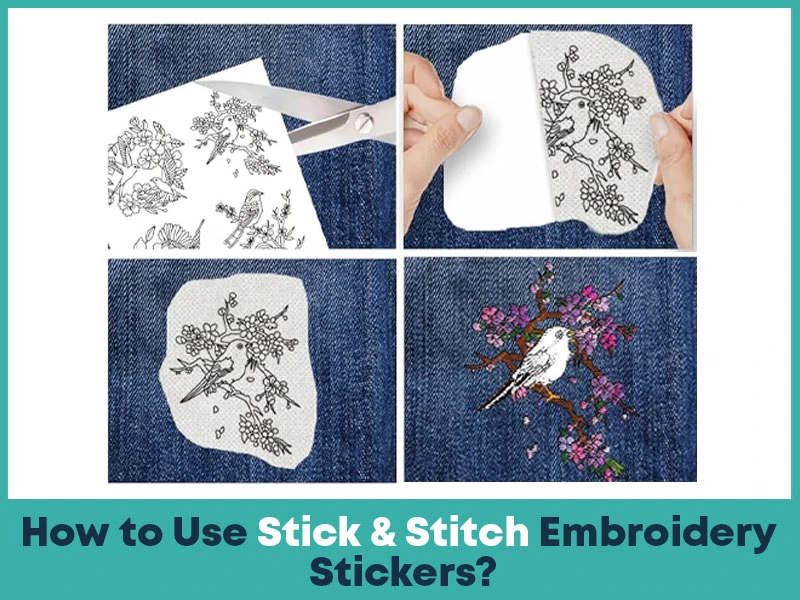
Stick and stitch stickers are a convenient and easy-to-use tool for embroidery. Here are the simple steps to apply and remove these stickers:
1. Prepare your fabric: Start by ensuring that your fabric is clean and free of any dust or dirt. Smooth out any wrinkles or creases on the fabric to ensure a neat embroidery surface.
2. Hoop the fabric: Place your fabric in an embroidery hoop, securing it tightly. This step is important as it helps to keep your fabric tight while working with the stick and stitch stickers.
3. Apply the sticker: Once your fabric is secured in the hoop, carefully peel the backing off the sticker and stitch the sticker. Place the adhesive side down onto the desired area of your fabric. Gently rub the sticker with your fingers or a smooth object to ensure it is securely attached.
4. Stitch your design: With the stick and stitch sticker in place, you can now start stitching your design. Use your preferred embroidery threads and stitches to bring your design to life.
5. Remove the sticker: Once you have completed your embroidery, it's time to remove the stick and stitch sticker. Fill a bowl or basin with warm water. Immerse your stitched fabric, ensuring that the sticker is completely submerged. Let it soak for a few minutes until the sticker dissolves.
6. Rinse and dry: After the sticker has dissolved, gently rinse your fabric under running water to remove any excess residue. Pat it dry with a paper towel or allow it to air dry.
Using stick and stitch stickers simplifies the embroidery process, making it accessible to beginners and experienced crafters alike. With their easy application and removal using warm water, they are a fantastic addition to any embroidery project.
1. Use colorfast fabric and thread: To ensure that your embroidery design stays vibrant and doesn't leak, it's important to use colorfast fabric and thread. Pre-wash and test your fabric and threads for colorfastness before starting your project.
2. Ensure the stabilizer sticks properly: Before applying the stick and stitch sticker, make sure your fabric is clean and free of any residue or oils. This will help ensure that the stabilizer sticks properly to the fabric, providing a stable surface for your embroidery.
3. Prevent your needle from getting sticky: Embroidery can sometimes leave a sticky residue on your needle. To prevent this, try wiping your needle with a clean cloth or tissue periodically while stitching. You can also apply a small amount of sewing machine oil or beeswax to the needle to reduce friction.
4. Use a properly sized needle: Choosing the right needle size is crucial for a smooth stitching experience. Use a needle that is suitable for your fabric and thread thickness. A too-small needle can cause fabric damage, while a too-large needle can leave visible holes.
5. Maintain a sharp needle tip: A sharp needle makes stitching easier and gives cleaner results. Invest in a needle sharpener to keep your needle tip sharp and ready for use.
By following these stick and stitch embroidery tips and tricks, you can enhance your stitching experience and achieve beautiful results on your projects.
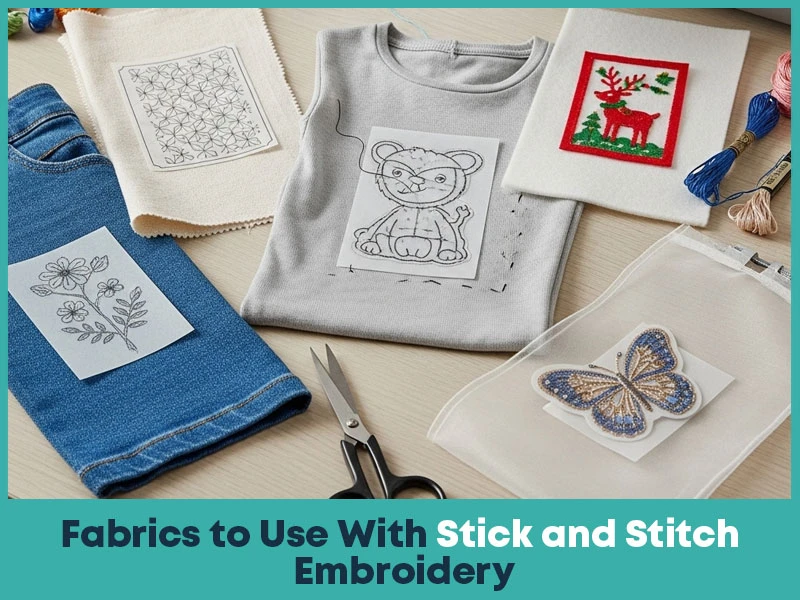
When it comes to using stick and stitch paper for embroidery, there are a variety of fabrics that work well with this technique. While smooth fabrics tend to provide the best results, stick and stitch can be used on a range of different fabric types.
Smooth fabrics, such as cotton or linen, are ideal for stick and stitch paper because the sticky backing adheres easily to the fabric surface. This ensures that your design stays in place while you stitch. Smooth fabrics also allow for precise and neat embroidery work.
In addition to smooth fabrics, textured fabrics can also be used with stick and stitch paper. These fabrics, like velvet or corduroy, can be challenging to mark with a transfer pen or other methods. Stick and stitch provides a convenient solution, allowing you to easily transfer your design onto textured fabric.
Looking to add some creative flair to your t-shirts? Look no further than stick and stitch embroidery patterns. With the pre-transferred designs from the stick and stitch embroidery Pack. You can easily embellish your favorite tees with stunning embroidery.
One great aspect of these patterns is that they do not come with step-by-step stitching instructions. This allows for personal creativity and the freedom to interpret and stitch the designs in your own unique way.
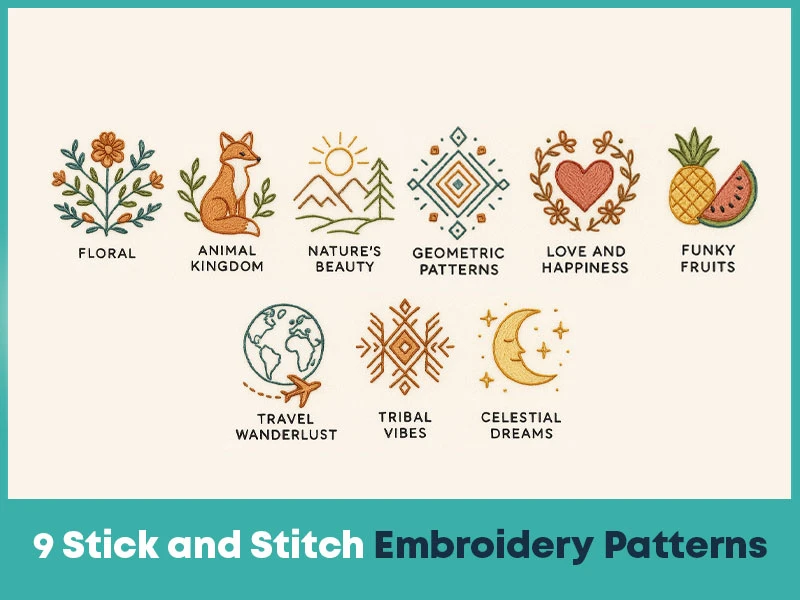
So, let's dive into 9 stick and stitch embroidery patterns for t-shirts:
1. Floral Delight: A bouquet of vibrant flowers, perfect for adding a touch of elegance to your tee.
2. Animal Kingdom: Adorable animal motifs like cats, dogs, and birds that bring a whimsical element to your t-shirt.
3. Nature's Beauty: Nature-inspired patterns such as leaves, trees, and butterflies, representing the beauty of the outdoors.
4. Geometric Patterns: Modern and minimalist designs that add a contemporary edge to your t-shirt.
5. Love and Happiness: Heart-shaped motifs and positive quotes to spread love and joy wherever you go.
6. Funky Fruits: Fun and playful fruit designs like watermelons, pineapples, and strawberries, perfect for summer fashion.
7. Travel Wanderlust: Icons and landmarks from around the world, inspiring the wanderer within you.
8. Tribal Vibes: Bold and complex tribal patterns that add an ethnic touch to your t-shirt.
9. Celestial Dreams: Moon, stars, and galaxy-themed designs that will make you feel like you're dreaming among the constellations.
Whether you have stretchy cotton t-shirts or any other type of fabric, these patterns are suitable for all. The stick and stitch designs adhere seamlessly to the fabric surface, ensuring that your artwork stays in place while you stitch. You can choose to embroider these patterns in embroidery hoops or directly onto the clothing itself.
Get ready to bring your t-shirts to life with these stick and stitch embroidery patterns. Let your creativity run wild and stitch your own unique style.
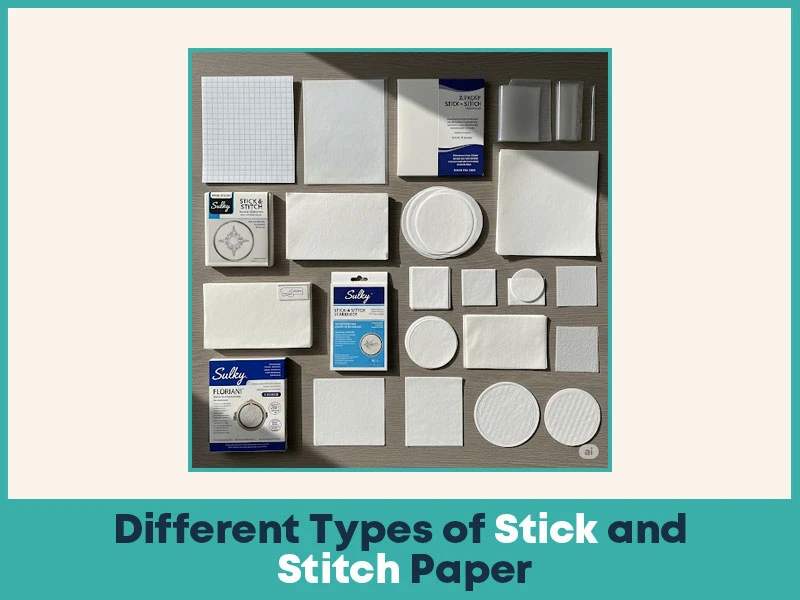
Stick and stitch paper is important for embroidery. It helps you transfer your chosen design onto fabric with precision, preventing smudging or shifting during stitching. There are different types of stick and stitch paper available, each serving the same purpose but with slight variations.
This type dissolves in water, making it perfect for delicate fabrics or projects that need clean removal after stitching. Once rinsed, it leaves no residue behind, keeping your fabric neat and ready to use.
A transparent, film-like material that provides a stable base for embroidery. It works well with a wide range of fabrics, including textured or stretchy ones. Like soluble paper, it is water-soluble and easy to remove.
Several brands offer high-quality stick and stitch paper, available online and in craft stores. Some of the most trusted options include:
Stick n' Stitch
Sulky Solvy
DMC Stick 'n Stitch Transfer Sheets
These brands are known for reliability, ease of use, and clean results.
Stick and stitch paper is a popular choice for transferring embroidery designs onto fabric. Here are the steps to use this handy tool:
Begin by printing your desired embroidery design onto the stick and stitch paper using an inkjet or laser printer. Ensure that you mirror the design if necessary for correct orientation on the fabric.
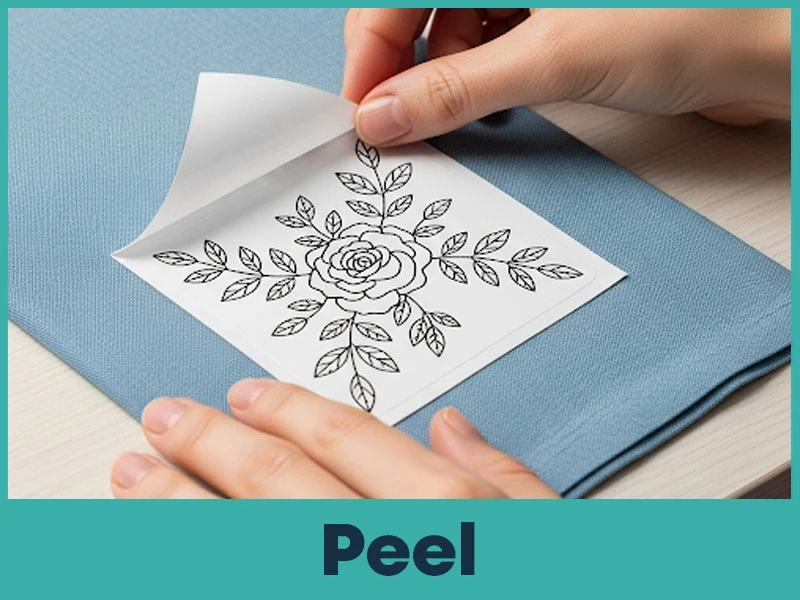
Once your design is printed, carefully peel off the backing from the stick and stitch paper. The adhesive side of the paper should now be exposed and sticky.
Position the exposed adhesive side of the stick and stitch paper onto the right side of the fabric where you want your design to be. Press down firmly to ensure a secure bond between the paper and fabric.
Now, start stitching your design directly on the fabric, following the printed lines on the stick and the stitch paper as your guide. You can use various embroidery techniques and threads to bring your design to life.
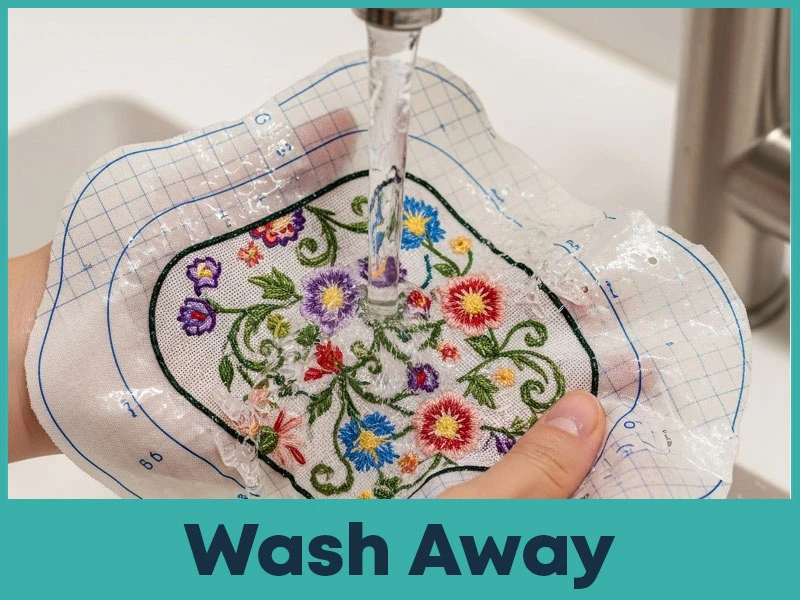
After you have finished stitching your design, it's time to remove the stick and stitch paper. Gently wash the fabric under warm running water. The stick and stitch paper will dissolve, leaving only your beautiful embroidery behind.
Finally, allow the fabric to air dry completely before trimming any excess threads or embellishing it further.
Using stick and stitch paper is a convenient and efficient way to transfer embroidery designs onto fabric. Give it a try for your next embroidery project and enjoy the ease and accuracy it offers.
In addition to the stick and stitch embroidery transfer paper, there are several other methods you can use to transfer your embroidery patterns. Each method has its own pros and cons, and the choice of fabric also plays a role in determining the best method to use.
One common alternative method is using a heat transfer pen. This involves tracing your design onto tracing paper or directly onto the fabric using a heat transfer pen. And then using heat (such as an iron) to transfer the design onto the fabric. Heat transfer pens are ideal for use on smooth and non-stretchy fabrics, and they offer a quick and precise transfer method. However, they may not be suitable for textured or stretchy fabrics.
Another option is using carbon transfer paper. Simply place the carbon transfer paper between your design and the fabric, and trace your design using a pen or pencil. The pressure from your tracing will leave a carbon copy of the design on the fabric. Carbon transfer paper is versatile and can be used on a variety of fabric types. However, it can sometimes smudge or fade over time.
When choosing the best fabric for transferring stick and stitch embroidery patterns, it's important to consider the texture and stretchiness of the fabric. Smooth fabrics like cotton or linen work well with heat transfer pens and carbon transfer paper. If working with stretchy fabrics like knits or jerseys, the stick and stitch transfer paper may be the most reliable and user-friendly option.
Remember, each transfer method has its own pros and cons. Experiment with different methods and fabrics to find the one that suits your embroidery project best. Get started with your embroidery projects today by exploring our embroidery services.
Nick William has been immersed in the world of embroidery digitizing for over 20 years, earning 25 industry awards throughout his career. As a 3rd generation embroidery expert, Nick’s journey started in his family’s workshop, where he learned the art of digitizing before the rise of modern software. He has worked with leading commercial embroidery businesses and has shared his expertise with over 75,000 home and professional embroiderers. As an author at True Digitizing, Nick is passionate about teaching others how to create beautiful, precise designs through easy-to-follow tutorials and expert advice.
Categories

How to Remove Embroidery From Any Fabric — Step-by-Step Guide 2026
28-06-2026

Embroidery Trends 2026: What's Hot in Machine & Hand Embroidery | TrueDigitizing
26-06-2026

Top Best Embroidery Digitizing Software in 2026
06-05-2026
")
Best Multi-Needle Embroidery Machines for Startups 2026
28-02-2026

DST File: The Complete Guide (What It Is, How to Create, Convert & Use in 2026)
28-02-2026

Janome 550E vs Baby Lock Flare | Best Mid-Range Embroidery Machine?
26-02-2026

Choose the Right Fabric for Embroidery
20-02-2026

Advanced Techniques in Embroidery Digitizing
19-02-2026

Most Common Types of Threads to Use in Machine Embroidery
12-02-2026

AI in Embroidery | Revolutionizing Art and Efficiency
12-02-2026
Asked Questions


