
At True Digitizing, we transform your creative spark into flawless, high-quality embroidery digitized designs that bring your vision to life.
Our Blogs
We Accept
Copyright 2025 Truedigitizing
At True Digitizing, we transform your creative spark into flawless, high-quality embroidery digitized designs that bring your vision to life.
We Accept
Copyright 2025 Truedigitizing

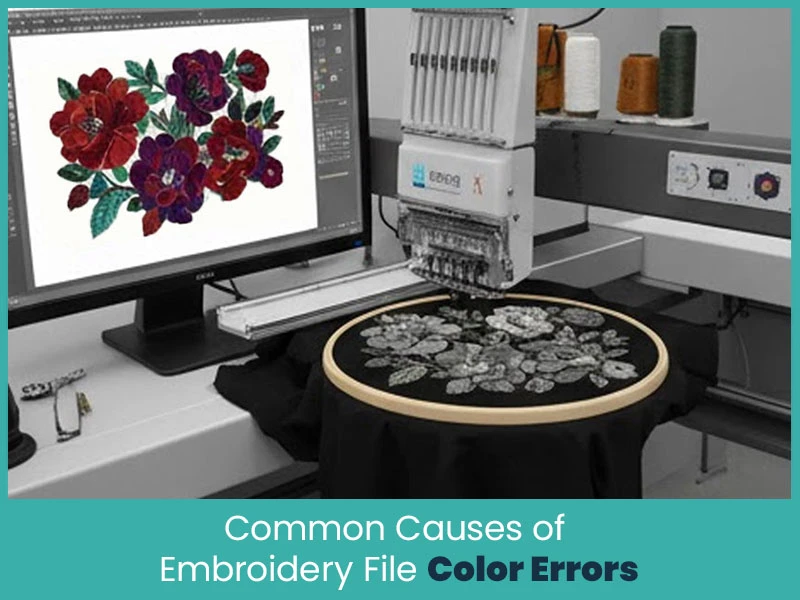
On a daily basis when you open embroidery design files and notice that the colors look completely different from what you expect, it could be that a bright red logo looks brown or the soft pastels turn dull. These color errors annoy every digitizer, especially when your final stitch doesn’t match your original design.
The good news is that these mistakes can be fixed through this guide. Then no matter if you’re a passionate beginner digitizer or a professional embroiderer, learning how to correct embroidery file color errors will save you time, thread and disappointment. In this blog post, we will cover clear, practical steps to help you find and fix those color issues easily. You’ll also learn how to prevent them in the future so every design comes out just as you imagined without any errors.
So let’s understand & get your embroidery files looking just right, color-perfect and machine-ready.

Embroidery files may look simple but behind every design are layers of coded data that control how your machine reads stitches and colors. When that data gets mismatched or lost, your design may display the wrong shades.
Here’s why this usually happens:
Many embroidery file types, such as DST or PES, do not always store complete color data. When you open them, your machine may guess the closest match from its built-in color palette.
The thread chart used by the original digitizer may differ from the one you use. Each brand, like Madeira or Isacord, has its own numbering system and mismatches can create big visual differences.
Convert your design from one format to another (for example, from EMB to PES) can cause colors to shift or reset.
Some files are saved without the full color palette, which leads to missing color information or default replacements.
For instance, many DST files don’t save color data at all. When you load them into your software or embroidery machine, it simply picks whatever colors it thinks are closest. That’s why your blue flower may suddenly turn green on the preview screen.
In short, embroidery color errors usually occur when the design’s color information doesn’t match your machine’s expectations.
Each thread brand has its own numbering system. If your software doesn’t recognize the same code used by the original design, it substitutes the color with something else. Even a small mismatch will change your final design look.
Some file formats are meant mainly for production and may ignore color data altogether. For example, DST files are commonly used for machines but don’t hold color information. That’s why when you open them, colors may not look the same as they did during digitizing.
When you convert a file from one format to another, the color information sometimes doesn’t transfer perfectly. Your software might automatically pick similar shades from its available chart, but they won’t always be accurate.
If the design doesn’t include a detailed color palette or it references an external file that’s missing, your embroidery software replaces those colors with default shades. This often happens when files are moved between computers or programs.
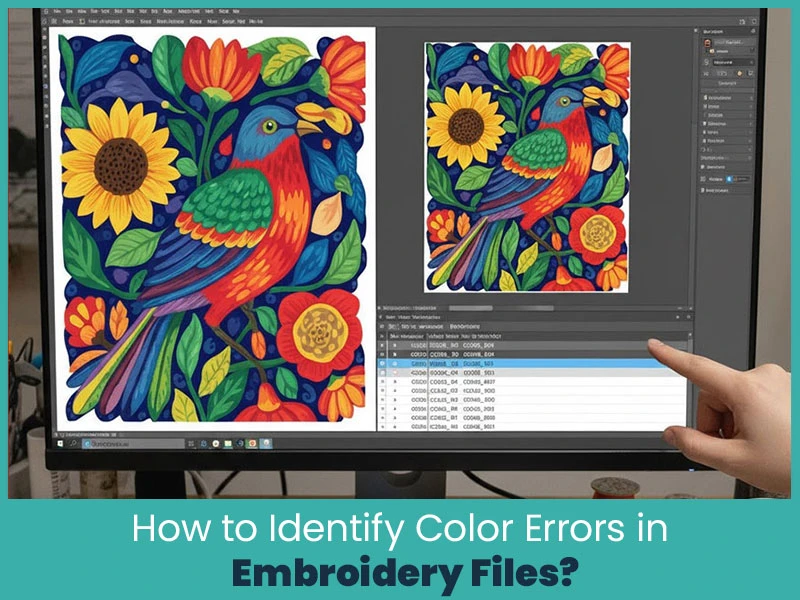
Spotting color errors before stitching can save you hours of rework and wasted thread. Here’s what to check:
The on screen preview looks different from your original artwork.
The software lists generic names like “Color 01” instead of brand names and thread numbers.
The stitching sequence doesn’t make sense (for example, background stitches showing first).
Test stitching shows unexpected or incorrect shades.
Always open your design in embroidery software and check how it looks before sending it to the machine. Many programs let you preview designs using your specific thread brand, so you can see a more accurate color display.
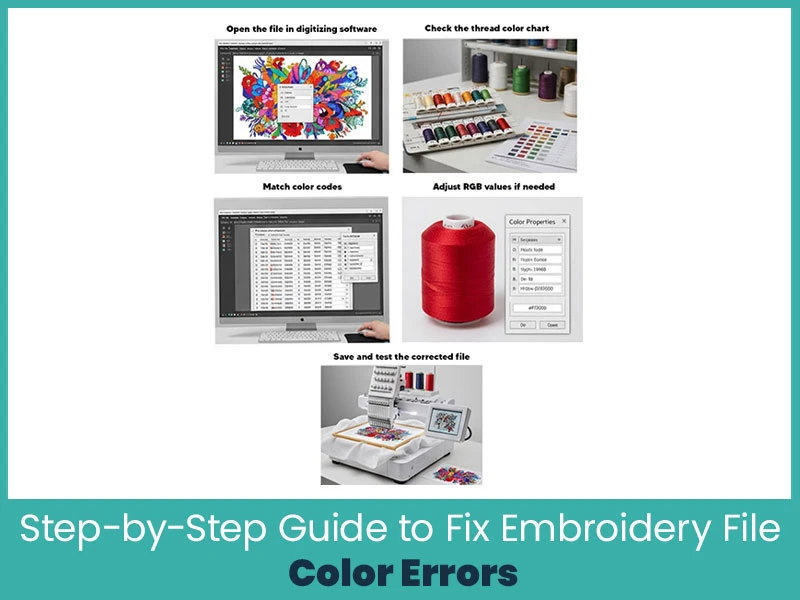
Here’s a simple, clear process you can follow to correct color issues before stitching your design:
Start by opening your original file in software programs like Wilcom, Hatch, Embird & so on. Use your source or “native” file type such as.EMB or.ART, whenever possible. These file types store more details and help better control your design settings.
Review the color chart included in the file. Make sure it lists the correct thread brand and code numbers. If your software shows colors without names or codes, you’ll need to reassign them manually.
Replace any incorrect or missing colors with the right ones from your preferred thread brand. Many embroidery programs have built-in catalogs for brands like Madeira, Isacord or Robison-Anton. Match each color using those brand charts for accuracy.
Sometimes the digital display doesn’t match the thread color exactly. Adjusting the RGB or hex color values in your software helps your screen display a more accurate preview. This is useful when you want the screen and the stitched result to look alike.
It is the last stage. Now everything looks right, save your file in your chosen format (PES, DST, EXP, JEF, etc.). Always run a small test stitch before starting the full project. This helps confirm that your colors look as expected. If something still looks off, make small corrections and test again.
By following these steps, you’ll catch errors early and save yourself from costly mistakes in the final results.
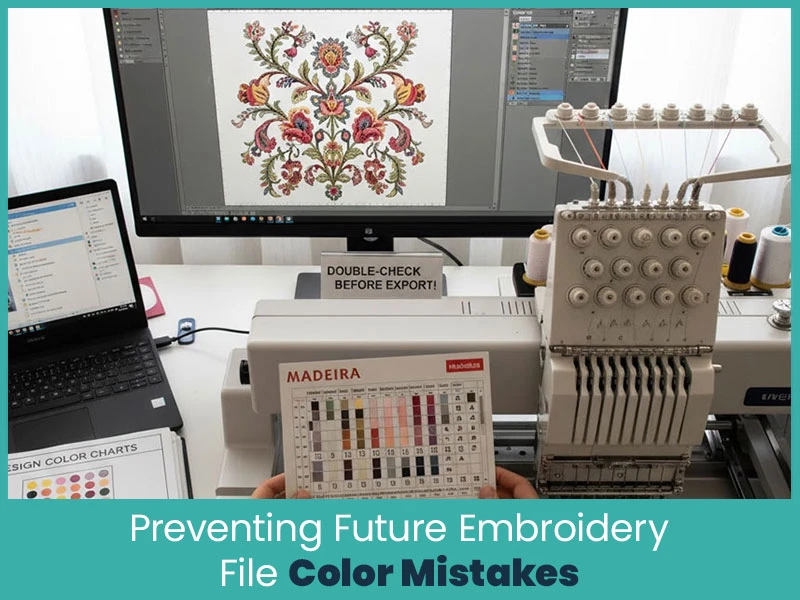
Fixing color errors is good but avoiding them altogether is even better. Here’s how you can prevent these issues from happening again:
Stick to one thread brand whenever possible and make sure its color chart is available in your software.
Save original files with their complete color information before converting to machine formats.
Avoid unnecessary file conversions. Each time you convert, there’s a small risk of losing color data.
Preview designs before export to confirm colors look correct on screen.
Keep a printed or digital record of your color chart for every design. This will help you quickly remap colors if needed later.
Taking a few minutes to double-check your design can save hours of frustration down the line.
Last but not least, colors are important in embroidery because colors attract and repel customers. If the colors are incorrect, even the best stitching can become unattractive. Understanding how to recognize, correct and avoid embroidery file color problems becomes essential before beginning to stitch. You can make sure that your embroidery projects always look fresh and consistent by following these easy techniques, which include checking your thread charts, matching color codes, modifying RGB values and testing your file. So choose colors wisely.
True Digitizing is always ready to help wherever you're stuck or want your designs digitized with stunning color accuracy. Every embroidery file you receive is color-matched, machine-ready and tested for perfect results by our skilled team of digitizers.Contact True Digitizing today.
Nick William has been immersed in the world of embroidery digitizing for over 20 years, earning 25 industry awards throughout his career. As a 3rd generation embroidery expert, Nick’s journey started in his family’s workshop, where he learned the art of digitizing before the rise of modern software. He has worked with leading commercial embroidery businesses and has shared his expertise with over 75,000 home and professional embroiderers. As an author at True Digitizing, Nick is passionate about teaching others how to create beautiful, precise designs through easy-to-follow tutorials and expert advice.
Categories

How to Remove Embroidery From Any Fabric — Step-by-Step Guide 2026
15-07-2026

Is SVG a Vector File? Yes — SVG vs EPS, PNG, PDF Vector Formats you need to know
08-07-2026

Embroidery Trends 2026: What's Hot in Machine & Hand Embroidery | TrueDigitizing
26-06-2026

Top Best Embroidery Digitizing Software in 2026
06-05-2026
")
Best Multi-Needle Embroidery Machines for Startups 2026
28-02-2026

DST File: The Complete Guide (What It Is, How to Create, Convert & Use in 2026)
28-02-2026

Janome 550E vs Baby Lock Flare | Best Mid-Range Embroidery Machine?
26-02-2026

Choose the Right Fabric for Embroidery
20-02-2026

Advanced Techniques in Embroidery Digitizing
19-02-2026

Most Common Types of Threads to Use in Machine Embroidery
12-02-2026
Asked Questions


