
At True Digitizing, we transform your creative spark into flawless, high-quality embroidery digitized designs that bring your vision to life.
Our Blogs
We Accept
Copyright 2025 Truedigitizing
At True Digitizing, we transform your creative spark into flawless, high-quality embroidery digitized designs that bring your vision to life.
We Accept
Copyright 2025 Truedigitizing

Embroidery digitizing goes beyond converting artwork into stitches. You control every stitch so the final design will look clean, perfect & professional. Mostly prospective embroiderers focus on basic fills and satin stitches but when you move toward advanced techniques, you won't have to figure out advanced techniques like shading, gradients, color blending, stitching nature and so on.
Advanced digitizing techniques help you create complicated designs. These techniques reduce thread breaks, prevent puckering & of course improve embroidery quality.

Shading adds depth to embroidery. It makes flat designs look more realistic. Instead of using one solid color, you use multiple stitch layers with slightly different shades.
In embroidery digitizing, shading works best with:
Tatami or fill stitches.
Short stitch lengths.
Controlled stitch direction.
You create a smooth transition by gradually changing thread colors. Let's suppose you digitize a flower, move from dark red in the center to light pink at the edges. This approach gives you a natural look.
Good shading requires:
Proper density control.
Overlap planning.
Correct stitch angle alignment.
If you set density too high, the fabric becomes stiff. If you set it too low, gaps appear. You must maintain proper balance.
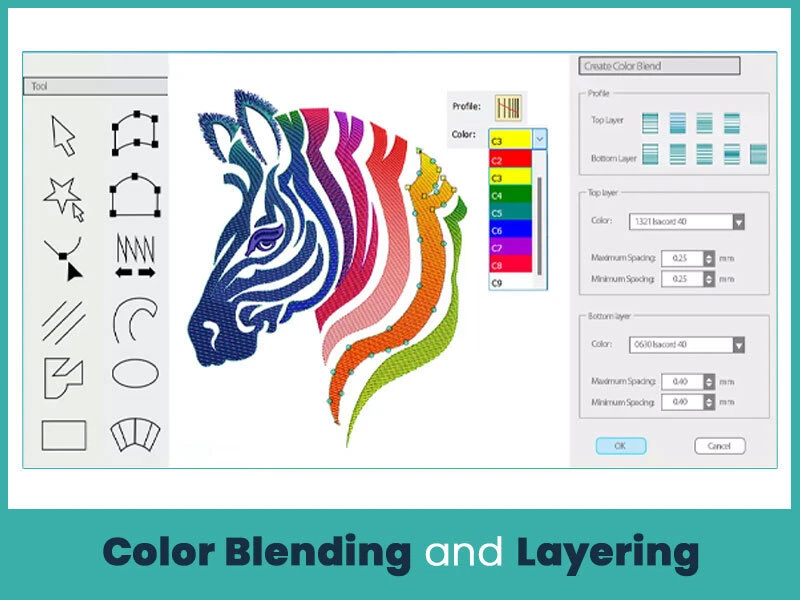
Color blending differs from simple shading. In blending, you overlap two thread colors slightly. This method creates a soft transition without harsh lines.
You achieve blending by:
Reducing stitch density in overlapping areas.
Changing stitch angles between layers.
Using underlay to stabilize the fabric.
Layering also plays an important role. You place background stitches first and add detail stitches on top. If you do not plan layering properly, threads break into the fabric or create uneven surfaces.
Blending works well for:
Portrait embroidery.
Animal fur textures.
Floral designs.
Logo gradients.
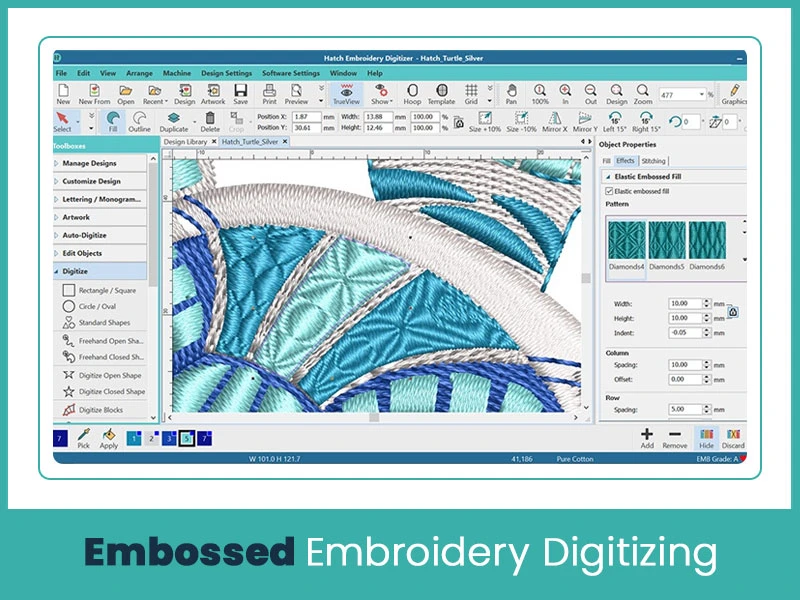
Embossed embroidery gives a little raised look without using foam. You create the illusion of depth by controlling stitch direction and spacing.
To create embossed effects, you:
Use contrasting stitch angles.
Apply tight fill stitches around design edges.
Keep center areas slightly lighter in density.
This method is perfect for jackets, hoodies, and heavy fabrics. Embossed digitizing needs proper stitch sequencing. If you arrange the order incorrectly, the design loses its raised effect.
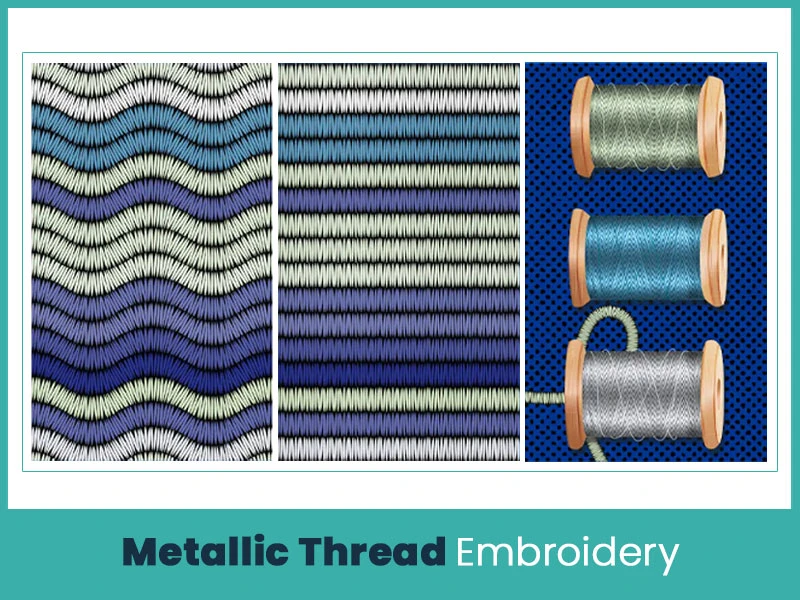
Metallic threads add shine and a premium look to embroidery. You can use them for logos, uniforms, and decorative designs.
However, metallic threads remain sensitive. They break easily if you:
Set stitch speed too high.
Use the wrong needle size.
Apply density too tightly.
When you digitize for metallic thread, you must:
Use slightly lower density.
Increase stitch length
Plan clean pathing to reduce trims.
Proper underlay reduces friction between fabric and thread. This step improves stitch quality and reduces thread breakage.
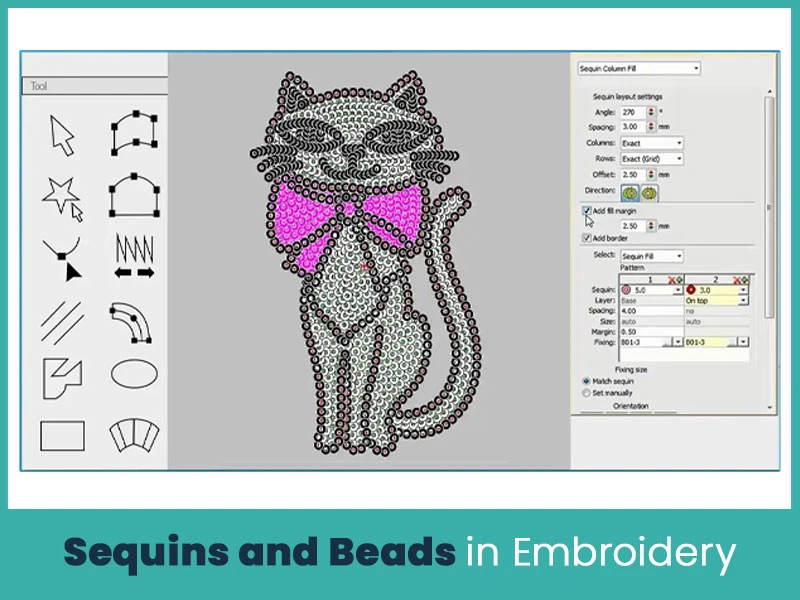
Advanced embroidery machines support sequin attachments that place sequins directly during stitching. You must plan sequin digitizing carefully because the machine stops at exact points to place each sequin correctly.
You define:
Exact stitch location.
Controlled spacing between sequins.
Correct sequin size settings.
Proper machine compatibility.
If placement points shift slightly, sequins overlap or misalign. This mistake creates uneven shine and poor finishing. You must leave enough space around each sequin to keep the fabric flexible. Tight placement makes garments stiff and uncomfortable.
Sequins add shine, movement, and texture. Designers use them for fashion wear, dance costumes, promotional apparel, and decorative logos. Light reflects from different angles and gives the design a dynamic appearance.
Bead embroidery often requires partial manual finishing. Machines mark placement stitches, and workers attach beads by hand for better control. This approach works well for detailed or premium designs.
Avoid placing sequins over heavy fill stitches. Dense stitching under sequins creates bulk and weak attachment points. Balanced spacing keeps the design smooth, flexible, and durable after washing.
Advanced digitizing depends on how well you control stitch types. Every stitch behaves differently on fabric. When you understand each stitch clearly, you improve both design quality and machine performance.
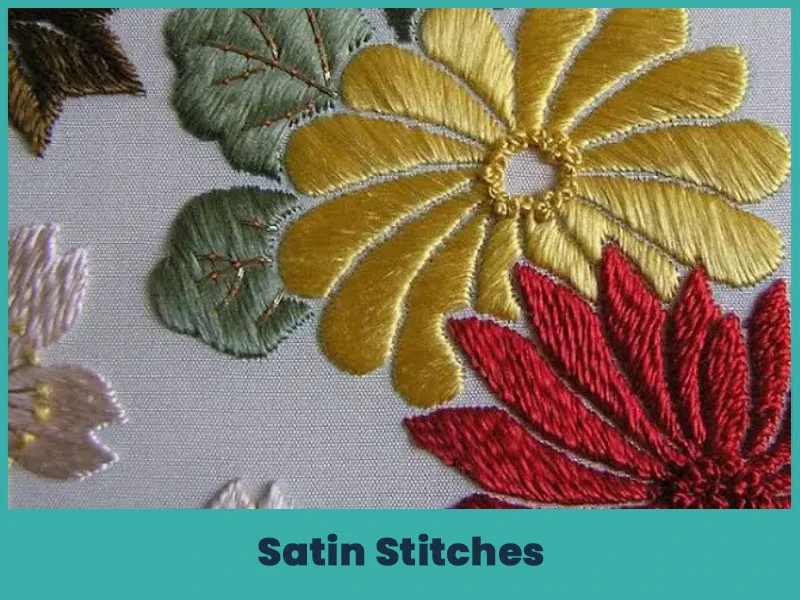
Satin stitches create smooth, clean, and slightly raised surfaces. They reflect light well and give logos and text a sharp finish.
Satin stitches work best for:
Text and lettering.
Borders and outlines.
Small design elements.
Narrow shapes.
You must control column width carefully. Very wide satin columns cause thread looping and snagging. You should maintain balanced stitch length so the surface stays smooth and strong.
Add proper underlay to stabilize the fabric. Edge-run underlay supports narrow columns. Zigzag underlay supports slightly wider areas. Good underlay prevents shifting and keeps edges clean.
Apply correct pull compensation to prevent gaps along edges. Without compensation, letters appear thin and uneven after stitching.
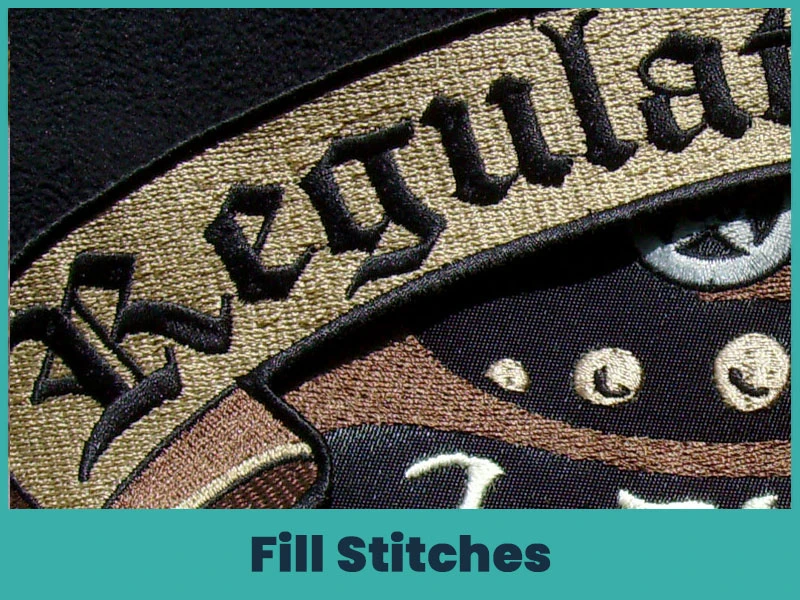
Fill stitches cover large areas and build the foundation of most embroidery designs. They provide structure and background support.
You improve fill stitches in advanced digitizing by using:
Variable stitch angles.
Pattern or motif fills.
Adjusted density based on fabric.
Layered stitching for depth.
Changing stitch angles improves light reflection and reduces visible stitch lines. It also reduces fabric distortion because stitches distribute tension evenly.
Pattern fills add texture inside large areas. You can create effects such as brick, waves, diagonal lines, or crosshatch. These patterns increase visual interest without raising stitch count too much.
You must adjust density carefully. Heavy fabric requires moderate density. Lightweight fabric requires lighter density to prevent puckering.
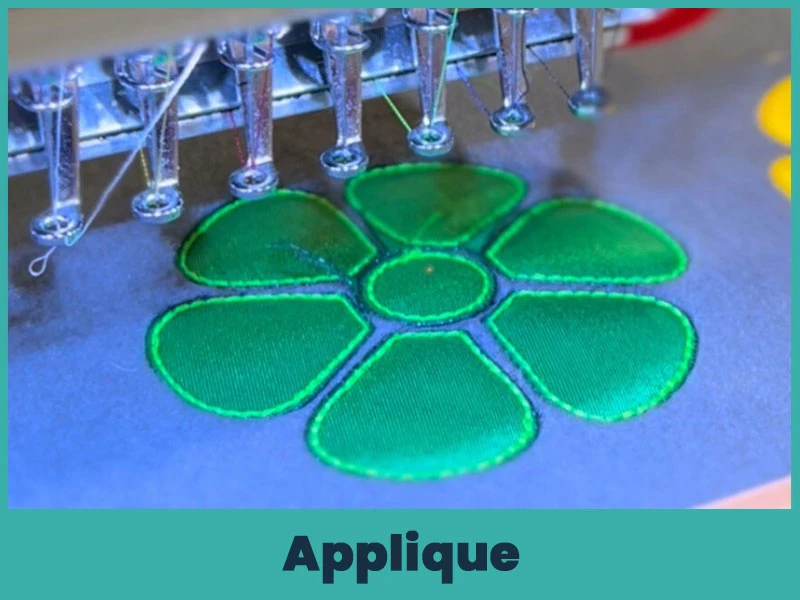
Applique reduces stitch count and keeps garments soft. Instead of filling large areas with thread, you use fabric pieces as the base.
The process includes:
Placement stitch.
Tack-down stitch.
Trim excess fabric.
Cover stitch (usually satin or decorative stitch)
Applique works well for large logos, school names, sports uniforms, and jacket backs. It saves production time and reduces thread usage.
Choose fabric carefully. Stable fabrics perform better because they do not fray easily. Proper trimming and clean cover stitching give applique a professional appearance.
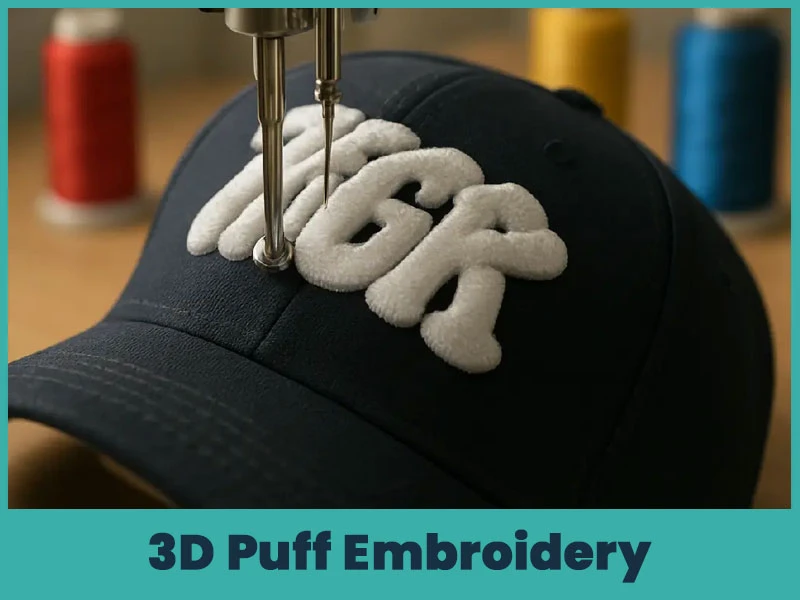
3D puff embroidery creates raised lettering and logos by placing foam under satin stitches. This technique remains popular for caps and structured garments.
For clean 3D puff results, you:
Use satin stitches only.
Increase stitch density slightly.
Remove underlay in foam areas.
Keep stitch direction consistent.
Design sharp corners carefully.
Do not use fill stitches over foam. Fill stitches cannot cover foam evenly.
After stitching, remove extra foam carefully by hand. Clean digitizing prevents gaps and fully covers foam. Proper edge control keeps the raised effect sharp and strong.
Digitizing software allows detailed stitch editing. Skilled digitizers refine every object before final output.
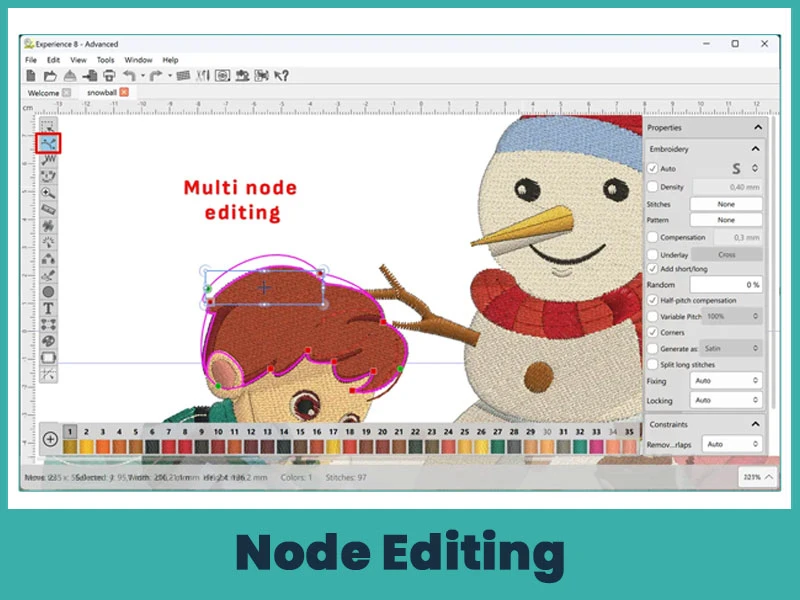
Node editing controls shape accuracy and stitch flow. Each object contains nodes that define its outline.
By adjusting nodes, you:
Smooth uneven outlines.
Correct distorted curves.
Fix sharp corners.
Improve stitch direction flow.
Clean node editing reduces jagged edges and improves stitch alignment. Accurate outlines produce cleaner embroidery results.
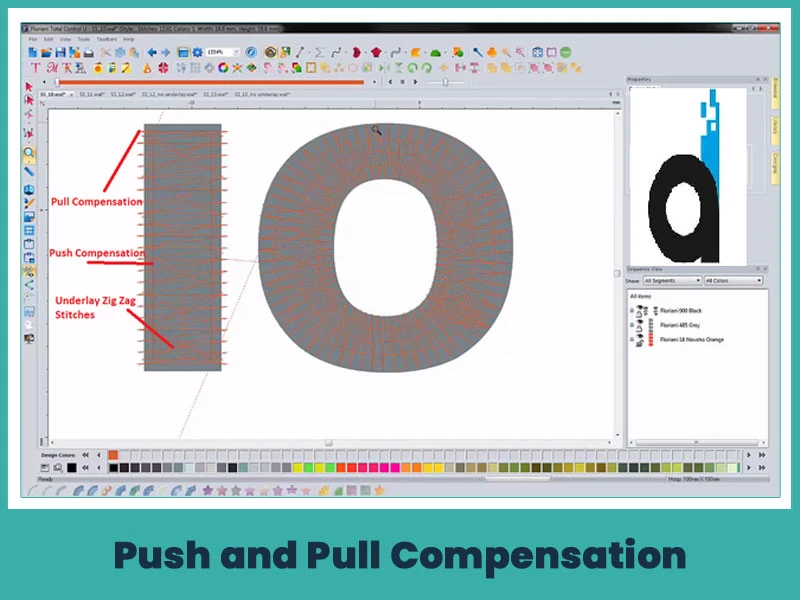
Fabric stretches during embroidery. Stitches push fabric outward and pull it inward. This movement changes the design shape.
Push compensation widens stitch columns slightly and pull compensation extends edges beyond the original outline.
Without compensation:
Letters become narrow.
Circles turn into ovals.
Borders shift out of position.
You should test your design on the actual fabric type. Cotton, polyester, fleece, and caps react differently. Accurate compensation keeps shapes balanced after stitching.
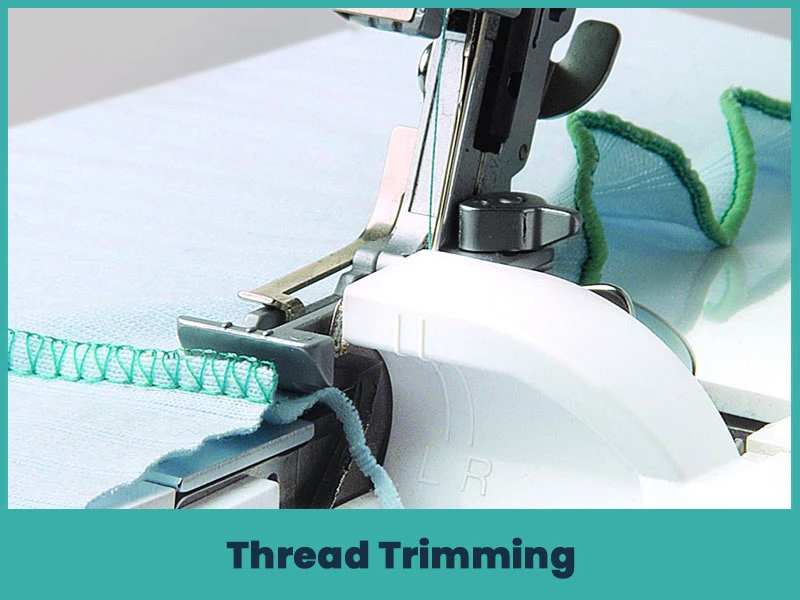
Thread trims affect production speed and final appearance. Too many trims slow machines and create loose thread ends.
You reduce unnecessary trims by:
Planning stitch sequence carefully.
Grouping nearby objects.
Using travel stitches inside filled areas.
Connecting design elements when possible.
Clean trimming reduces machine stops and improves overall finish. Fewer trims reduce thread waste and increase efficiency in bulk production.
Modern embroidery requires technical control and creative planning. New approaches focus on visual depth and texture without increasing stitch count unnecessarily.
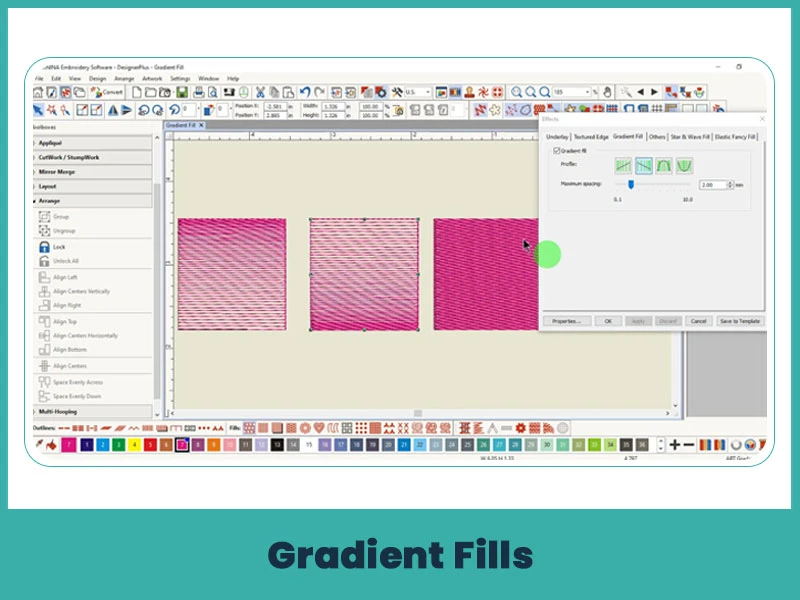
Gradient fills create smooth color transitions. You control gradients by adjusting stitch density, stitch angle, and color layering.
Some software includes automatic gradient tools, but manual adjustment gives you better control over stitch quality.
Gradients work well for:
Corporate logos.
Fashion embroidery.
Artistic graphics.
Sports branding.
Balanced density prevents stiffness and keeps the fabric flexible.
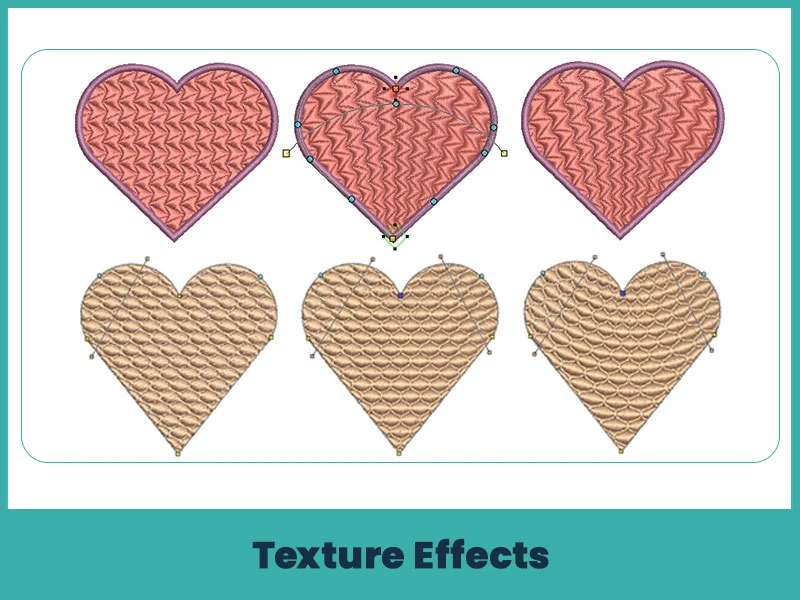
Texture effects add visual depth to embroidery. You create texture through:
Motif fills.
Pattern stitches.
Directional stitching changes.
Layered stitch angles.
Texture increases realism in designs such as animal fur, hair, wood grain, or abstract patterns. Proper texture planning increases visual impact without increasing bulk.
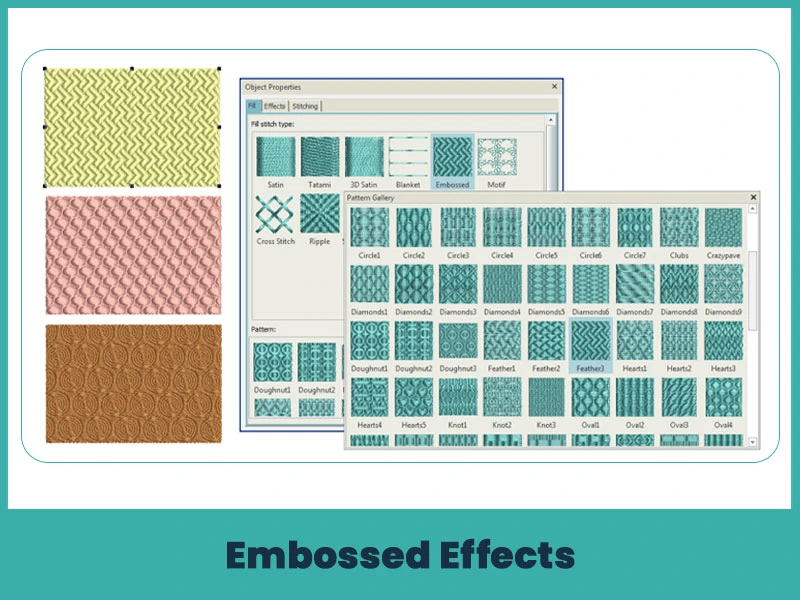
Embossed effects create a raised appearance through stitch angle contrast and density variation. You build depth without using foam.
You achieve embossed results by:
Changing stitch direction around edges.
Increasing density in outer areas.
Keeping center areas lighter.
This technique works well for:
Hoodie designs..
Jacket backs.
Premium brand logos.
Careful stitch planning keeps the raised effect visible even after washing and regular use.
Advanced techniques in embroidery digitizing improve design quality & production efficiency. Shading, blending, 3D puff, applique, metallic thread handling & editing techniques help you create professional results. When you understand stitch types, advanced density control, push and pull compensation, and layering, your designs looks outstanding.
Nick William has been immersed in the world of embroidery digitizing for over 20 years, earning 25 industry awards throughout his career. As a 3rd generation embroidery expert, Nick’s journey started in his family’s workshop, where he learned the art of digitizing before the rise of modern software. He has worked with leading commercial embroidery businesses and has shared his expertise with over 75,000 home and professional embroiderers. As an author at True Digitizing, Nick is passionate about teaching others how to create beautiful, precise designs through easy-to-follow tutorials and expert advice.
Categories

Embroidery Trends 2026: What's Hot in Machine & Hand Embroidery | TrueDigitizing
26-06-2026

Top Best Embroidery Digitizing Software in 2026
06-05-2026
")
Best Multi-Needle Embroidery Machines for Startups 2026
28-02-2026

DST File: The Complete Guide (What It Is, How to Create, Convert & Use in 2026)
28-02-2026

Janome 550E vs Baby Lock Flare | Best Mid-Range Embroidery Machine?
26-02-2026

Choose the Right Fabric for Embroidery
20-02-2026

Most Common Types of Threads to Use in Machine Embroidery
12-02-2026

AI in Embroidery | Revolutionizing Art and Efficiency
12-02-2026

Best Thread Tension 101 | A Guide for Embroidery Machines
09-02-2026

Mastering Small Lettering in Machine Embroidery
04-02-2026
Asked Questions


