
At True Digitizing, we transform your creative spark into flawless, high-quality embroidery digitized designs that bring your vision to life.
Our Blogs
We Accept
Copyright 2025 Truedigitizing
At True Digitizing, we transform your creative spark into flawless, high-quality embroidery digitized designs that bring your vision to life.
We Accept
Copyright 2025 Truedigitizing

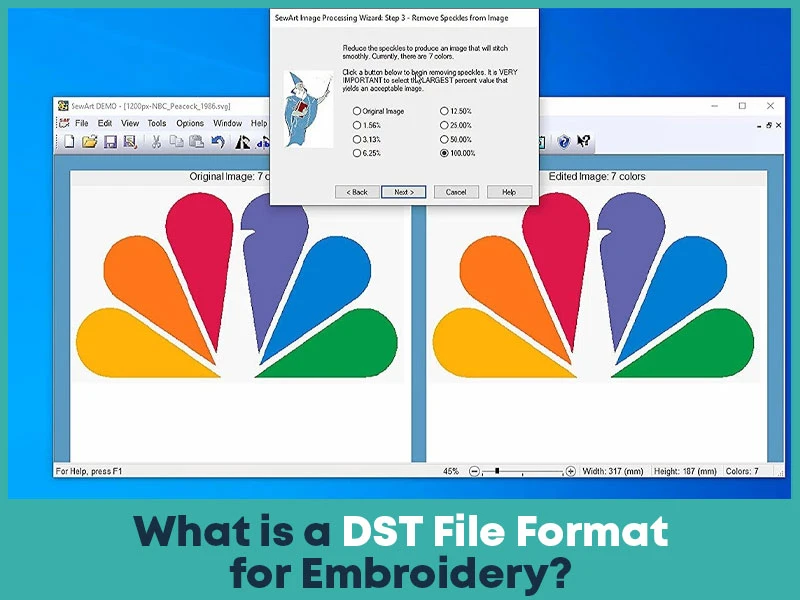
The DST (Data Stitch Tajima) file format is widely used for embroidery patterns, developed by Tajima to encode design information such as stitch types, lengths, and colors. This format is compatible with different embroidery machines, allowing designers to simply share and recreate designs. DST files are preferable because they give accurate stitch path instructions that ensure consistent results across machines.
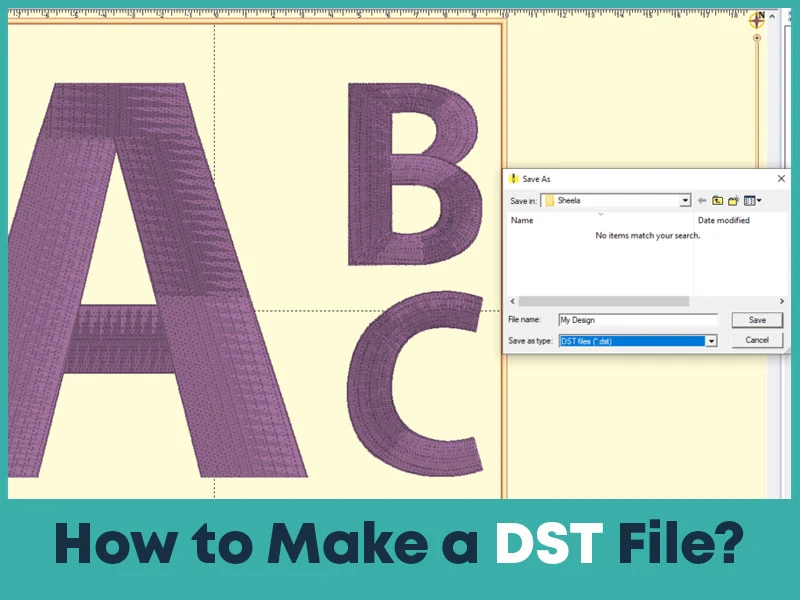
Creating a DST file requires embroidery digitizing software that can convert an image or vector file into an embroidery compatible format. Here is a step-by-step guide:
Choose a Design: Start with a clear image or logo you want to digitize. High-resolution images work best.
Import into Digitizing Software: Use embroidery software like Wilcom or Embird. These tools allow you to set stitch types and directions.
Set Stitch Parameters: Select stitch type, density, and sequence based on the design complexity.
Convert to DST Format: Once the design is completed, save or export the file as a DST. This file can now be uploaded to an embroidery machine for stitching.
True Digitizingoffers professional embroidery digitizing services that ensure accurate and efficient DST file creation for all design types.
Understanding the DST file structure is beneficial for troubleshooting and making edits. DST files are binary files with encoded information about each stitch, including:
This structure allows embroidery machines to interpret and reproduce designs accurately. Every element ensures that the design’s details are stitched correctly.
Once your DST file is ready, the next step is transferring it to your embroidery machine correctly. A properly downloaded file helps prevent design errors, machine reading issues, and unexpected stitching problems. While the process is generally straightforward, it is important to follow the correct steps to ensure smooth production.
Connect to Your Machine: Use a USB drive, memory card, network connection, or direct computer connection depending on your machine model. Most advanced embroidery machines support USB file transfers for quick access.
Export the DST File: Open your embroidery digitizing software and export the completed design in DST format. Before saving, verify the design size, hoop dimensions, and stitch count to ensure compatibility with your machine.
Transfer the File: Save the DST file to a compatible storage device. Make sure the file name follows your machine's naming requirements, as some embroidery machines have character limitations.
Upload to the Machine: Insert the USB drive or connect the device to your embroidery machine. Browse the machine menu and locate the transferred DST file.
Preview the Design: Before stitching, use the machine's preview function to review the design placement, dimensions, and stitch sequence. This helps identify any issues before production begins.
Select and Start Stitching: Once everything looks correct, load the design, select thread colors if needed, and begin the embroidery process.
For best results, always run a sample stitch-out on scrap fabric before starting large production runs. This allows you to verify thread coverage, stitch density, and overall design quality.
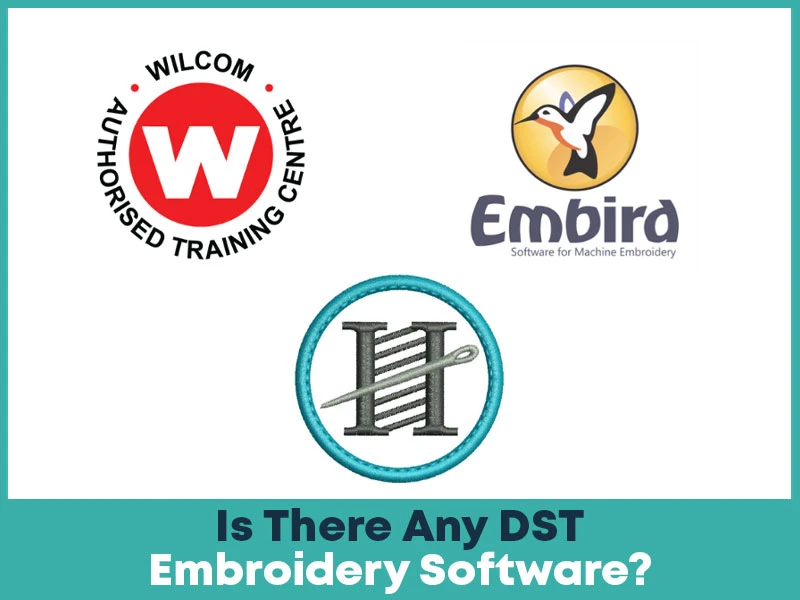
Yes, there are many embroidery software programs available that support DST files for creating, editing, converting, and managing embroidery designs. These programs allow users to digitize artwork, adjust stitch settings, edit existing files, and prepare designs for embroidery machines.
The right software depends on your skill level, budget, and project requirements. Beginners often prefer user friendly software with automatic digitizing features, while professional digitizers typically use advanced software that offers complete control over stitch placement and design optimization.
Embroidery software focuses primarily on digitizing, while others specialize in file conversion, lettering creation, design editing, and machine compatibility. Many programs also include stitch simulation tools that help users preview designs before production, reducing errors and improving embroidery quality.
Whether you are creating custom logos, embroidery patches, hat embroidery designs, or commercial embroidery files, using reliable DST software can significantly improve workflow efficiency and final stitch quality.
Wilcom is considered one of the most powerful embroidery digitizing software solutions available today. It is widely used by professional digitizers, embroidery businesses, and commercial production shops around the world.
Key Features:
• Advanced manual digitizing tools for complete stitch control.
• Professional lettering and monogram creation.
• High-quality stitch simulation and previews.
• Extensive embroidery file format support.
• Advanced editing and production management tools.
Wilcom is ideal for businesses that regularly handle complex logos, commercial embroidery projects, and high-volume production work.
Hatch is developed by Wilcom and is designed for hobbyists, small businesses, and embroidery enthusiasts who want professional-quality results with a simpler interface.
Key Features:
• Easy-to-use workspace.
• Auto-digitizing tools for faster design creation.
• Built-in embroidery fonts and monograms.
• Lettering customization options.
• Helpful tutorials for beginners.
Hatch offers many professional features while remaining easier to learn than full Wilcom software.
Embird is a flexible and affordable embroidery software package known for its modular design. Users can purchase only the features they need, making it a popular choice for small embroidery businesses.
Key Features:
• Embroidery editing and resizing tools.
• File conversion between multiple embroidery formats.
• Stitch management functions.
• Lettering and monogram creation.
• Additional plug-ins for advanced digitizing.
Many embroiderers appreciate Embird because it provides professional functionality at a lower cost compared to premium software.
Ink/Stitch is a free, open-source embroidery extension for Inkscape. It allows users to create embroidery designs without purchasing expensive software.
Key Features:
• Completely free to use.
• Works directly inside Inkscape.
• Supports embroidery file exports including DST.
• Basic digitizing and editing tools.
• Active community support.
Ink/Stitch is an excellent starting point for beginners who want to learn embroidery digitizing before investing in commercial software.
The DST format has remained the industry standard for decades because of its reliability, compatibility, and simplicity. Originally developed for Tajima embroidery machines, it quickly became one of the most accepted embroidery file formats worldwide.
One of the biggest reasons for its popularity is universal machine compatibility. Most commercial embroidery machines can read DST files directly, making file sharing easier between digitizers, embroidery shops, and production facilities.
DST files also contain essential stitch information without unnecessary design data. This lightweight structure allows embroidery machines to process files quickly while maintaining stitching accuracy. Because of its proven performance and broad machine support, professional digitizers often deliver final embroidery files in DST format even when designs are created using other software.
Although DST is one of the most widely used embroidery formats, several other file types serve different purposes depending on the embroidery machine and software being used.
The biggest advantage of DST files is their broad compatibility across commercial embroidery machines. While formats like PES, JEF, and VP3 can store additional design information, DST remains the preferred choice for production environments where machine compatibility and consistent stitch output are priorities.
Converting a design into a DST file can be done through embroidery digitizing software, online converters, or professional digitizing services. The method you choose depends on the complexity of the design and the quality level you need.
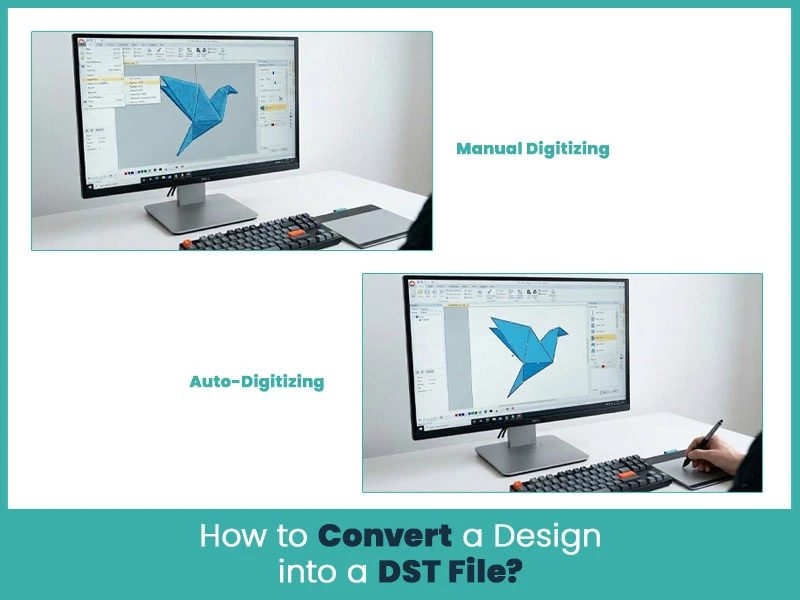
Manual digitizing is considered the highest-quality approach because every stitch is intentionally placed by the digitizer.
• Import your artwork into embroidery software such as Wilcom, Hatch, or Ink/Stitch.
• Carefully trace logos, text, and design elements using manual digitizing tools.
• Assign appropriate stitch types, including satin, fill, and running stitches.
• Adjust stitch density according to the fabric type and design size.
• Preview the embroidery simulation and check for unnecessary trims or jump stitches.
• Export the completed design as a DST file.
Manual digitizing provides superior detail, cleaner lettering, smoother stitch flow, and better production results.
Auto-digitizing offers a faster solution for simple artwork.
• Upload the image into software with auto-digitizing capabilities.
• Allow the software to generate stitch paths automatically.
• Review the generated embroidery design carefully.
• Edit any areas that appear overly dense, uneven, or inaccurate.
• Export the corrected design as a DST file.
While auto-digitizing saves time, manual adjustments are usually required for professional-quality embroidery.
Online converters can quickly transform images into embroidery files.
• Choose a reliable embroidery conversion platform.
• Upload a clean, high-resolution image.
• Adjust available settings if the platform allows customization.
• Generate and download the DST file.
• Test stitch the design before production.
Online tools work best for simple designs but may struggle with detailed logos and small text.
For business logos, commercial embroidery, and detailed artwork, professional digitizing services often deliver the best results.
• Submit your artwork to an experienced digitizing company.
• Discuss fabric type, embroidery size, and project requirements.
• Review the provided design preview or sample stitch-out.
• Receive an optimized DST file ready for production.
Professional digitizers understand stitch behavior, fabric interaction, underlay settings, and density management, resulting in cleaner embroidery outcomes.
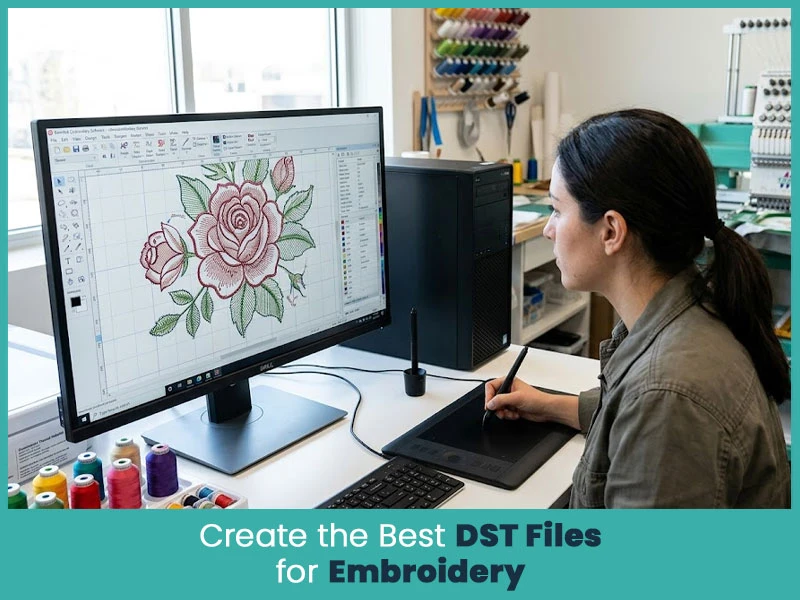
To achieve optimal results with DST files, follow these best practices:
Use High-Quality Images: Start with a clean, sharp image that clearly shows all design details.
Select Appropriate Stitch Types: Choose stitch styles that match the design elements and fabric characteristics.
Adjust Stitch Density Carefully: Balance thread coverage without creating excessive density that may cause puckering.
Optimize Underlay Settings: Proper underlay improves design stability and stitch appearance.
Minimize Jump Stitches: Reducing unnecessary jumps creates cleaner embroidery and reduces production time.
Preview Before Saving: Always use stitch simulation tools to inspect the final design before exporting.
Test Stitch Every Design: A sample stitch-out helps identify problems before full production.
Export as DST Format: Save the final design in DST format to ensure broad machine compatibility and reliable embroidery results.
Many embroidery issues that appear during production actually begin during the digitizing stage. Learning how to properly convert and optimize DST files can significantly improve embroidery quality, efficiency, and consistency.
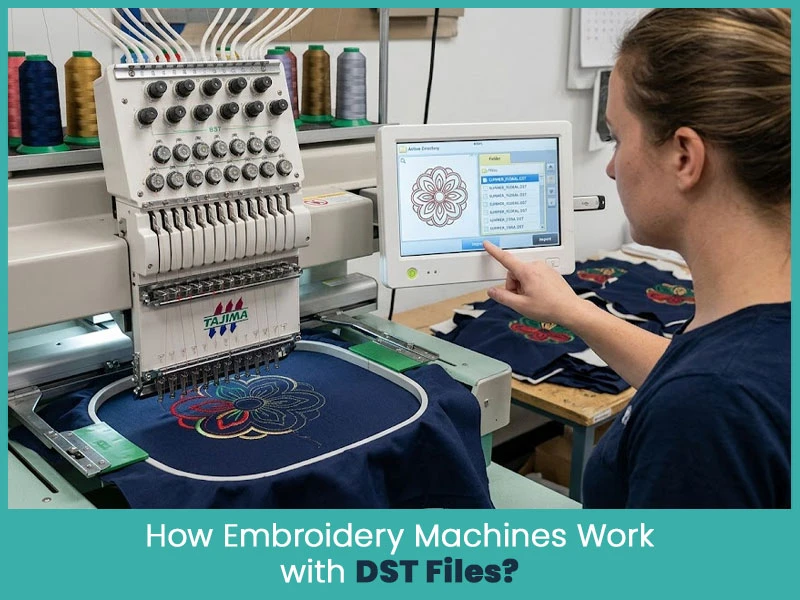
Embroidery machines rely heavily on DST files to produce accurate stitching patterns. Here's how they interact:
File Compatibility: Embroidery machines read the encoded data in DST files, interpreting stitch positions, types, and sequences to replicate designs.
Seamless Integration: Modern machines, like Tajima and Brother models, are equipped to handle DST files directly, ensuring efficient file transfer via USB or direct connection.
Real-Time Adjustments: Some advanced machines allow for on-the-go stitch density and thread color adjustments, using the DST file as a reference.
Precision Execution: By adhering to the detailed instructions in DST files, embroidery machines deliver consistent, high-quality results every time.
Stitch density plays an important role in embroidery quality and durability. Stitch density is encoded in the DST file format to ensure proper design execution across different fabrics. It refers to the number of stitches in a given design area. Higher density is used for thicker fabrics, while lower density suits lightweight materials.
Adjustments in stitch density ensure optimal thread coverage without puckering.
Different stitch types, like satin and fill stitches are configured with specific densities for the best visual outcome.
Always preview density settings before exporting the DST file.
Balance density to avoid thread breaks or excessive fabric tension.
Proper density settings reduce strain on the embroidery machine and ensure smooth operation.
By leveraging these tools and techniques, you can maximize the efficiency of your embroidery digitizing process and achieve impeccable results.
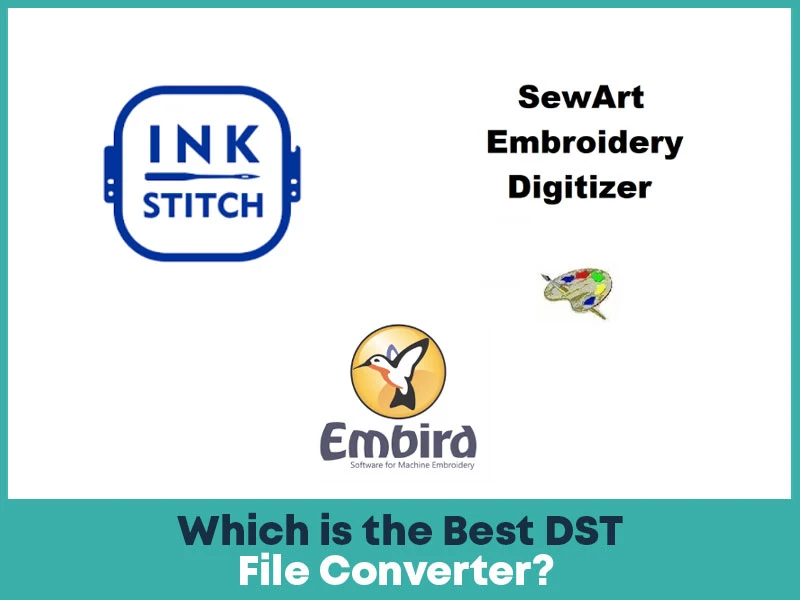
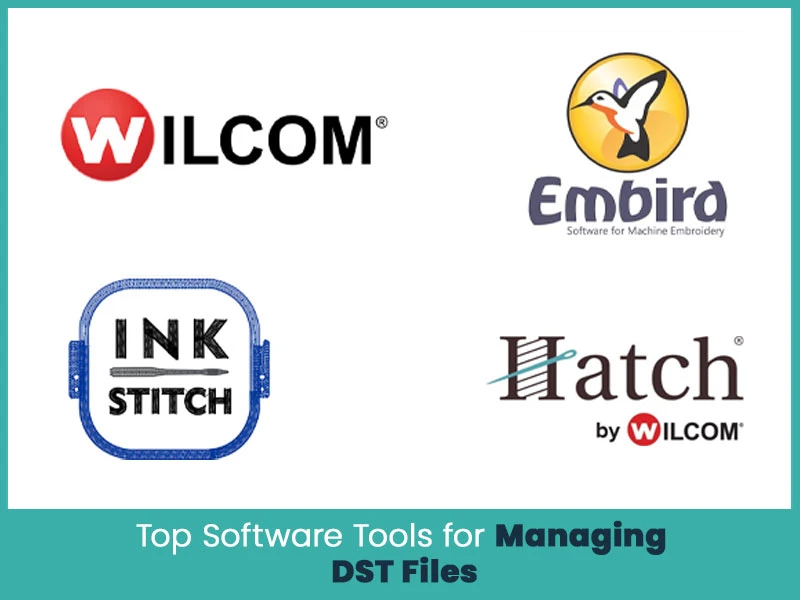
When it comes to converting files to DST, the choice of software matters. Below are popular options with high conversion accuracy:
Ink/Stitch: Free, open-source extension for Inkscape, good for basic conversions.
SewArt: A versatile converter that supports different file formats.
Embird: Not only for digitizing but also for precise file conversions.
Every software has unique features, so choose one based on your project’s complexity and budget.
Understanding DST files is important for anyone involved in embroidery digitizing, custom embroidery production, or machine embroidery. Since DST remains one of the most widely accepted embroidery file formats, learning how it works can help you achieve better stitch quality, smoother production, and improved machine compatibility.
Whether you are converting artwork into embroidery files, editing existing designs, or creating embroidery ready logos from scratch, having a solid understanding of DST files can save time and reduce production errors. If you need professionally digitized DST files, contact True Digitizing. We simplify the process by delivering accurate, machine-ready embroidery files optimized for different fabrics and embroidery applications. With expert digitizing and attention to detail, you can confidently transform your designs into high-quality embroidered products.
Nick William has been immersed in the world of embroidery digitizing for over 20 years, earning 25 industry awards throughout his career. As a 3rd generation embroidery expert, Nick’s journey started in his family’s workshop, where he learned the art of digitizing before the rise of modern software. He has worked with leading commercial embroidery businesses and has shared his expertise with over 75,000 home and professional embroiderers. As an author at True Digitizing, Nick is passionate about teaching others how to create beautiful, precise designs through easy-to-follow tutorials and expert advice.
Categories

Is SVG a Vector File? Yes — SVG vs EPS, PNG, PDF Vector Formats you need to know
08-07-2026

How to Remove Embroidery From Any Fabric — Step-by-Step Guide 2026
28-06-2026

Embroidery Trends 2026: What's Hot in Machine & Hand Embroidery | TrueDigitizing
26-06-2026

Top Best Embroidery Digitizing Software in 2026
06-05-2026
")
Best Multi-Needle Embroidery Machines for Startups 2026
28-02-2026

DST File: The Complete Guide (What It Is, How to Create, Convert & Use in 2026)
28-02-2026

Janome 550E vs Baby Lock Flare | Best Mid-Range Embroidery Machine?
26-02-2026

Choose the Right Fabric for Embroidery
20-02-2026

Advanced Techniques in Embroidery Digitizing
19-02-2026

Most Common Types of Threads to Use in Machine Embroidery
12-02-2026
Asked Questions


