
At True Digitizing, we transform your creative spark into flawless, high-quality embroidery digitized designs that bring your vision to life.
Our Blogs
We Accept
Copyright 2025 Truedigitizing
At True Digitizing, we transform your creative spark into flawless, high-quality embroidery digitized designs that bring your vision to life.
We Accept
Copyright 2025 Truedigitizing

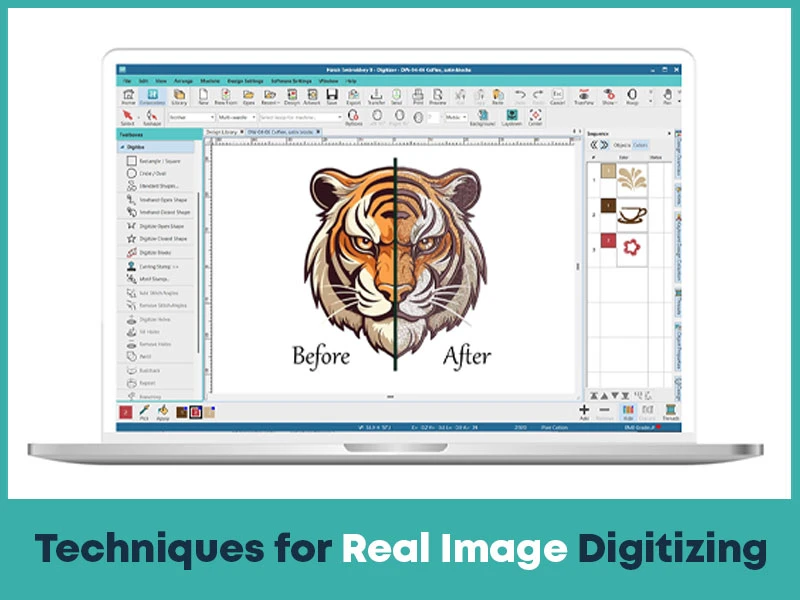
Image digitizing is the process of converting an ordinary image or artwork into a digital format that embroidery machines can understand and recreate onto fabric. This process is important in the art of embroidery as it allows for complex and detailed designs to be accurately converted onto fabric.
Real Image digitizing involves using specialized software to convert the image into a series of stitches and commands that the embroidery machine can follow. This ensures that the stitches on the fabric are perfect and the outcome of the artwork is stunning.
It plays an important role in the embroidery process because it helps to maintain the quality and accuracy of the embroidered pattern. True Digitizing specializes in delivering high-quality real image digitizing, ensuring your designs are accurately converted into digital formats for perfect embroidery results.
When it comes to real image digital transformation, there are many ways to gather and convert real images or documents to digital formats. These methods employ scanners, cameras, or specialized software to collect and transform the original image's details precisely.
People and groups can use these strategies to maintain and spread valuable visual information in a more accessible and easy digital format.
In this blog post, we will explore some of the most common techniques for real image digitizing. Such as scanning, photography, and software-based methods. We will discuss the advantages and limitations of each technique, as well as provide tips for achieving high-quality results.
Choosing the right equipment for a project involves considering the specific needs of the project, the technical requirements, and budget constraints. It is essential to prioritize long-lasting and performance to ensure the selected equipment can handle the demands of the task at hand.
Durability is important to ensure the equipment can withstand the rigors of the project. Performance is necessary to achieve the desired outcomes efficiently. Versatility allows the equipment to adapt to different project requirements, maximizing its utility.
To set up the scanning process for the highest quality scan of artwork, ensure that the scanner is set to a resolution of 1200 dpi. Use the right scanner, such as the Epson Scanner, and carefully scan the image to capture all the details.
Once the image is scanned, open the file in Photoshop and use the Marquee Tool to remove any excess white parts and paper edges, allowing for a clean digitization of the image. This process will result in a high-quality digital version of the artwork, suitable for printing or online use.
Several primary factors affect digital picture quality, including bit depth, resolution, and the technology used to digitize genuine images. Bit depth defines the number of colors that a digital image may display, whereas resolution affects the amount of detail and sharpness. The real image digitizing method, such as scanning or digital photography, also impacts the overall quality of the image.
To make adjustments to digital images based on the resolution, bit depth, and sampling of the original analog material. First, you need to understand these terms.
Resolution refers to the number of pixels per inch. Bit depth refers to the range of color values, whereas sampling refers to the number of measurements performed per unit of time. When changing photographs, it is essential to consider how an image differs from its real-world size. This can be handled by setting the physical print size and resolution.
When working with paper backgrounds and color palettes, it is important to separate the artwork from its background. This can be done by using the White Point Eyedropper Tool under adjustments levels to adjust the white point of the image and then deleting the background. Additionally, adding a new white-fill background layer is important for better visualization of the artwork and color palettes.
Do you want to convert your simple artwork into embroidery-ready digitizing or looking for reliable digitizing servicesin the USA at very affordable prices? True Digitizing is here for you. We specialize in all kinds of custom embroidery digitizing services, from custom embroidery digitizing to hat embroidery digitizing in the USA. Our expert team ensures your artwork is digitized with precision, delivering high-quality stitch files ready for production.
So don’t wait, place your order today with True Digitizing and experience professional results at the lowest prices in the USA.
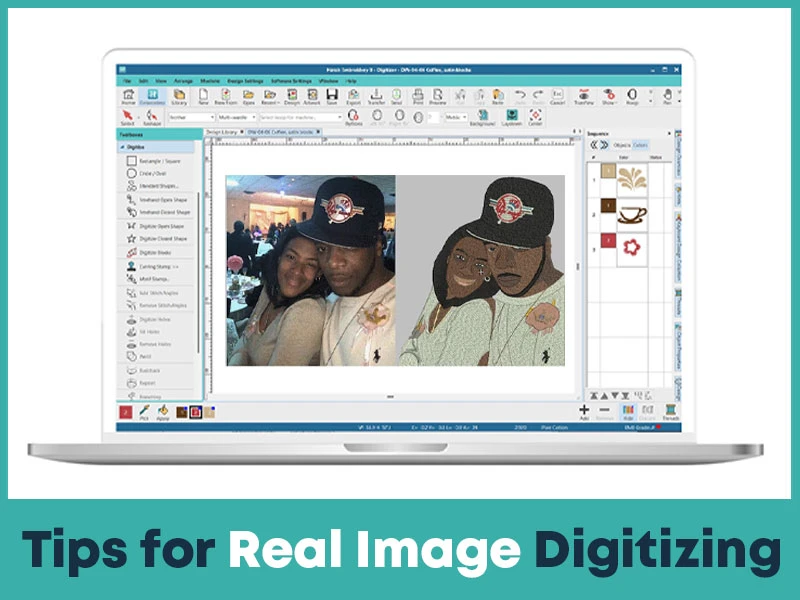
The process of real image digitizing has become increasingly important. Whether it's for professional use or personal archiving, converting physical photographs or documents into digital format gives numerous benefits. However, it's important to approach this process with care and attention to detail to ensure that the digital copies are of high quality and accurately represent the original images.
These tips will guide anyone looking to successfully transition from physical to digital images, whether you're a professional, a family archivist, or someone looking to digitize important documents.
Use a high-resolution scanner for photos or documents. Always adjust settings like DPI (at least 300 for prints, higher for archiving), color mode, and file format (TIFF for archiving, JPEG/PNG for sharing).
Adjust brightness, contrast, and sharpness using photo-editing tools to enhance details. Avoid over-editing, which can distort the real look of the image.
Higher DPI means better quality but larger file size. For long-term storage, choose lossless formats like TIFF or PNG; for casual sharing, JPEG is fine.
When digitizing old photos, artworks, or documents, make sure fine textures and colors are captured. If needed, scan at multiple resolutions or use restoration tools for damaged originals.
Handle photos carefully, avoid fingerprints, and clean the scanner glass before use. Always keep the physical copy safe and untouched while digitizing.
Create folders by year, event, or category. Always back up your digitized images to cloud storage or an external hard drive to avoid data loss.
Understanding the skill of real-image digitization is important for creating perfect embroidered designs. From choosing the appropriate equipment to using scanning processes and optimizing digital files, every step plays an important role in maintaining the intent of the original image. Whether you're a professional embroiderer or a person digitizing significant memories, the guidance provided ensures a smooth transition from physical to digital media.
Transform your custom embroidery designs with our expert skills and discover all the possibilities of your digital artwork. Explore the world of embroidery services today and convert your vision into a magnificent reality.
Nick William has been immersed in the world of embroidery digitizing for over 20 years, earning 25 industry awards throughout his career. As a 3rd generation embroidery expert, Nick’s journey started in his family’s workshop, where he learned the art of digitizing before the rise of modern software. He has worked with leading commercial embroidery businesses and has shared his expertise with over 75,000 home and professional embroiderers. As an author at True Digitizing, Nick is passionate about teaching others how to create beautiful, precise designs through easy-to-follow tutorials and expert advice.
Categories

Top Best Embroidery Digitizing Software in 2026
06-05-2026
")
Best Multi-Needle Embroidery Machines for Startups 2026
28-02-2026

DST File: The Complete Guide (What It Is, How to Create, Convert & Use in 2026)
28-02-2026

Janome 550E vs Baby Lock Flare | Best Mid-Range Embroidery Machine?
26-02-2026

Choose the Right Fabric for Embroidery
20-02-2026

Advanced Techniques in Embroidery Digitizing
19-02-2026

Most Common Types of Threads to Use in Machine Embroidery
12-02-2026

AI in Embroidery | Revolutionizing Art and Efficiency
12-02-2026

Best Thread Tension 101 | A Guide for Embroidery Machines
09-02-2026

Mastering Small Lettering in Machine Embroidery
04-02-2026
Asked Questions


