
At True Digitizing, we transform your creative spark into flawless, high-quality embroidery digitized designs that bring your vision to life.
Our Blogs
We Accept
Copyright 2025 Truedigitizing
At True Digitizing, we transform your creative spark into flawless, high-quality embroidery digitized designs that bring your vision to life.
We Accept
Copyright 2025 Truedigitizing

As you know, embroidery digitizing needs embroidery software to transform any picture into a piece of art. It's thrilling, but one mistake might result in a design that is more scrap than art. Regardless of your level of experience, everyone makes mistakes when digitizing. The best part? You can avoid most of them with some simple tricks and a bit of planning. Let’s dive into the biggest embroidery digitizing mistakes that can ruin your project. Then we will share some clear and easy digitizing tips to keep your work looking sharp. So we are ready to help you avoid those irritating embroidery troubleshooting issues.
Skipping the fabric prep and stabilizer setup is one of the fastest ways to ruin your embroidery. It is like trying to build a house without checking your base; it simply won't hold. Even while you may be excited to begin stitching, neglecting the small details might result in major issues like digitized thread breakage or poor designs. This is what you need to focus on.
It is like setting off on a road trip without a map, you may get somewhere, but probably not where you intended when you're initially learning how to drive. It won't be good, but you might make it anywhere. You need to know what your design is for, what fabric it’s going on, and how your machine handles it. A logo for a soft scarf needs different settings than one for a tough canvas bag.
How to Avoid It: Make a plan. What’s the design’s size? Where’s it going on the fabric? What colors are you using? Think about whether you want something bold or super detailed, and plan your stitch order to avoid extra steps that can cause thread breaks.
Stating that all fabrics are the same is a serious mistake. Stretchy knits need a different approach from stiff denim. If you don’t think about the fabric’s weight or stretch, your design might end up warped or even tear the material.
How to Avoid It: Check your fabric first. Is it stretchy, thin, or heavy? Use lighter stitches for delicate fabrics and add a stabilizing layer to keep things smooth. This is key for embroidery troubleshooting.
Stitch direction can make or break your design. You can notice puckering or gaps if they differ from the outlines of your artwork.
For instance, a curving letter looks hard and odd when straight stitches are used on it.
How to Avoid It: Make sure your stitches flow with the design, like following the curve of a flower or the edge of a logo. Test it on a scrap piece to catch any issues early.
.webp)
Underlay stitches are like the base of a house. They hold everything together. Without them, your design may look uneven and won’t hold up after multiple washes.
How to Avoid It: Always add underlay, especially for stretchy fabrics or complex designs. A simple zigzag or straight underlay keeps your work sharp and strong.
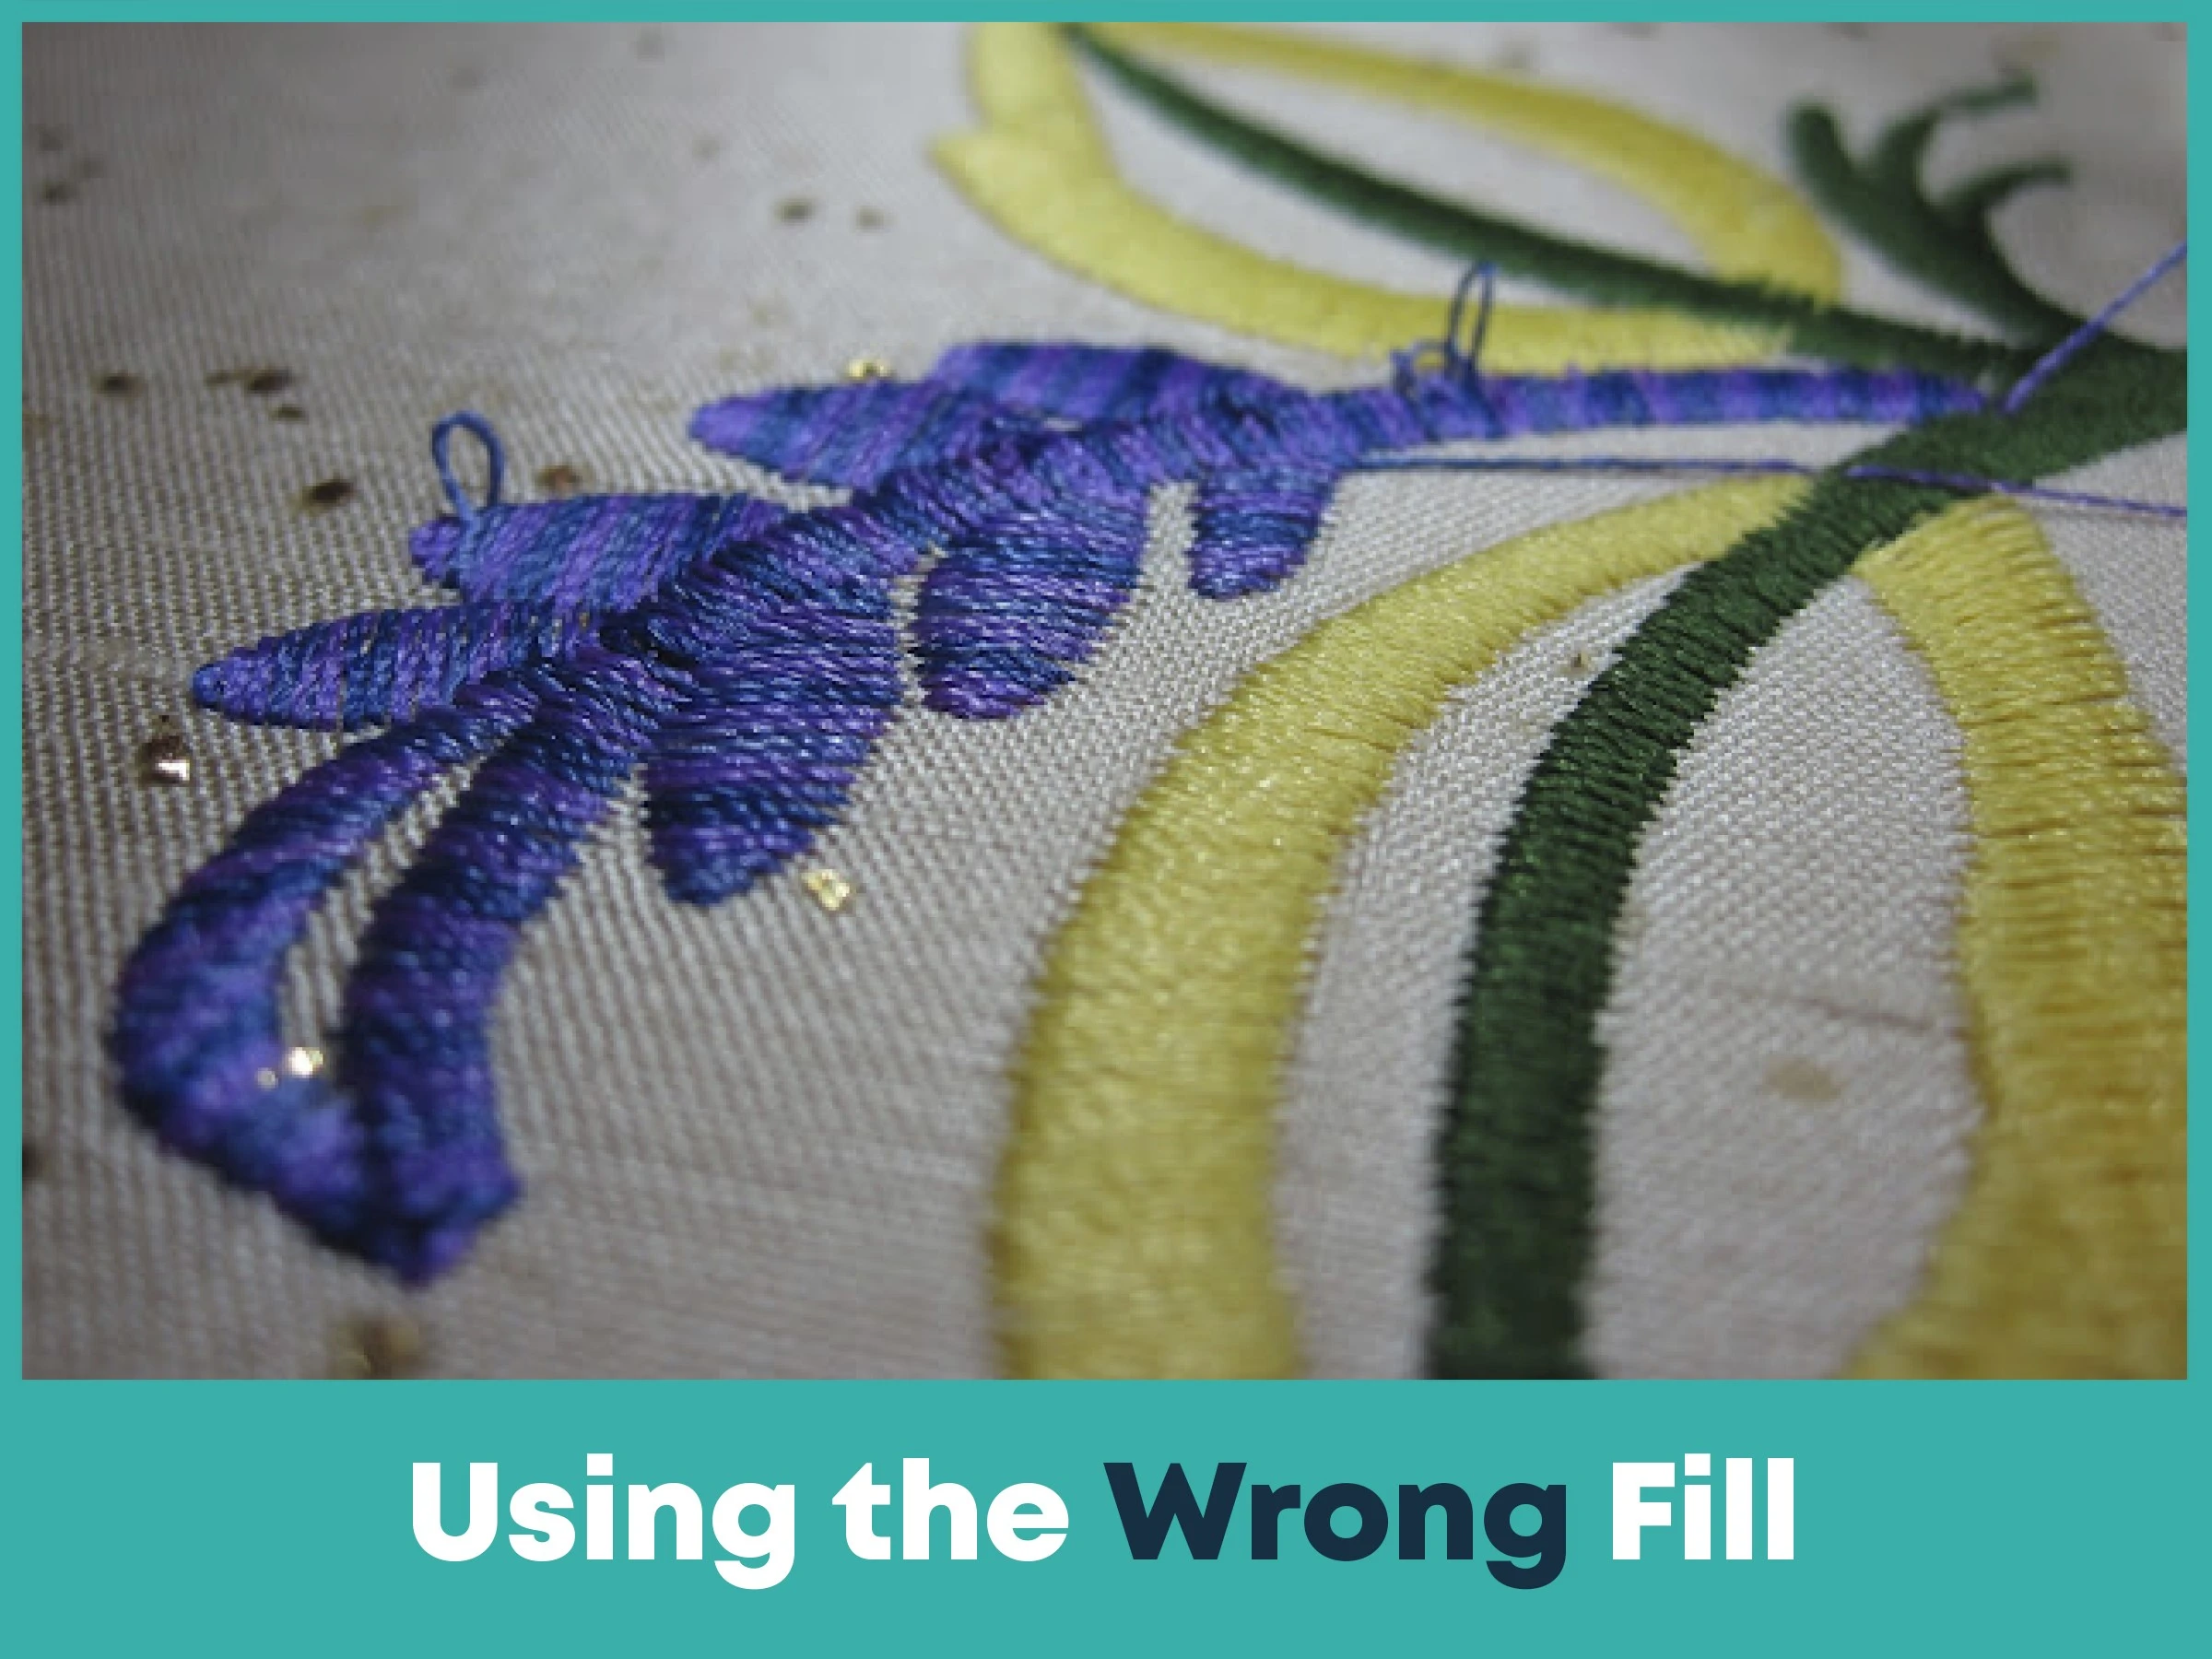
Choosing the wrong stitch type, such as using a satin stitch for large areas, can lead to bulkiness or broken threads. Each stitch has a different purpose, and the wrong one can ruin the look.
How to Avoid It: Use satin stitches for narrow spots and fill stitches for larger areas. Try different options in your software to find what looks best.
Stitch density is like the perfect amount of sugar in your coffee. Too much or too little, and it’s off. Too many stitches make your design stiff and more likely to break. Too few, and it looks patchy.
How to Avoid It: Match density to your fabric. Around 0.4 to 0.6 mm is a good starting point. Test on a scrap to make sure it’s just right.
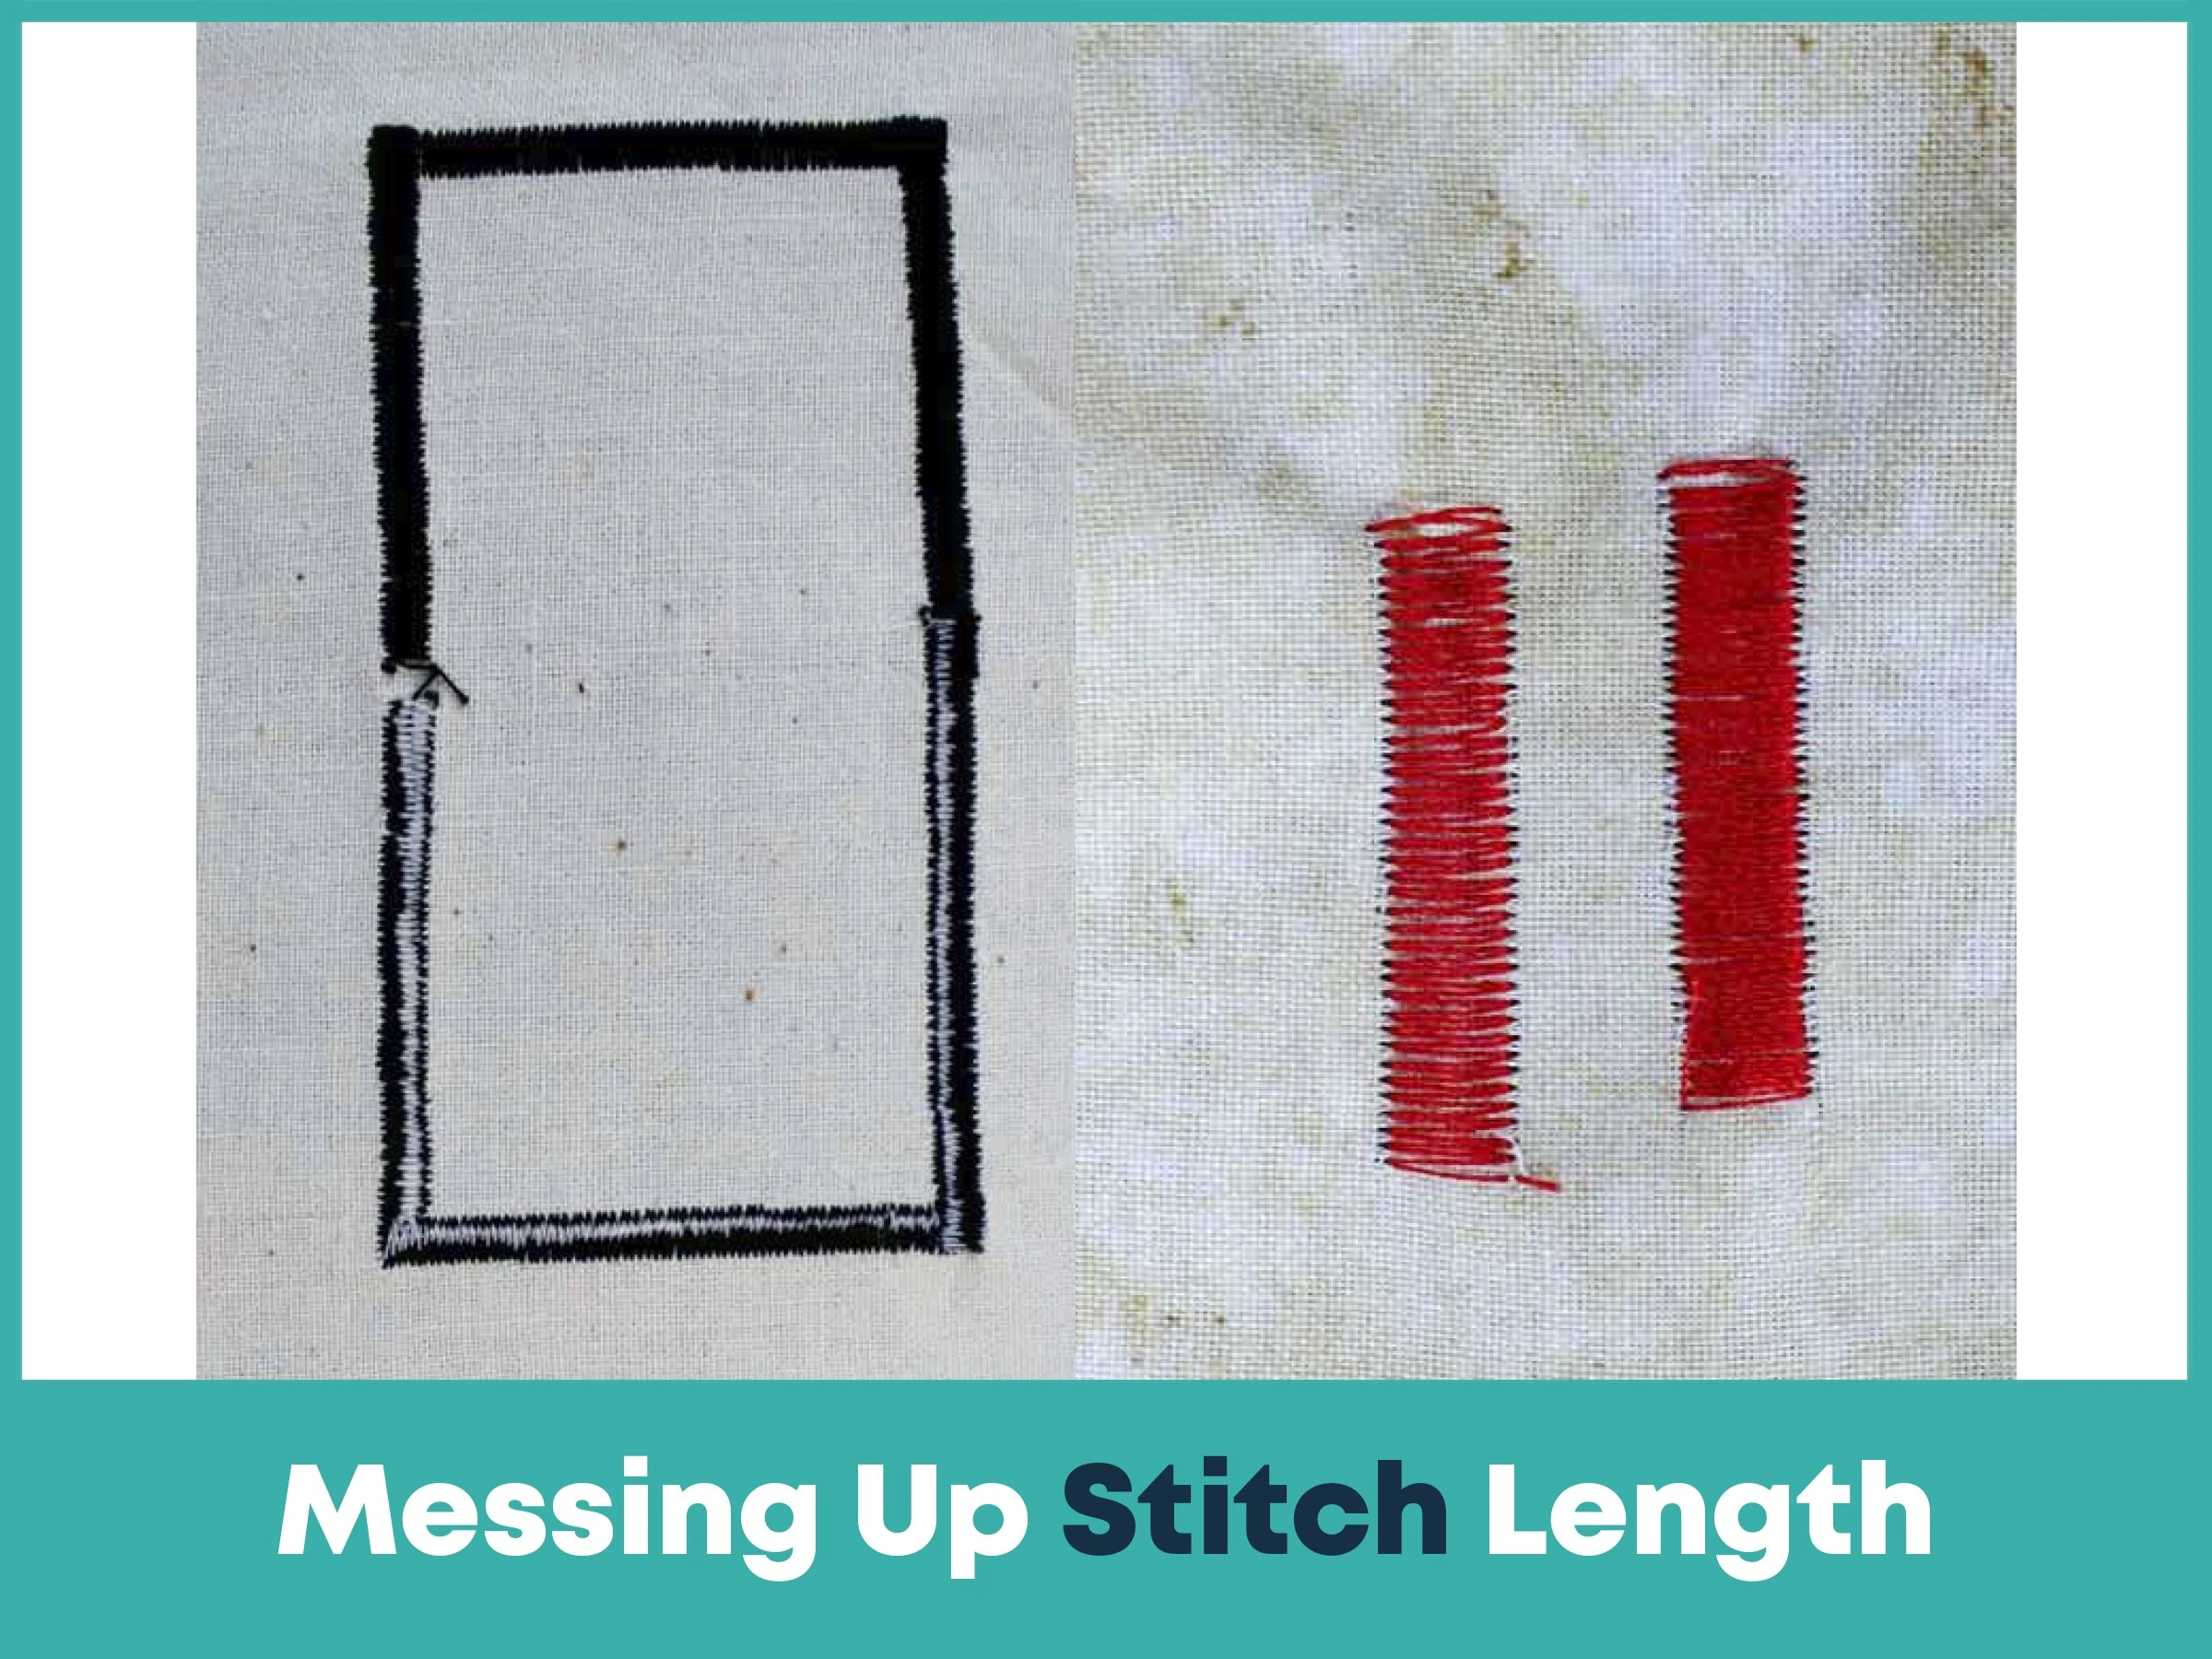
Stitch length affects how your design looks and holds up. Long stitches can snag and look messy, while short ones can make it too heavy and cause thread breaks.
How to Avoid It: Aim for 2–4 mm for satin stitches and a bit shorter for fills. Test and tweak based on how it looks.
Highly detailed design might shine on a flat shirt but flop on fuzzy fleece. Choosing a design that doesn’t fit the fabric can lead to blurry or distorted results.
How to Avoid It: Pick designs that match the fabric’s texture. Keep complex stuff for smooth surfaces and simplify for textured ones.
Digitizing isn’t just about turning a picture into stitches. You need to think about things like fabric stretch or how stitches pull. Ignoring these can lead to designs that don’t line up.
How to Avoid It: Adjust for stretching or pulling in your software. Use the preview to check how the design will stitch out and fix anything that looks off.
Skipping the final check can lead to minor mistakes like wrong thread colors or skipped areas, ruining the entire project.
How to Avoid It: Stitch a test on similar fabric. Look over your design file and check the stitch order before the final run.
Changing a design’s size without tweaking the stitches is a common mistake. If the design is too big, the stitches look too thin. If it's too small, the stitches bunch up and cause the fabric to pucker.
How to Avoid It: Adjust stitch density and length when resizing. Test it to make sure it still looks good.
.webp)
A blurred picture indicates blurry embroidery. Starting with a low-quality file is like starting to sketch with a poor pencil.
How to Avoid It: Use a sharp picture (at least 300 DPI) or a vector format. Clean it up before digitizing to keep things clear.
Here’s a quick cheat sheet to keep your projects on track:
Match the fabric: Set your stitches for the fabric’s weight and stretch.
Plan stitch order: Keep jumps low for a clean, smooth design.
Get stitch angles right: Follow the design’s shape for a natural look.
Use underlay: It’s your trick for stable, long-lasting embroidery.
Don’t skip planning: Know your goal before you start.
Don’t add too many stitches: They cause messy designs and thread breaks.
Don’t mess up density: Wrong density damages the look and durability.
Don’t trust auto-digitizing completely: It’s just a starting point, but you need to fine-tune.
Your digitizing software can be the best but using it wrong can lead to trouble. Here’s what to watch out for:
Wrong tool use: Like using a satin stitch for a big area, it’s too much for the fabric.
Misplaced stitches: Stitches in the wrong spot can ruin detailed designs.
Overusing auto tools: Auto digitizing needs your tweaks to look good.
Bad stitch order: Wrong order means extra jumps and thread breaks.
Ignoring fabric: Every fabric needs its own settings.
Wrong stitch angles: Bad angles make designs look flat or puckered.
How to Avoid It: Get familiar with your software, test settings on a scrap, and keep stitch order clean to avoid embroidery troubleshooting nightmares.
If digitizing feels like a puzzle you can’t solve, True Digitizing is here to help. Struggling with thread breaks, puckered fabric, or designs that don’t look right? Our team takes care of everything, creating designs exactly how you want them and perfectly matched to your fabric. True Digitizing offers high-quality embroidery digitizing services across the USA with prices starting at just $12.
We create dependable and quick outcomes for everything from basic logos to complicated designs. Do you want to simplify your upcoming project? Contact us today and watch your ideas come to life.
Embroidery digitizing is an enjoyable art, but it requires some attention to detail. You can create designs that look amazing and last for years by avoiding blunders like neglecting the fabric, lack of planning, or using the incorrect stitch settings. The trick is to take it slow, test your work and keep the end goal in mind. Whether you’re stitching for a hobby or a business, these digitizing tips will help you avoid blunders and make embroidery you love. If it feels overwhelming, True Digitizing is ready to step in and handle all your projects. So open your embroidery software, plan smart, and start creating something awesome.
Nick William has been immersed in the world of embroidery digitizing for over 20 years, earning 25 industry awards throughout his career. As a 3rd generation embroidery expert, Nick’s journey started in his family’s workshop, where he learned the art of digitizing before the rise of modern software. He has worked with leading commercial embroidery businesses and has shared his expertise with over 75,000 home and professional embroiderers. As an author at True Digitizing, Nick is passionate about teaching others how to create beautiful, precise designs through easy-to-follow tutorials and expert advice.
Categories

How to Remove Embroidery From Any Fabric — Step-by-Step Guide 2026
15-07-2026

Is SVG a Vector File? Yes — SVG vs EPS, PNG, PDF Vector Formats you need to know
08-07-2026

Embroidery Trends 2026: What's Hot in Machine & Hand Embroidery | TrueDigitizing
26-06-2026

Top Best Embroidery Digitizing Software in 2026
06-05-2026
")
Best Multi-Needle Embroidery Machines for Startups 2026
28-02-2026

DST File: The Complete Guide (What It Is, How to Create, Convert & Use in 2026)
28-02-2026

Janome 550E vs Baby Lock Flare | Best Mid-Range Embroidery Machine?
26-02-2026

Choose the Right Fabric for Embroidery
20-02-2026

Advanced Techniques in Embroidery Digitizing
19-02-2026

Most Common Types of Threads to Use in Machine Embroidery
12-02-2026
Asked Questions


