
At True Digitizing, we transform your creative spark into flawless, high-quality embroidery digitized designs that bring your vision to life.
Our Blogs
We Accept
Copyright 2025 Truedigitizing
At True Digitizing, we transform your creative spark into flawless, high-quality embroidery digitized designs that bring your vision to life.
We Accept
Copyright 2025 Truedigitizing

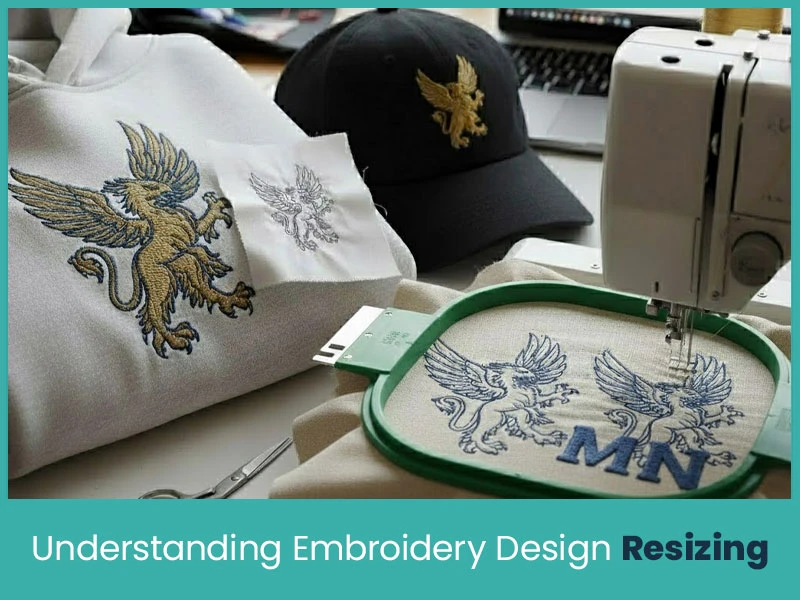
You have a design and you need it to look just as sharp on a cap as it does stretched across the back of a t-shirt, hoodie or jacket. That’s the challenge many embroiderers face. Sometimes designs look sharp at a small size but when you resize them, design gets blurry or stitching gets messy. In other words, when shrinking a design, parts vanish or distort.
In this informative blog post, you’ll get expert tips for resizing embroidery designs properly, either it is for caps or for full-back placements on T-shirts, jackets, hoodies & so on. If you’re just starting or already doing custom apparel, these techniques will help you preserve quality, avoid mistakes and deliver designs that look perfect at any size.
When you resize embroidery designs, you're not just stretching or squashing an image in a graphic program. Embroidery has additional constraints:
- Stitch count and density: If you resize designs too much, density becomes too tight and the fabric will pucker. If you scale down designs too much, there won’t be enough stitches to show details. So balance stitch density if you are resizing designs.
- Line thickness and elements: Fine lines that look good at one size would disappear or look ragged at another.
- Underlay, compensation, and pathing: You often have to rework the underlay (foundation stitching) and adjust how the design fills and edges are done.
- Fabric and tension issues: Different garments behave differently. A hoodie’s fabric is thicker; a cap’s curved surface causes distortion.
- A good rule: You can resize modestly (say ±10–20%) safely without redigitizing but beyond that, you should treat it as a new version. Also always run test samples on scrap fabric or a similar garment to check how the resized version behaves.
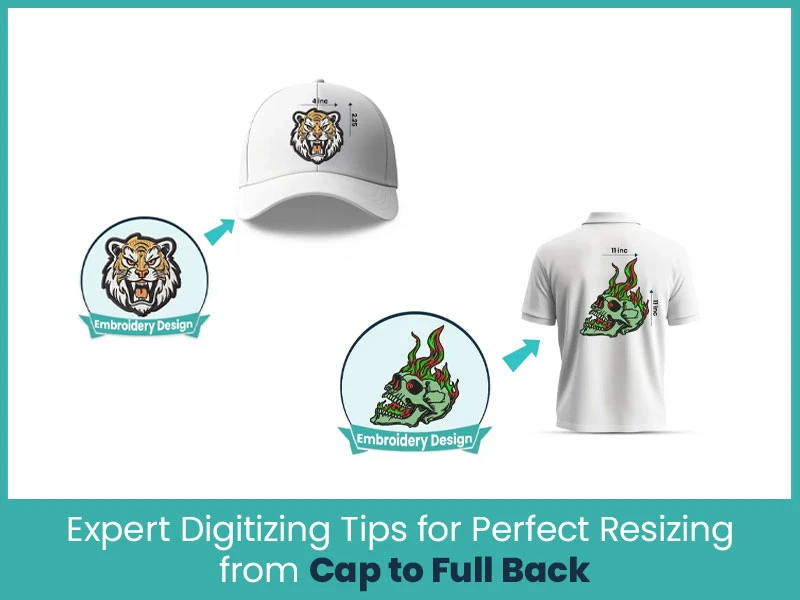
Resizing for caps is among the trickiest tasks because of the small area, curved surface and structural limits. Here are techniques to preserve quality:
Small changes (increase or decrease by 10 to 20%) are enough. Big jumps mostly cause trouble.
When enlarging, reduce density slightly so stitches don't bunch up. When shrinking, increase density a little but not so much that you damage the fabric.
If you have small text or thin lines, consider thickening them or removing complicated parts when resizing. They might not look clear when the design is made smaller.
On a curved cap surface, stitches tend to pull in toward the middle. You can widen satin stitches or add slight compensation so they sit flat.
The underlay that worked at one size might not work when scaled. Recalculate underlay for stability. Also adjust stitching order, sometimes starting from the center and flowing outward improves balance.
Many pros slow their machines when working on caps, especially detailed designs. Slower speed helps reduce misalignment and thread breaks.
Always run the design on a scrap or backup cap before you commit to the final piece. It helps you catch issues early.
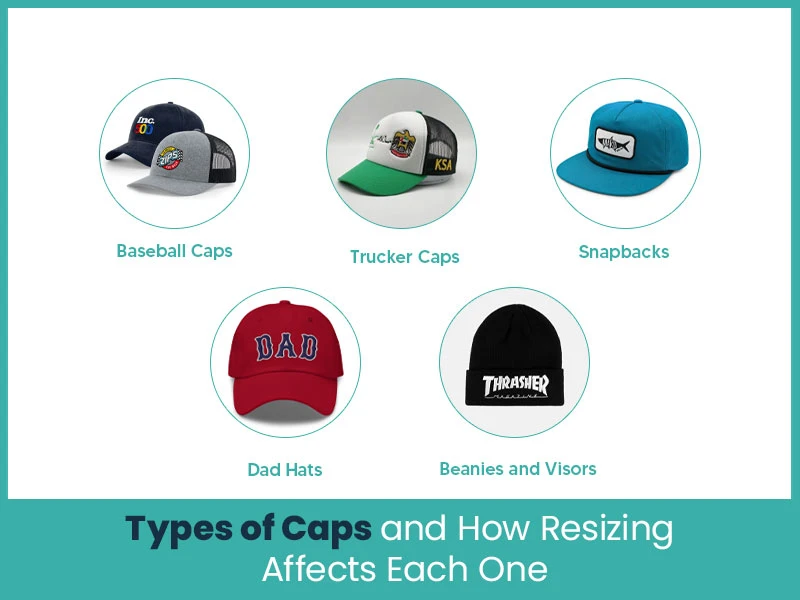
Each style of cap has its own challenges. Below we break them down and note what to watch out for when resizing.
These are the most common.Baseball caps usually have a structured front panel and moderate surface area.
- Designs should stay clear of seams and the crown’s curve.
- Keep bottom of design at least ½ inch above brim seam.
- Use medium density; too tight will pucker the fabric.
-Trucker caps have mesh backs and a structured front.
- Because of mesh, avoid heavy fill stitches that may pull or slip.
- Use water-soluble toppers or lightweight underlays to stabilize.
- Similar to baseball caps but often with more height.
- You may get a little more vertical space for designs.
But keep in mind the curvature is steeper so compensation matters the most.
- These are softer and often unstructured.
- Because they’re not rigid, the fabric moves more.
- You need more stabilizer support (sticky or cut-away) and lower stitch density.
- Beanies are knit; visors are brim-like.
- On beanies: keep designs flatter, avoid heavy fills. Use wash-away stabilizer so stitches don’t sink.
- On visors: designs wrap close to edges, watch the seam and curvature.
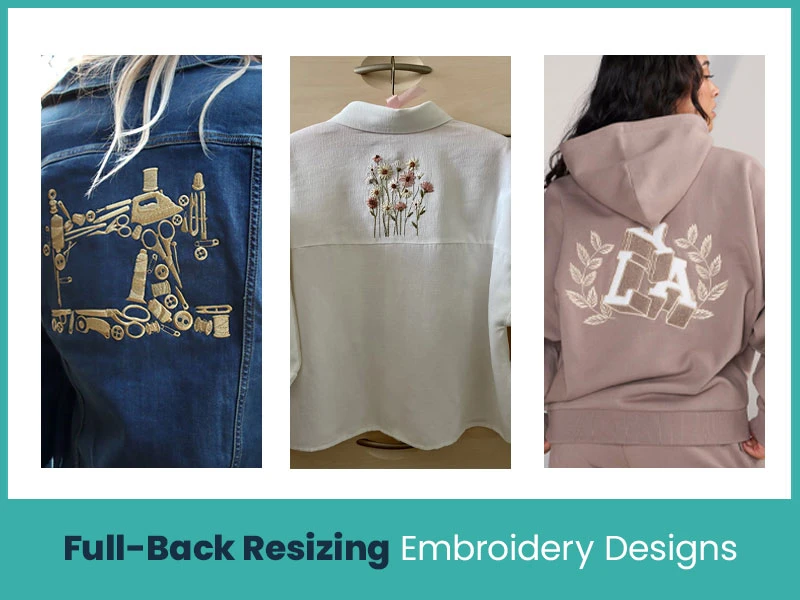
When scaling up for larger areas like the back of a shirt,jacket or hoodie, you get more space then but also face new challenges. Here’s how resizing works in such cases:
- T-shirt fabric is generally flat and soft so resizing is easier.
- But too much density leads to stiffness. Use balanced densities so the design moves naturally with the fabric.
- For large designs that cover much of the back, avoid overly dense fills; mix fills and open areas.
- Heavy fabrics are used for Jackets like denim, leather and corduroy.
- Because the fabric is hard, puckering must be prevented by lowering the density.
- Edges & transitions should be smooth rather than abrupt.
- You may need to soften sharp corners or points when enlarging.
- The sweatshirt fabric is thick and stretchy.
- For hoodie backs, allow a gap from seams and pockets.
- Use underlays that help stabilize but don’t create rigid patches.
- Avoid too much density in areas near stitching seams or folds.
Here are detailed digitizing practices to help you produce sharp results across sizes:
1. Bottom-up, center-out sequencing: Start creating your design from lower parts and sequence stitches outward. This helps reduce distortion.
2. Smart underlay selection: Use double zigzag or edge-walk underlay for large areas and adjust density according to size.
3. Stitch compensation: For satin and border stitches, widen or narrow slightly depending on scaling to keep edges sharp.
4. Overlap elements when scaling up: To avoid gaps in large fills, allow slight overlap in adjacent segments.
5. Break large designs into panels: If a full-back design is huge, splitting it into panels or sections can reduce stress and distortion.
6. Monitor stitch angles: Maintain consistent angle flow across fills and transitions even after scaling.
7. Check thread paths and trimming order: For larger or complex designs, make sure the trimming and thread transitions stay efficient to avoid tangles or misalignment.
At True Digitizing, we always make sure your design will be perfect at any size. We deliver high quality designs to our customers. In case the design is not delivered in high quality and does not fulfill the customer's satisfaction, we offer free revisions until customers are 100% satisfied. Because your satisfaction is our first priority.
If you want designs that work flawlessly across caps, T-shirts, jackets, and hoodies, True Digitizing ensures your brand looks consistent and clean then no matter the size is.
Resizing embroidery designs is a careful balance between art and technique. Going from caps to full-backs demands respect for fabric behavior, stitch dynamics, and digitizing strategy. If you're cautious with density, compensation and test runs, you can preserve quality across sizes.
If you need help resizing complex logos or want a professional set of files ready to use, reach out to True Digitizing. Let us take the guesswork out so your designs look perfect on different caps, hoodies, jackets and more.
Nick William has been immersed in the world of embroidery digitizing for over 20 years, earning 25 industry awards throughout his career. As a 3rd generation embroidery expert, Nick’s journey started in his family’s workshop, where he learned the art of digitizing before the rise of modern software. He has worked with leading commercial embroidery businesses and has shared his expertise with over 75,000 home and professional embroiderers. As an author at True Digitizing, Nick is passionate about teaching others how to create beautiful, precise designs through easy-to-follow tutorials and expert advice.
Categories

How to Remove Embroidery From Any Fabric — Step-by-Step Guide 2026
15-07-2026

Is SVG a Vector File? Yes — SVG vs EPS, PNG, PDF Vector Formats you need to know
08-07-2026

Embroidery Trends 2026: What's Hot in Machine & Hand Embroidery | TrueDigitizing
26-06-2026

Top Best Embroidery Digitizing Software in 2026
06-05-2026
")
Best Multi-Needle Embroidery Machines for Startups 2026
28-02-2026

DST File: The Complete Guide (What It Is, How to Create, Convert & Use in 2026)
28-02-2026

Janome 550E vs Baby Lock Flare | Best Mid-Range Embroidery Machine?
26-02-2026

Choose the Right Fabric for Embroidery
20-02-2026

Advanced Techniques in Embroidery Digitizing
19-02-2026

Most Common Types of Threads to Use in Machine Embroidery
12-02-2026
Asked Questions


