




At True Digitizing, we transform your creative spark into flawless, high-quality embroidery digitized designs that bring your vision to life.
Our Blogs
We Accept

Copyright 2025 Truedigitizing






At True Digitizing, we transform your creative spark into flawless, high-quality embroidery digitized designs that bring your vision to life.
We Accept
Copyright 2025 Truedigitizing
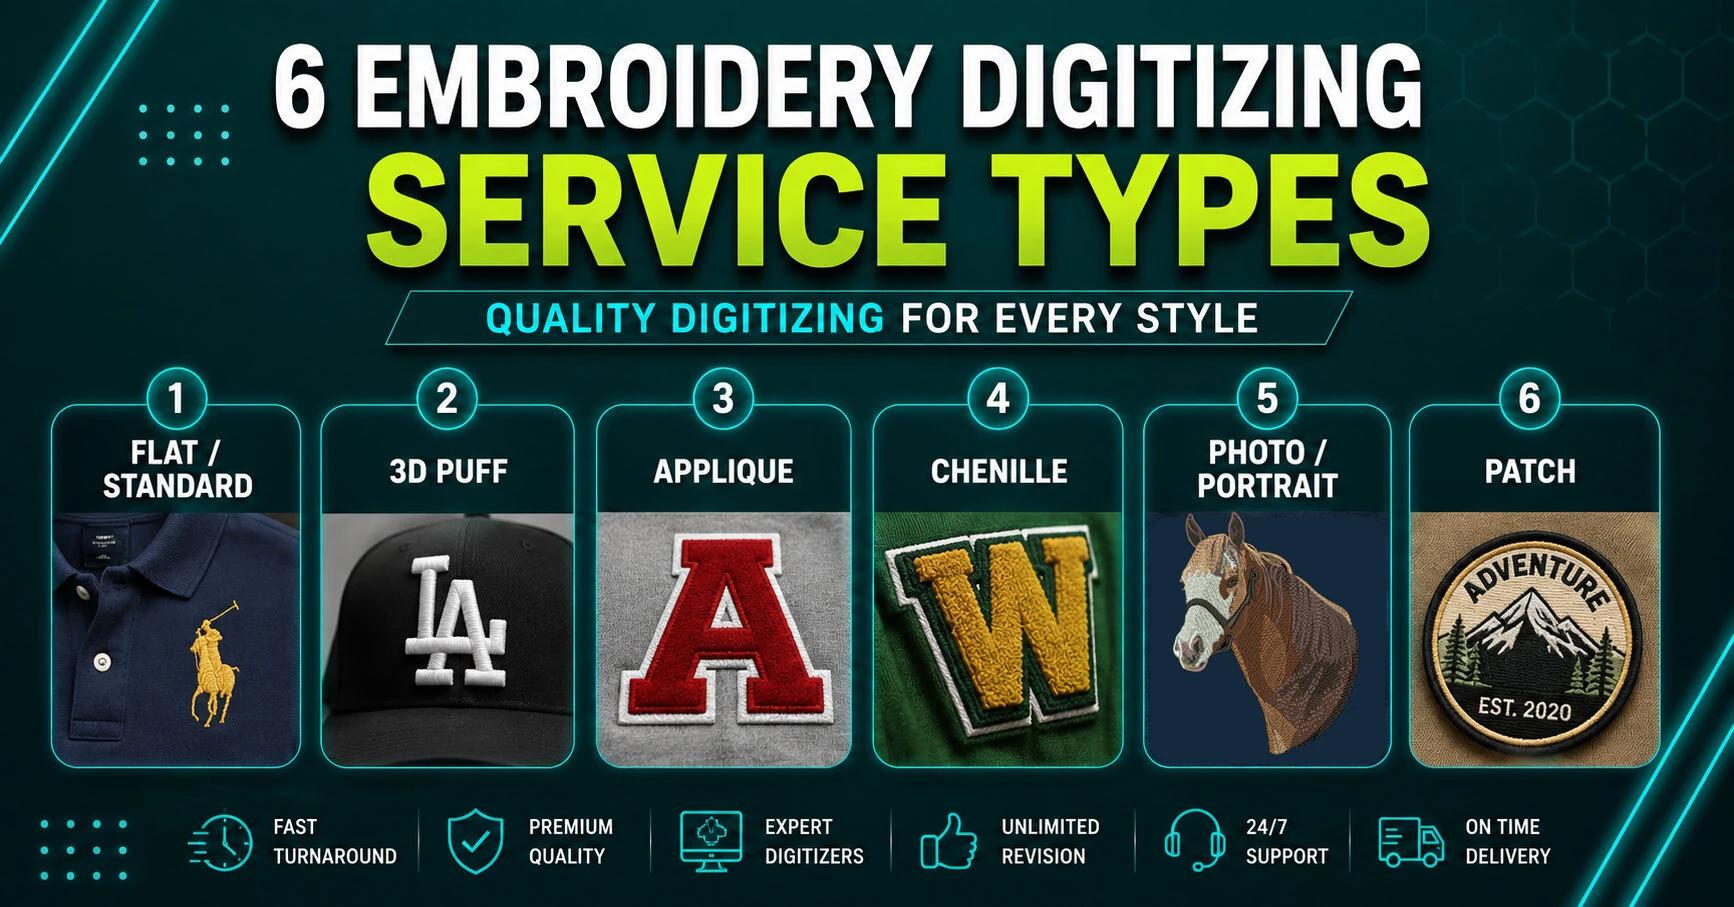


Embroidery digitizing services are not one product. There are six distinct types — flat, 3D puff, applique, chenille, photo and patch digitizing — and each one uses a different stitch strategy, a different underlay and a different price structure. The right choice depends on three things: what your artwork looks like, what garment it is going on, and how many pieces you are running. Match those three first, and the file you get back will stitch clean on the first sew-out.
Most people searching for embroidery digitizing services assume they are buying one thing. They send a logo, they get a stitch file back, done. That assumption is exactly why so many first sew-outs come off the machine looking wrong — puckered caps, applique edges that lift, lettering that fills in solid. The file was probably fine. It was just the wrong type of digitizing for the job.
There are six distinct embroidery digitizing services in commercial use, and they are not interchangeable. Each one uses a different stitch strategy, a different underlay structure, and a different pricing model. This guide walks through all six, shows you which one your artwork actually needs, explains what really drives the price of each, and gives you a checklist for judging the file before you approve it. True Digitizing has produced more than 20,000 designs across all six categories over 13+ years, and the patterns below come straight from that production floor.
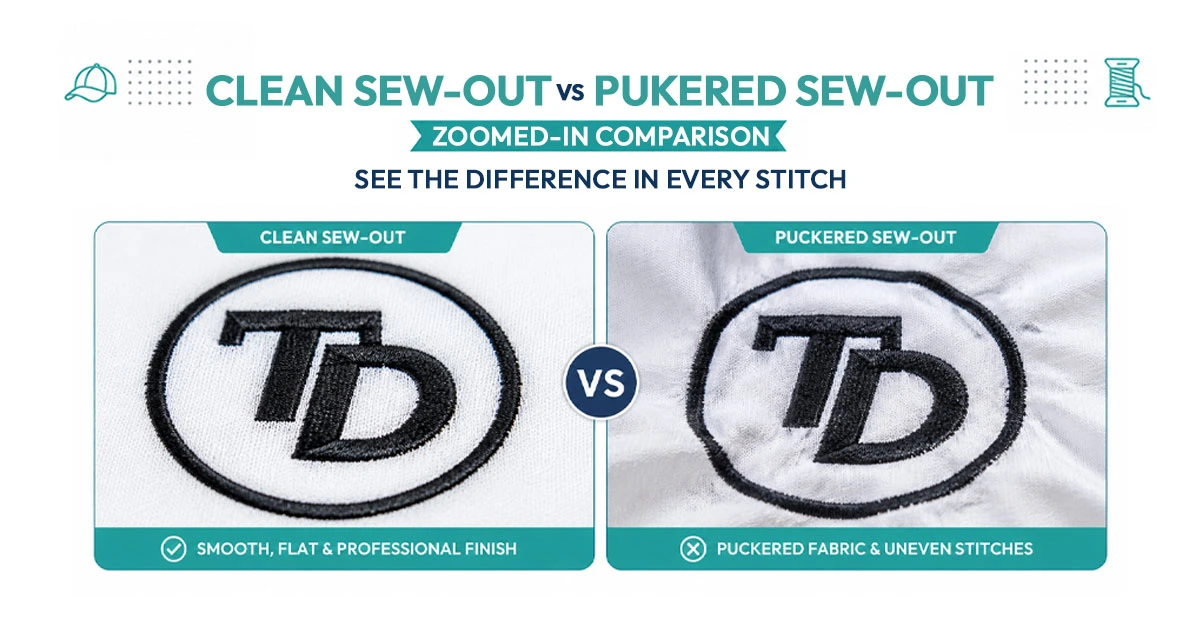
Not sure which digitizing type your logo needs? True Digitizing will tell you free.
True Digitizing has completed 20,000+ designs for USA embroiderers over 13+ years. Send your artwork and the garment it is going on, and you will get a straight recommendation before any money changes hands.
Get a Free Quote — True DigitizingDigitizing is not file conversion. An embroidery machine cannot read a JPG, a PNG or even a vector file. It reads a stitch file — a sequenced set of needle coordinates, stitch types, thread stops and trim commands. A digitizer builds that sequence by hand, deciding where every stitch lands.
That is the part most buyers miss. In machine embroidery, the same logo can be digitized five different ways and produce five different results on fabric. The digitizer is making judgment calls about push and pull compensation, underlay density, stitch direction and sequencing — and those calls change completely depending on which service type the job falls under.
Before the detail, here is the whole landscape in one view. Use this to narrow down to one or two candidates, then read those sections closely.
| Service Type | Best For | Relative Stitch Count | Difficulty |
|---|---|---|---|
| Flat / Standard | Left chest logos, polos, shirts, bags | Low to medium | Standard |
| 3D Puff | Structured caps, bold block lettering | Medium | High |
| Applique | Large designs, jacket backs, team names | Very low for the area covered | Medium |
| Chenille | Varsity letters, letterman jackets | Low (specialty machine) | High |
| Photo / Portrait | Faces, pets, memorial pieces | Very high | Highest |
| Patch | Uniforms, resale, multi-garment reuse | Medium to high | Medium |
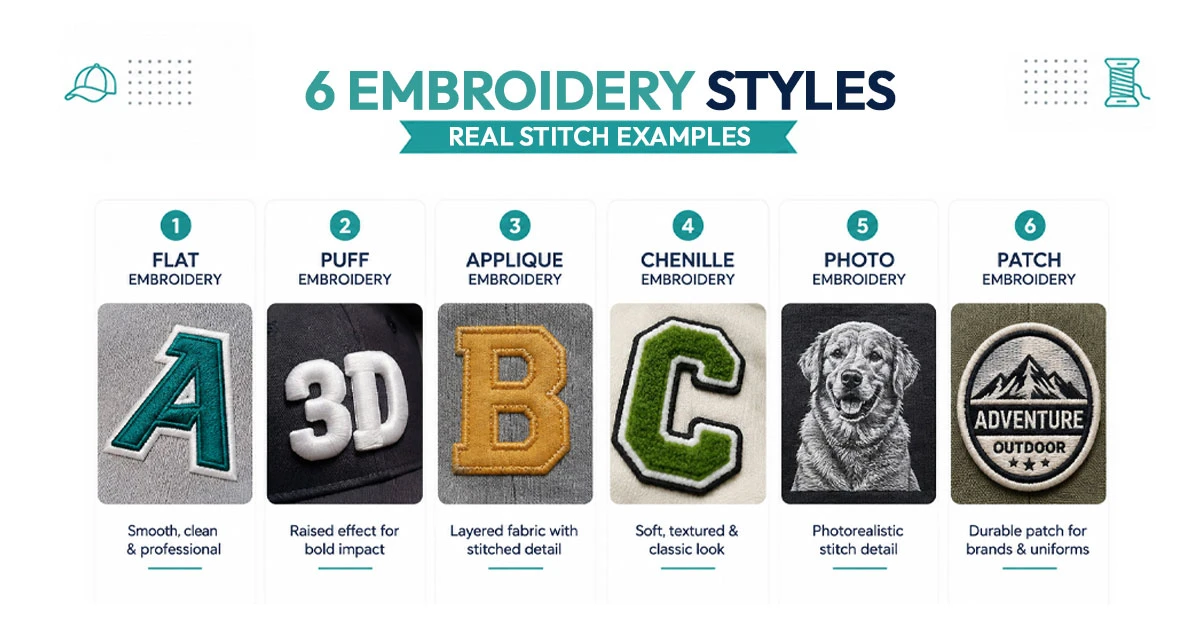
Flat digitizing, sometimes called standard or 2D digitizing, is what most orders need. The design sits level with the fabric surface and is built from satin columns, fill areas and running stitches. Left chest logos, sleeve marks, polo branding, tote bags and shirt fronts all fall here.
The craft in flat digitizing is invisible when it is done well. Column widths get adjusted so satin stitches do not gap on stretchy knit. Fill angles get rotated so large areas do not read as one flat slab. Small text gets rebuilt rather than shrunk, because lettering under roughly a quarter inch tall will close up if the density is not reduced. If you want the underlying mechanics, our breakdown of satin stitch vs fill stitch covers when each one belongs in a design.
Choose flat digitizing when your artwork has clean shapes, a limited colour count, and is going onto a stable woven or knit garment at a normal logo size. It is the lowest-risk, lowest-cost option and it covers the large majority of commercial work. True Digitizing handles this category through its custom embroidery digitizing service.
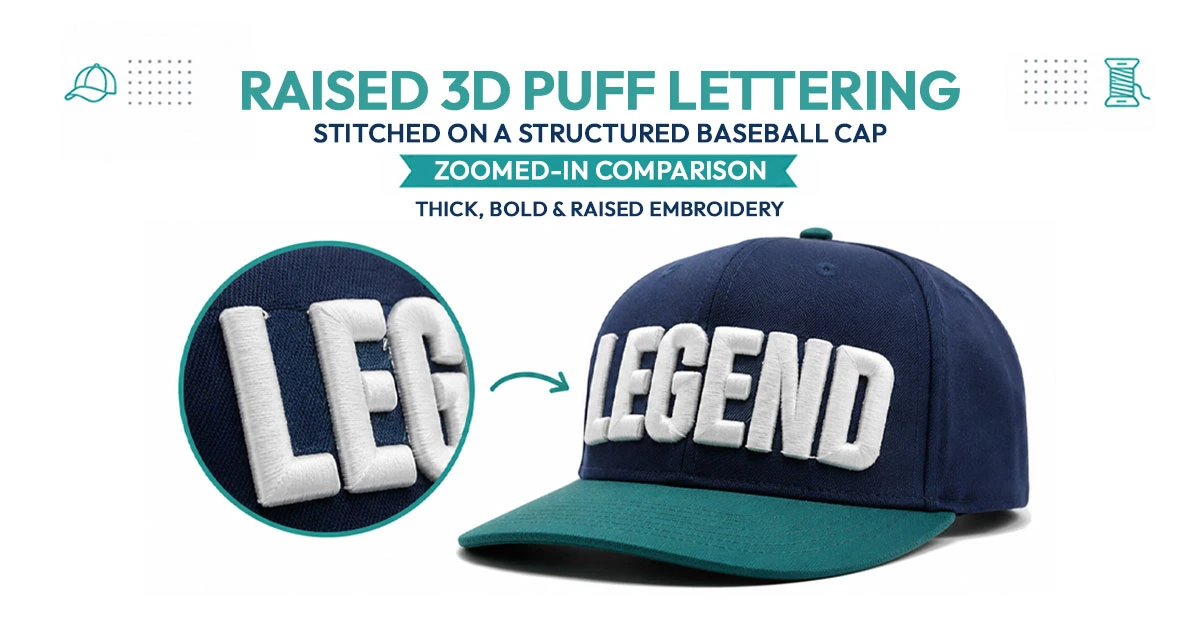
3D puff uses a foam sheet laid on the garment. The machine stitches through it, the satin columns encase it, and the excess foam is torn away afterwards. The result is raised, dimensional lettering — the look you see on structured baseball caps and streetwear.
Puff is unforgiving, and it is the type most often ordered by mistake. Foam only works with wide satin columns; thin strokes cannot wrap it and the foam shows through as white flecks. Corners need specific stitch handling or the foam tears at the turn. Every letter needs a closed outline so the foam has a boundary to break along. And the design has to be sized to the cap panel and seam, not just scaled down from a flat version.
Choose puff when the artwork is bold, blocky lettering or a simple shape with thick strokes, and the garment is a structured cap or a heavyweight item. Do not choose it for detailed logos, thin script, or anything with small text. A design that needs both looks is usually digitized as a hybrid — puff on the main lettering, flat on the supporting detail.
Applique replaces solid stitched fill with a piece of fabric that is tacked down and then edged with satin. Instead of stitching a twelve-inch jacket back solid — which would take a very high stitch count and stiffen the garment — you cut the shape from fabric and only stitch the border.
A properly digitized applique file runs in a specific sequence: a placement stitch that marks where the fabric goes, a tackdown stitch that holds it after you lay it on, a machine stop for trimming, then the satin border that covers the raw edge. Miss any of those steps and the operator is guessing at the machine.
The quality markers are in the details. The tackdown has to sit far enough inside the placement line that the fabric cannot shift outside it. The satin border needs enough width to bury the cut edge, and more width on fabrics that fray. Corners and tight curves need mitred column handling so the border does not bunch. True Digitizing runs this work through its applique embroidery digitizing service, and it is the fastest way to cover a large area without the run time and stiffness of a full fill.
Choose applique for jacket backs, large team names, spirit wear, and any design over roughly five inches where a solid fill would be impractical. It is also the right answer when you want a fabric texture or pattern inside the shape.
Chenille produces the thick, fuzzy, looped texture on varsity letters and letterman jackets. It is a genuinely different process: it requires a chenille or moss-stitch capable machine, and the file is built as spiral or serpentine paths that the machine fills with looped yarn rather than as standard satin and fill blocks.
Because the yarn is thick, chenille cannot hold fine detail. Designs get simplified deliberately — small elements are dropped or enlarged, and the outline is usually finished with a standard satin border in a contrasting colour to give the shape a crisp edge. A digitizer working in chenille is as much editing the artwork as converting it.
Choose chenille for school letters, mascot patches, team jackets and anything where the raised woolly texture is the point. Do not order it for corporate logos with fine type — the format will not hold them.
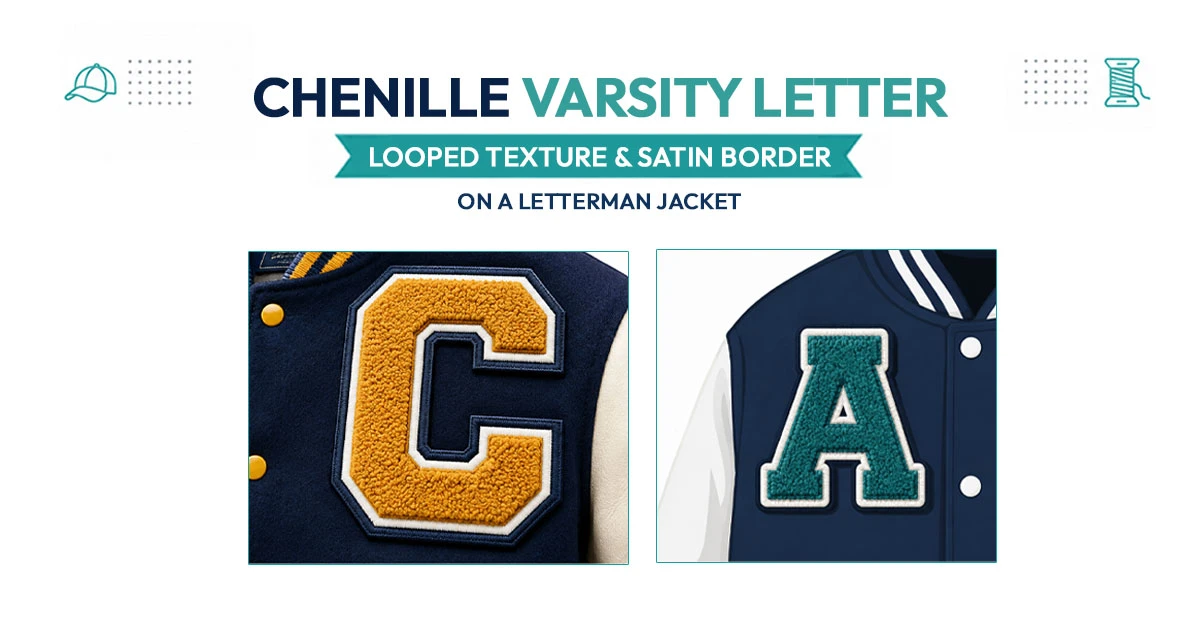
Photo or portrait digitizing turns a photograph — a face, a pet, a building — into thread. It is the most demanding service on this list and the one where automated software fails most visibly.
The problem is that a photograph contains continuous tone and thread does not. A digitizer has to reduce thousands of colours down to a workable palette, then rebuild the gradients using layered stitch directions and varied densities so the eye reads shading that is not literally there. Skin tones are the hardest part; getting a face to look like the person rather than a generic mask is where the skill sits.
Photo work carries the highest stitch counts on this list, which means the longest run times and the most stress on the fabric. Stabilizer choice matters more here than anywhere else. Expect the price and the turnaround to reflect that — this is the one category where a bargain quote is a genuine warning sign.
Choose photo digitizing for memorial pieces, pet portraits, family gifts and commemorative work. Set expectations on size too: portraits need physical space to hold detail, and a face shrunk to left-chest size will lose the features that make it recognisable.
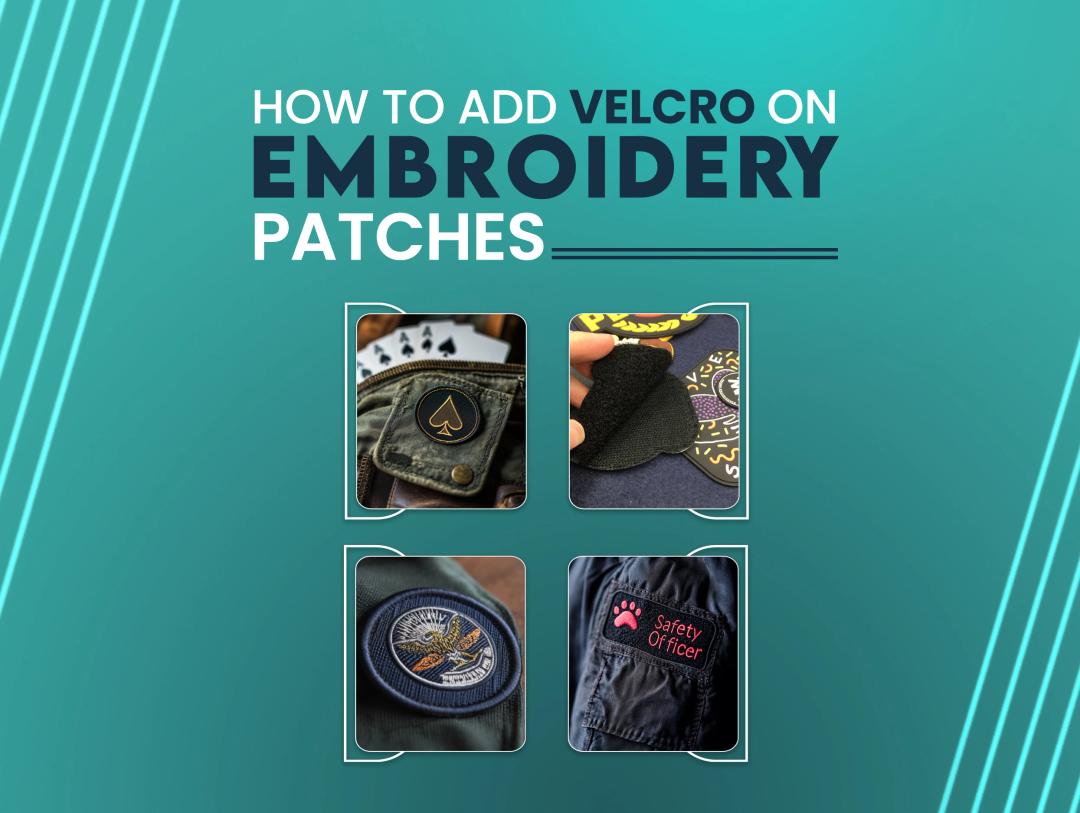
Patch digitizing builds the design to be stitched onto backing material rather than directly onto a garment. The finished patch is then applied by iron, sew, velcro or heat seal.
The file is structurally different from a garment file. It needs a merrowed or satin border sized to the patch edge, an internal layout that accounts for the backing rather than a stretchy knit, and usually a denser build because twill backing does not move the way apparel does. A flat logo file will not simply work as a patch file.
Choose patches when the same design goes onto many different garments, when you are producing for resale, when the base garment cannot be hooped, or when uniforms need a removable identifier. For volume operations this is often the cheapest route per unit, because one digitizing charge produces an item you can apply endlessly.
Order the right digitizing type the first time with True Digitizing
True Digitizing delivers stitch-ready files within 24 hours — trusted by 5,000+ USA embroiderers. Flat, puff, applique, chenille, photo and patch all handled in-house by hand.
Start My Order at True DigitizingWork through three questions in order. They resolve almost every job.
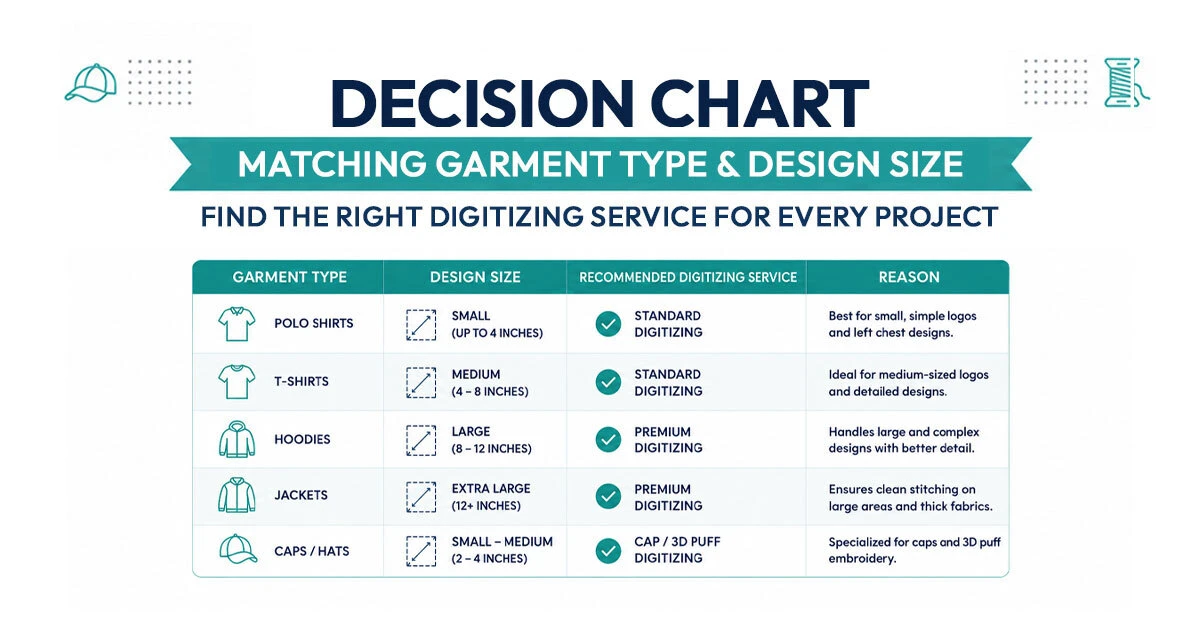
First, what is the garment? A structured cap pushes you toward puff or a cap-specific flat build. A letterman jacket points to chenille or applique. A polo or shirt front is flat territory. A garment that cannot be hooped — a finished bag, a heavy coat — points to a patch.
Second, how big is the design? Under about four inches, flat handles it. Between four and eight inches, compare flat against applique on stitch count. Above eight inches, applique is usually the practical answer unless the design demands solid coverage.
Third, how much detail does the artwork carry? Fine lines, small text and gradients rule out puff and chenille immediately. Continuous tone means photo digitizing. Clean flat shapes with a countable colour list mean flat or applique.
Digitizing quotes vary widely, and the reason is usually that different providers price on different bases. Understanding which basis you are being quoted on matters more than the headline number.
Stitch count is the most common driver. Some providers quote per thousand stitches, which means a photo portrait costs many times what a left chest logo costs. Others quote a flat rate per design regardless of stitch count, which favours complex work and penalises simple work.
Colour and stop count adds labour. Every thread change is a sequencing decision and, on the shop floor, a machine stop.
Service type carries its own multiplier. Puff, chenille and photo all require specialist handling that flat work does not, and honest providers price them separately rather than pretending they are the same job.
Revisions and edits are where quotes diverge most. Some providers include unlimited revisions until the file sews clean; others charge per edit. Ask before you order, not after.
Turnaround is the last variable. Rush work costs more everywhere. If your deadline is real, say so upfront rather than discovering the surcharge at invoice time. Our guide to hiring an embroidery digitizing provider goes deeper on comparing quotes fairly.
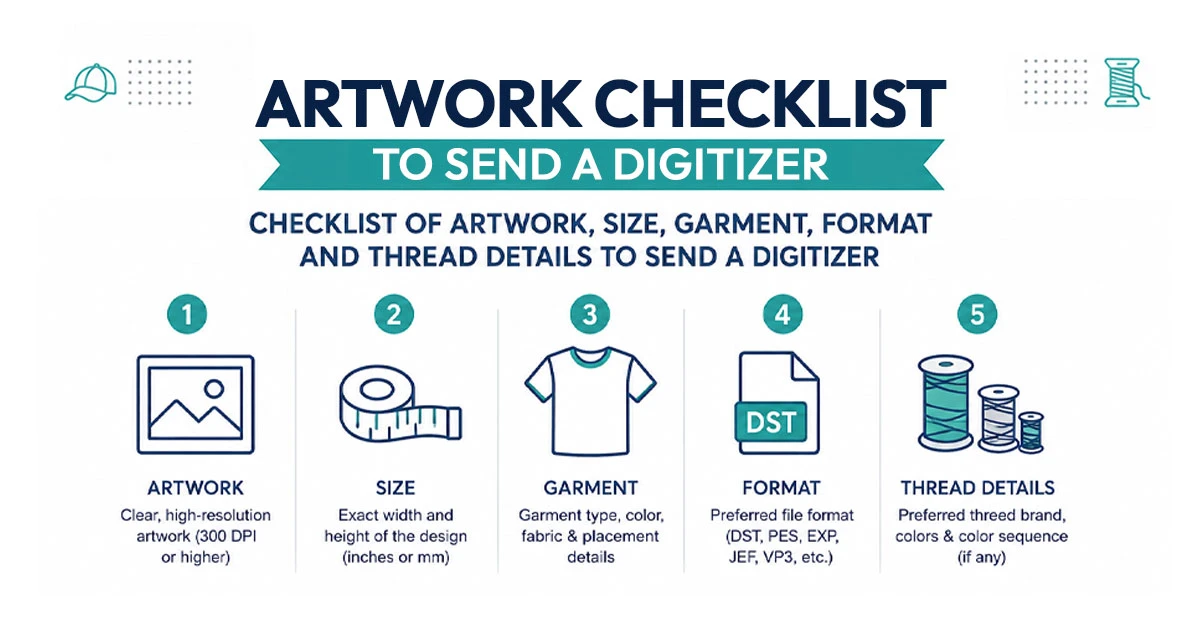
Most delays and most revision rounds trace back to an incomplete order. Send all six of these the first time and the file usually comes back right.
1. The cleanest artwork you have. A vector file is ideal. A high-resolution PNG or JPG works. A logo screenshotted from a website does not — the digitizer will be guessing at edges that are not really there.
2. The finished size in inches. Width and height, not "make it look right." Size determines density, underlay and whether small text survives.
3. The garment and fabric. Pique polo, fleece hoodie, structured cap, canvas tote — each behaves differently under the needle.
4. The machine format you need. DST for most commercial Tajima and Barudan machines, PES for Brother, JEF for Janome, EXP, VP3 and others besides. Getting this wrong means a file you cannot load.
5. Thread brand and colour codes if they matter. If you are matching brand colours, send the codes rather than leaving the digitizer to approximate.
6. Any placement constraints. Seams, pockets, zips and cap panel edges all limit where stitches can go.
You do not need digitizing software to catch the common problems. Run these checks on the preview and the stitch count your provider sends.
Sanity-check the stitch count against the size. If a two-inch left chest logo comes back at a very high stitch count, the density is probably too heavy and the design will stiffen or pucker.
Look at the smallest text. Zoom in. If letters look like they are closing up on screen, they will fill in solid on fabric.
Count the colour stops. More stops than colours in your logo usually means inefficient sequencing, which costs you machine time on every single garment.
Check the applique sequence if applicable. Placement, tackdown, stop, border. If any step is missing, send it back.
Always run a test sew-out on the actual fabric. Not on scrap poplin — on the garment you are producing. This is the only check that catches everything, and it is the step most shops skip when they are behind.
Digitizing software exists and auto-digitizing buttons exist. Whether they are worth it depends entirely on what you are producing and how often. Our comparison of manual vs auto digitizing for logos covers the quality difference in detail.
Embroidery digitizing services are six different products sharing one name. Flat handles most logos. Puff belongs on structured caps and bold lettering. Applique covers large areas cheaply. Chenille is for varsity work. Photo digitizing is the specialist end. Patches are for volume and reuse.
Pick the type by garment, size and detail level — in that order — send your digitizer complete information, and check the file before you approve it. Get those three habits right and the vast majority of embroidery problems disappear before a needle ever moves.
True Digitizing has helped 5,000+ USA embroiderers get professional stitch files since 2013. Send your artwork and the garment, and you will get the correct service type recommended before you pay anything.
Get My Design Digitized by True DigitizingFast turnaround · truedigitizing.com · 100% satisfaction guaranteed
TrueDigitizing's team of embroidery digitizers and file conversion experts — delivering practical guides for home hobbyists and commercial shops alike. Our specialists cover the full range of embroidery production: custom digitizing for machine embroidery, vector art conversion, and physical embroidered patch manufacturing — with a 6-hour turnaround on digital files and worldwide patch delivery in 5 business days. Every article we publish comes from the same people handling real production orders daily. When we write about stitch density, underlay settings, or file formats, it is because we work with these variables across hundreds of client files every week — not because we researched them from the outside.
Categories
How to Remove Embroidery From Any Fabric — Step-by-Step Guide 2026
15-07-2026
Is SVG a Vector File? Yes — SVG vs EPS, PNG, PDF Vector Formats you need to know
08-07-2026

Embroidery Trends 2026: What's Hot in Machine & Hand Embroidery | TrueDigitizing
26-06-2026
Top Best Embroidery Digitizing Software in 2026
06-05-2026

Best Multi-Needle Embroidery Machines for Startups (2026)
28-02-2026
DST File: The Complete Guide (What It Is, How to Create, Convert & Use in 2026)
28-02-2026
Janome 550E vs Baby Lock Flare | Best Mid-Range Embroidery Machine?
26-02-2026
Choose the Right Fabric for Embroidery
20-02-2026
Advanced Techniques in Embroidery Digitizing
19-02-2026

Most Common Types of Threads to Use in Machine Embroidery
12-02-2026
Asked Questions